Timing Chain Kit How to Replace: Buyer Checklist
A timing chain kit replacement is not just a mechanic’s job hidden behind the front cover. For distributors, repair networks, and sourcing engineers, it is where fitment data, component consistency, installation discipline, and warranty exposure meet. One wrong guide profile, weak tensioner, missing bolt, or poorly explained timing-mark variation can turn a normal service job into a labour claim.
This article approaches timing chain kit how to replace from a B2B sourcing angle. It covers what must be confirmed before the engine is opened, how a controlled replacement should progress, which parts belong in different kit levels, what failure modes quality teams should watch, and how buyers can compare suppliers without relying on price alone.
It is written for procurement teams managing mixed engine coverage across Europe, North America, Australia, and Brazil, where engine-code accuracy, stable kit content, and lot traceability directly affect return rates. Driventus manufactures engine components in Taizhou, Zhejiang under IATF 16949:2016 and ISO 9001:2015 controls, with inspection records available for production lots. Typical programme discussions cover engine-code validation, bill of materials, tolerances, MOQ, price tiers, sample timing, packaging, and 30- to 60-day production lead-time planning after specification approval. Driventus is an independent aftermarket manufacturer; brand names and OE-style references are used for fitment identification only.
Decision gate before teardown: is the chain kit really the problem?
The first replacement decision should happen before the timing cover comes off. Many returned kits are fitted to engines whose real problem was oil starvation, sludge, a blocked gallery, a failing VVT actuator, a worn camshaft adjuster, or previous repair damage. If the diagnosis is weak, the warranty file will be weak too.
Use this pre-teardown gate for service teams and warranty reviewers:
- Confirm the engine code from the vehicle record or engine marking, plus production year/month, emissions variant, fuel type, turbo or non-turbo layout, and transmission layout.
- Cross-check the application against the kit bill of materials and any OE-style reference format supplied by the buyer, such as OE 06A… or OE 11251… conventions where applicable.
- Record odometer reading, oil-service interval, and diagnostic trouble codes before disassembly. Common fault families include P0016/P0017/P0018/P0019 and VVT response codes.
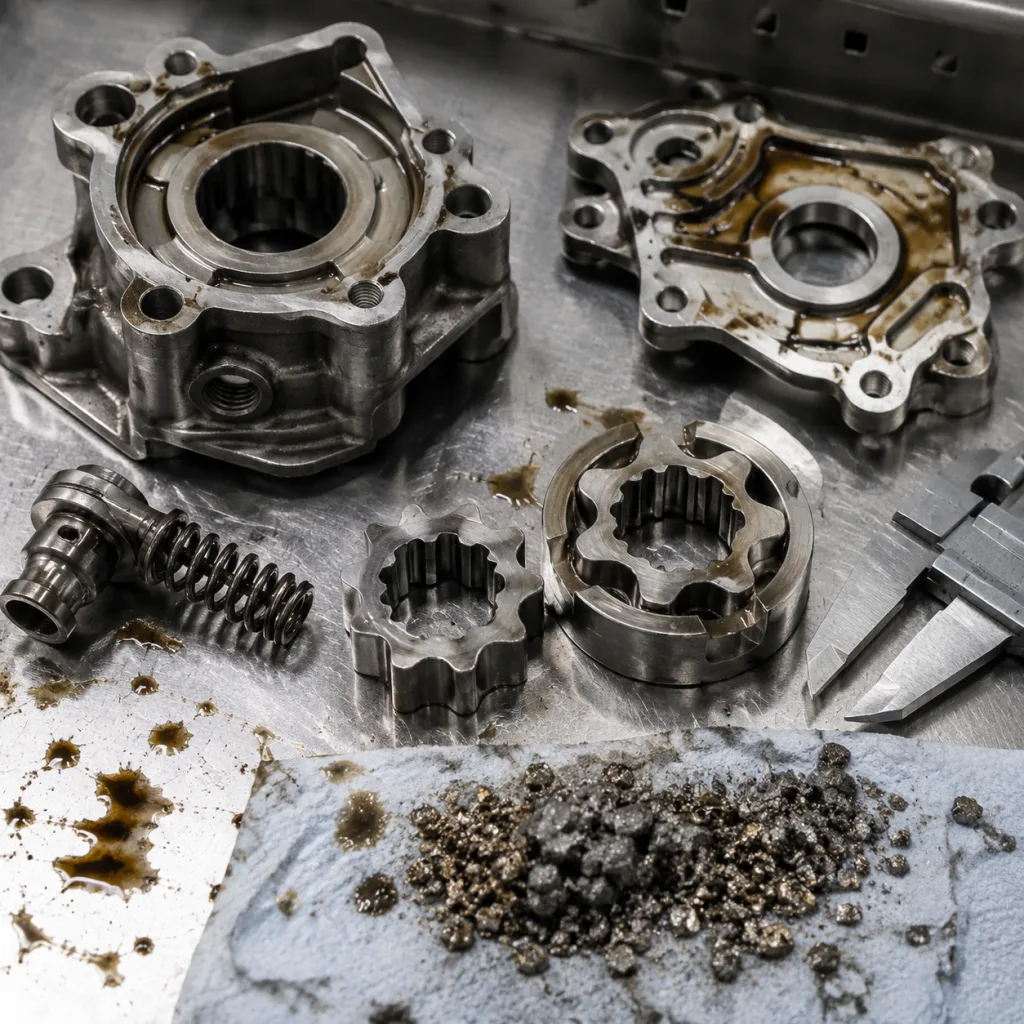
- Check oil level, oil grade, oil-change history, filter condition, and visible sludge under the filler cap or cover. A delayed hydraulic tensioner can be caused by aerated oil, wrong viscosity, or a restricted oil feed.
- Inspect for coolant contamination, fuel dilution, or metallic debris in the oil. If metal is present, the sump, pickup screen, oil pump, and VVT oil-control valves may need inspection before a new kit is installed.
- Identify the noise pattern: cold-start rattle for 1–3 seconds, hot idle rattle, overrun noise, or continuous chain noise. Record when it occurs.
- Measure basic oil pressure if the service data provides a test port and specification. As a practical screening rule, engines with less than about 0.7–1.0 bar at hot idle should not be blamed on the kit until lubrication faults are investigated.
- Verify special-tool requirements for camshaft, crankshaft, high-pressure fuel pump, oil-pump, or balance-shaft locking. Missing locking tools create high risk on variable valve timing engines.
- Check whether the procedure calls for one-time-use bolts, updated tensioner designs, revised sealant locations, or adaptation/relearn after installation.
For importers and repair-chain buyers, the lesson is simple: generic installation notes are not enough for engines with VVT, balance shafts, wet belts near chain drives, or torque-to-yield crankshaft bolts. Warranty policy should require evidence before approval. For higher-value claims, for example claims exceeding USD 100 in part value or any case including labour reimbursement, request photos of the VIN plate or engine code, DTC screen, old parts, timing marks before removal, oil condition, and the installed new kit. This separates a component issue from a lubrication, diagnosis, or installation problem.
Step-by-step replacement sequence buyers should expect workshops to follow
The exact procedure depends on engine design. Still, a controlled sequence makes field failures less likely and gives procurement teams a practical way to judge whether the kit supports real service work. Technicians must always follow the vehicle service manual for torque values, tightening angles, timing positions, sealant beads, oil-priming steps, and locking-tool references. The outline below is a general timing chain kit how to replace workflow, not a substitute for model-specific service data.
1. Disconnect the battery and remove access components: covers, auxiliary belts, pulleys, intake parts, engine mounts, brackets, and undertrays where required. Support the engine if a mount is removed. 2. Drain oil or coolant if the timing cover, water pump, oil pan interface, or front cover design requires it. Use clean drain containers so contamination can be inspected. 3. Set cylinder No. 1 to top dead centre using service data and timing reference points. Do not rely only on paint marks made on the old chain. 4. Install the specified crankshaft, camshaft, high-pressure pump, oil-pump, and balance-shaft locking tools where applicable. Locking tools should seat without force; forcing a tool can hide an already shifted timing position. 5. Remove the timing cover without damaging aluminium sealing faces, dowel locations, or oil passages. Use non-gouging scrapers. Avoid rotary abrasive discs near open oilways. 6. Release chain tension in the specified order and remove the old chain, guides, sprockets, tensioner, and related fasteners. Bag old parts by location if they may be needed for warranty comparison. 7. Compare old and new parts before installation. Check guide profile, chain pitch, link count, sprocket tooth count, oil-feed holes, tensioner stroke, locating pins, and mounting-hole positions. Chain link count and sprocket tooth count must be exact. A locating-hole mismatch is a no-fit condition, not a workshop modification task. 8. Clean mating surfaces without allowing old sealant, abrasive material, or broken guide fragments to enter the sump or oil galleries. If a guide has broken, inspect the pickup screen and pan area before reassembly. 9. Install new sprockets, guides, chain, and tensioner in the documented order. Align coloured links, timing marks, flats, arrows, stamped dots, or locking positions exactly as specified. 10. Apply sealant only where required. Many covers need a bead of about 2–4 mm, depending on service data. Too much sealant can squeeze into oil galleries or tensioner feeds and cause low oil pressure or delayed tensioner response. 11. Torque bolts using calibrated tools. Replace torque-to-yield bolts, crank bolts, cam bolts, guide bolts, or cover fasteners where the service data requires replacement. Repair chains should record final torque/angle steps for crank and cam fasteners. 12. Release the tensioner according to the procedure and verify that the chain and guide are seated correctly. Hydraulic tensioners should not be compressed in a way that damages the check valve or ratchet. 13. Rotate the engine manually through at least two full crankshaft revolutions. Re-check timing marks, tool fit, and piston-to-valve clearance indicators where relevant. If resistance is felt, stop. Do not use the starter motor to “push through” resistance. 14. Refill fluids, prime oil pressure where applicable, start the engine, and check for abnormal noise, oil or coolant leaks, and diagnostic codes. Some engines require cranking with fuel/ignition disabled until oil pressure builds. 15. Perform a road test or warm-up cycle, then recheck the timing-cover area, crank seal, cam seal, water pump, valve cover, and oil pan joints after the thermostat has opened and the engine has returned to idle.
A serviceable kit should make this workflow easier, not more confusing. Good packaging separates bolts, seals, and guide sets. Sprockets should be protected with oil, VCI, desiccant, or suitable wrapping. Left/right and upper/lower guides should be clearly identified. Labels should show part number, batch number, production date, and quantity. Carton dividers should stop sprocket teeth from damaging gaskets in transit. These are small details, but they prevent expensive mistakes at the bench.
Kit content comparison: short kit, standard kit, or full repair kit?
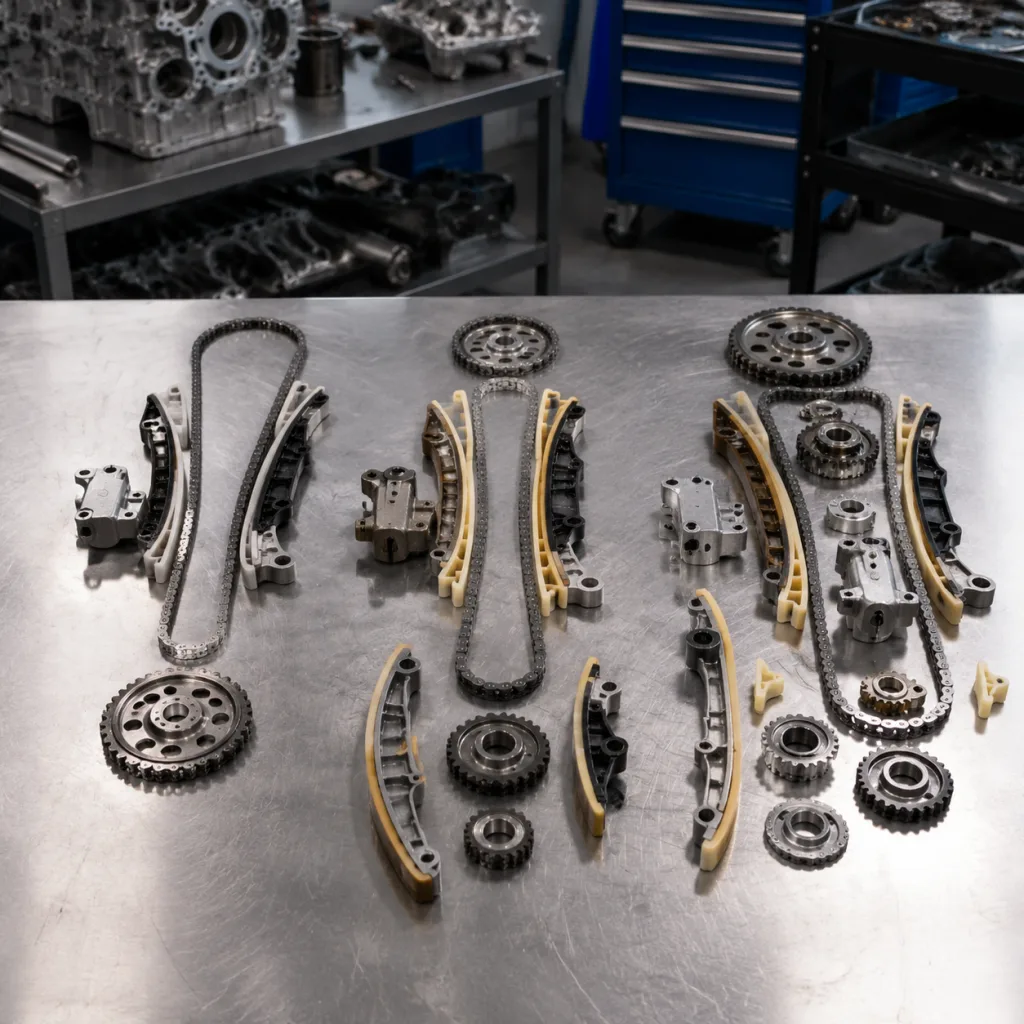
A timing chain kit is not a fixed universal package. One reference may include only the chain, guides, and tensioner. Another may include sprockets, bolts, gaskets, seals, VVT-related hardware, and sometimes a water pump. Buyers should define the content by engine platform, repair method, warranty strategy, and local workshop practice rather than by the lowest unit price.
In an RFQ, state whether the target is an economy repair kit, standard service kit, or full repair kit. The difference can change ex-works price by 15–45%, depending on sprocket, phaser, water pump, and bolt content. It can also change the failure rate if workshops are expected to reuse parts that should have been replaced.
| Component | Inspection point before fitment | Procurement relevance |
|---|---|---|
| Timing chain | Pitch, exact link count, plate finish, pin condition, roller or bush design, free articulation, side clearance, pre-lube condition | Wrong link count, stiff links, burrs, or pitch variation can create immediate timing errors or noise |
| Hydraulic or mechanical tensioner | Stroke, oil port position, locking pin condition, ratchet operation, body finish, leak-down behaviour, spring preload | Inconsistent tensioner pressure or delayed oil filling can cause cold-start rattle |
| Chain guides and rails | Moulding profile, wear-surface bonding, curvature, bolt-hole position, material consistency, flash, sink marks | Dimensional mismatch causes edge loading, chain tracking problems, or breakage |
| Sprockets and gears | Tooth count, timing marks, bore diameter, keyway profile, phaser interface, runout, burr control, hardness | Mis-machined sprockets affect cam/crank correlation and may trigger fault codes |
| Gaskets and seals | Material, thickness, lip condition, locating features, compatibility with oil and coolant, compression set | Poor sealing increases oil-leak warranty claims and repeat labour costs |
| Bolts and fasteners | Thread, grade, length, coating, head style, one-time-use status, washer type, torque class | Reused or incorrect bolts can lose clamp load or damage aluminium threads |
| Ancillary parts | Water pump, oil pump chain, balance-shaft chain, crank seal, cover seals, O-rings, plugs where specified | Full-kit coverage reduces technician guesswork and avoids mixing old wear parts with new timing parts |