Lower Engine Gasket Set Symptoms of Failure: Diagnosis Guide
A lower engine gasket set is not usually the first part buyers think about, but failure in the lower sealing system can trigger oil loss, coolant contamination, crankcase pressure problems, repeat repair claims, and avoidable engine downtime. For procurement teams, distributors, and repair networks, the cost is not limited to the gasket set itself. It includes labour, diagnostic time, vehicle downtime, freight for replacement parts, customer dissatisfaction, and possible damage to adjacent components such as the oil pump, timing cover, crankshaft seals, oil cooler, or transmission bellhousing area.
This guide covers the most common lower engine gasket set symptoms of failure, how to separate gasket faults from related sealing and ventilation problems, and what to inspect before ordering a replacement. It is written for B2B buyers and technical teams that need to reduce warranty exposure while sourcing consistent, application-correct parts. Driventus is an independent aftermarket manufacturer; brand names are referenced for fitment only. Our parts are produced under IATF 16949:2016 and ISO 9001:2015 systems, with material compliance aligned to REACH (EC) No 1907/2006 where applicable.
What a lower engine gasket set seals
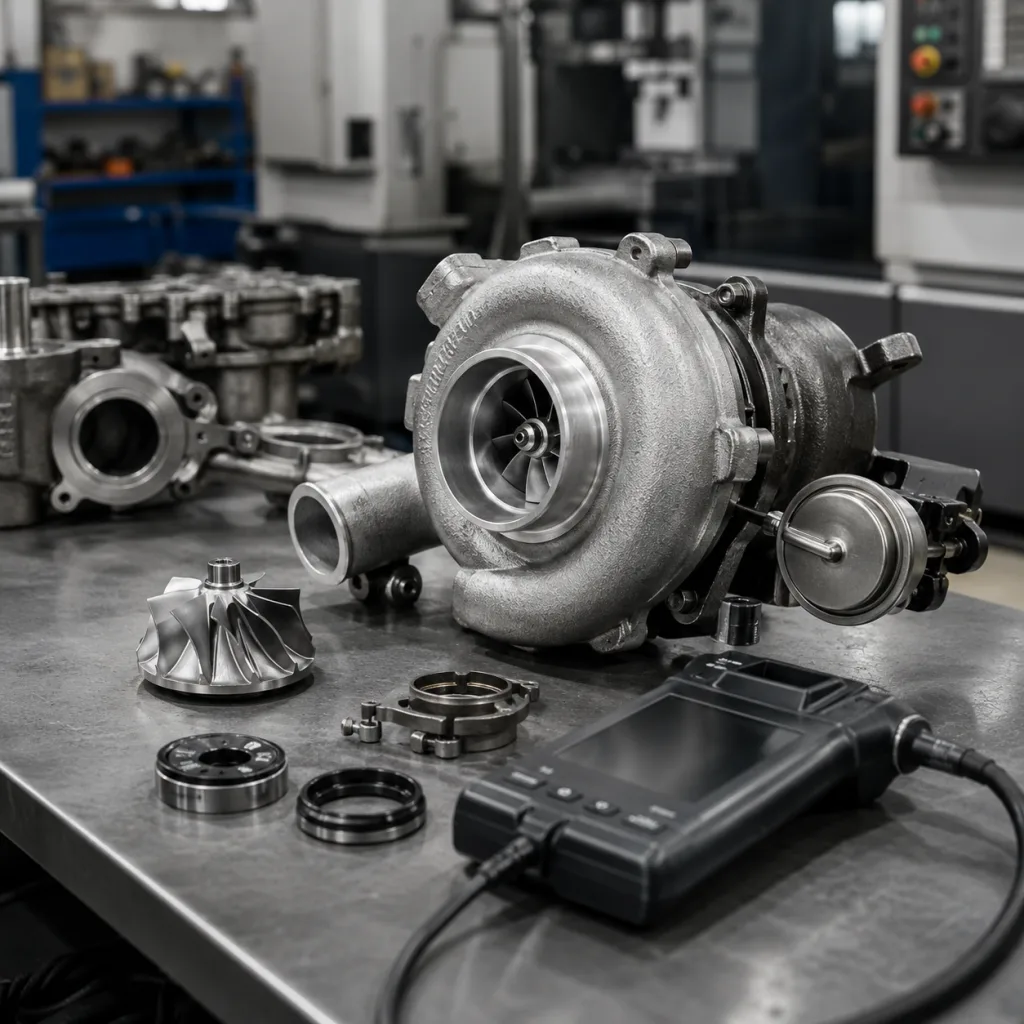
A lower engine gasket set typically covers sealing points in the lower half of the powertrain assembly, where oil, coolant, crankcase vapour, and rotating-shaft interfaces are concentrated. Depending on engine family, it may include the oil pan gasket, timing cover gasket, rear main seal, front crank seal, lower intake or coolant passage seals, oil pump seals, pickup tube O-rings, balance shaft housing seals, and related O-rings or valve cover corner seals if they affect the lower-end leak path.
The exact content of the set matters because different engines divide sealing responsibility in different ways. Some applications use a formed elastomer oil pan gasket, while others use a sealant-only joint. Some timing covers carry both oil and coolant passages, which makes a failure more serious than a simple external seep. On many modern aluminium engines, the cover, sump, bedplate, and seal carrier must work as a single clamped assembly, so a small mismatch in gasket thickness or bead profile can disturb several sealing points at once.
These parts work under constant exposure to heat cycling, oil splash, coolant, blow-by pressure, vibration, and clamp-load relaxation. During cold starts, the seal must tolerate rapid expansion differences between the block, pan, cover, and fasteners. During long highway use, towing, or extended idling, oil temperature and crankcase pressure can rise enough to expose weaknesses in aged rubber, compressed fibre, or over-applied sealant.
Typical functions by subcomponent
Component
Main function
Common failure mode
Oil pan gasket
Seals sump to block or bedplate
Oil seepage from bolt-line distortion, over-torque, or gasket compression set
Timing cover gasket
Seals front cover oil and coolant passages
Coolant or oil crossover leaks, edge seepage, cover warpage
Oil drip between engine and transmission, seal lip inversion, housing misalignment
Oil pump or pickup O-rings
Maintain oil-side sealing and suction integrity
Hardening, flattening, air ingestion, low oil pressure symptoms
Coolant seals/O-rings
Seal fluid ports and transfer passages
Coolant staining, pressure loss, contamination at mixed-fluid joints
</tr></thead><tbody> </tbody></table>For sourcing teams, the key issue is dimensional match and material suitability. Even a small difference in bead height, compressed thickness, carrier stiffness, corner moulding, or seal lip geometry can change clamp load and service life. A good replacement set should not simply fit the bolt pattern; it should reproduce the sealing behaviour required by the engine design.
Most common symptoms of failure
The most visible lower engine gasket set symptoms of failure are usually fluid loss, contamination, and recurring wetness around the lower engine assembly. The exact pattern depends on which sealing point is compromised, how the engine is installed in the vehicle, and whether airflow moves the leak away from its source during driving.
Engine oil spots under the vehicle: Often associated with an oil pan gasket, rear main seal, front crank seal, timing cover, or oil pump seal. Fresh oil after an overnight park is more useful diagnostically than old residue on an undertray.
Wet bellhousing area: Frequently points to rear main seal leakage, but transmission input seal issues, valve cover leaks, and rear oil gallery plugs must also be ruled out before ordering a lower set.
Oil around the timing cover: Can indicate gasket shrinkage, cover warpage, incorrect sealant use, front crank seal lip wear, or leakage from a higher cam or valve cover area running down the front of the engine.
Coolant traces mixed with oil: May suggest a crossover leak at the timing cover, lower intake sealing area, oil cooler, or another shared oil-coolant interface. Milky oil, rising oil level, or coolant loss with no external drip should be treated as higher-risk symptoms.
Burning oil smell after driving: Oil may be leaking onto the exhaust, subframe, engine mount, or heat shield and burning off after the engine reaches operating temperature.
Oil consumption with no visible external leak: Internal seepage, drip loss onto hot surfaces, crankcase ventilation faults, or unrelated piston ring and turbocharger issues may be present.
Increased crankcase pressure: A blocked PCV system, restricted breather hose, or severe blow-by can mimic gasket failure and force oil past otherwise serviceable seals.
Low oil level or intermittent oil pressure concern: In some applications, hardened pickup tube O-rings or lower-end sealing faults can contribute to oil aeration or suction loss. This should be investigated immediately because bearing damage can follow.
Repeat leakage after previous repair: A comeback after gasket replacement often indicates a warped pan, damaged flange, incorrect torque sequence, contaminated mating face, wrong material specification, or unresolved pressure problem.
A useful rule in diagnosis is this: a gasket fault usually leaves a repeatable leak pattern after cleaning and heat cycling. Random wetness without a clear source often means the root cause is above the gasket or outside the set, such as excess blow-by, blocked breather passages, a warped housing, a cracked cover, or a leak from an adjacent oil cooler, turbo oil line, or sensor port.
For buyers, symptom language from the workshop should be specific. A report that says "oil leak at lower engine" is not enough for accurate sourcing or claim evaluation. Ask for the leak location after cleaning, whether oil or coolant is involved, the highest wet point, the engine code, mileage or operating hours, and whether crankcase pressure was checked.
Symptom-to-cause diagnostic checklist
Use a structured inspection before replacing parts. This reduces misdiagnosis, improves first-time fix rates, and helps buyers avoid unnecessary claims against a gasket set that did not cause the leak.
1) Check the leak path
Start by degreasing the lower engine area, undertray, bellhousing, timing cover, and sump flange. Run the engine to operating temperature, then inspect again after a short road test and heat soak. Trace the highest wet point. Oil and coolant move downward and rearward with gravity and airflow, so the visible drip point is often not the source. UV dye can help when the engine has multiple old stains or when the leak only appears under load.
2) Identify the fluid
Confirm whether the residue is engine oil, transmission fluid, coolant, power steering fluid, or air-conditioning condensate carrying old dirt. Fluid colour, smell, viscosity, and location all matter. A wet bellhousing, for example, may be engine oil from a rear main seal, but it may also be transmission fluid from an input shaft seal. Coolant crystals near the timing cover call for a different decision than oil seepage along an oil pan flange.
3) Inspect mating surfaces
Look for:
Scratches, corrosion, dents, or sealant residue on the block, pan, cover, or seal carrier
Warpage on stamped oil pans, aluminium covers, and plastic or composite housings
Old gasket material left in bolt holes, grooves, corners, or blind threaded holes
Distorted bolt flanges caused by over-torque or previous impact damage
Cracks near mounting ears, drain plug bosses, oil cooler ports, or timing cover corners
A straightedge and feeler gauge should be used where the service procedure allows. On thin stamped pans, bolt holes may pull upward and reduce gasket compression between fasteners. On aluminium covers, even minor warpage can create a persistent leak path after replacement.
4) Verify crankcase ventilation
A failed PCV valve, restricted breather hose, frozen separator, or heavy blow-by can push oil past a good gasket. Check vacuum or pressure behaviour according to the engine procedure. If pressure is excessive, replacing the gasket alone will not solve the leak and may create another comeback within days.
5) Check adjacent seals and components
Front and rear crank seals, cam seals, oil cooler seals, turbo oil feed and return lines, oil pressure switches, dipstick tubes, filter housings, and valve cover gaskets can make it appear that the lower gasket set has failed. Always confirm the exact leak origin before ordering. For mixed oil and coolant complaints, also check the oil cooler, head gasket indicators, and coolant pressure behaviour.
6) Review service history and operating conditions
Repeated overheating, low oil operation, sealant overuse, incorrect fastener reuse, and poor prior repairs increase the chance of gasket distortion and surface damage. Fleet vehicles, delivery vehicles, taxis, and towing applications may show earlier sealing fatigue because of high heat soak, frequent starts, and long idle periods.
Inspection points for procurement and workshop teams
OE cross-reference confirmed by engine code, production date, and VIN data where available
Sealing surface flatness checked before ordering or authorising warranty repair
Gasket material selected for oil, coolant, temperature, and clamp-load exposure
Bolt reuse rules, torque sequence, and sealant locations reviewed against the service procedure
PCV system and breather routing verified before final repair approval
Photographs taken after cleaning, after operation, and at the highest wet point for claim records
When replacement is justified
Replacement is justified when the leak source is confirmed and the engine has clear evidence of seal degradation, loss of gasket compression, or damaged sealing interfaces that require disassembly. Typical triggers include persistent oil loss after cleaning, coolant-oil cross-contamination, soaked undertrays, oil dripping near exhaust components, measurable pressure loss at coolant passages, low oil level complaints, or repeated comeback after temporary resealing.
Replacement is also justified when the lower engine must already be opened for related work, such as oil pan removal, timing cover service, oil pump inspection, rear main seal replacement, or bottom-end repair. In these cases, reusing aged gaskets or seals can create a new leak shortly after the main job is completed. For repair networks, the incremental part cost is usually lower than the labour cost of reopening the same assembly.
For buyers, the replacement decision should be based on fitment and validation, not price alone. A lower engine gasket set should match the OE geometry and compression behaviour for the application. This is especially important for engines with aluminium housings, thin cover flanges, plastic oil pans, integrated seal carriers, or sealant-assisted joints. A set that appears visually similar may still fail if the elastomer hardness, bead height, coating type, or compressed thickness is wrong.
Driventus supports OE-style dimensional matching and validation testing for batch consistency. Where a programme requires it, we can support custom manufacturing for specified gasket materials, coatings, markings, kit content, and packaging needs.
If you are comparing replacement options, review:
Material type: fibre, rubber-coated steel, multi-layer steel, moulded elastomer, PTFE seal, or composite carrier
Compressed thickness and bead height at critical sealing zones
Bolt-hole alignment, corner moulding, and dowel or locator fit
Temperature resistance, oil resistance, coolant resistance, and ageing behaviour
Compatibility with sealant-only or gasket-plus-sealant joints
Inclusion of one-time-use seals, O-rings, washers, or installation sleeves where required
Batch traceability, inspection records, and packaging protection against deformation
Driventus is an independent aftermarket manufacturer; brand names are referenced for fitment only.
What buyers should verify before ordering
Before a purchase order is issued, the buying team should confirm the part family, engine variant, production range, and revision level. Many leakage issues are caused by small design changes between model years, regional emissions variants, sump designs, timing cover revisions, or crankshaft seal carrier updates. In B2B sourcing, a technically correct match is more valuable than a broad but vague application listing.
Recommended verification list
Engine code, displacement, fuel type, aspiration, and production date range
OE part-number cross-reference, when available, such as OE 06A107065 or similar format from the customer data set
Vehicle platform, transmission type, and drive layout where they affect sump or rear seal configuration
Presence of sealant beads, moulded corners, integrated O-rings, locating tabs, sleeves, or installation tools
Bolt torque specification, tightening sequence, and one-time-use fastener requirements
Material specification, hardness, coating, compressed thickness, and operating temperature range
Kit content by position, including oil pan gasket, timing cover gasket, front crank seal, rear main seal, O-rings, and ancillary washers where applicable
Packaging requirements for warehouse handling, export shipping, barcode labels, private label cartons, and deformation protection
Required compliance documents, including IATF 16949:2016, ISO 9001:2015, and material declarations where applicable
If your programme needs private label packaging, lot traceability, or drawing-based changes, our custom manufacturing team can review the application.
A proper supplier review should also check incoming inspection records, dimensional reports, material certificates, retention samples, and final leak testing or fit-check methods. For distributors, this information supports claim handling and helps separate installation errors from part-related concerns. For importers and repair chains, it improves consistency across multiple branches and reduces substitution risk when demand spikes.
You can review our quality system for certification and process details. When sharing an enquiry, include the OE reference, engine code, target market, annual volume, packaging requirements, and any known failure pattern. That information allows a faster and more accurate sourcing response.
Reducing comeback rates after replacement
A successful repair depends on more than installing new seals. Most comeback claims after lower-end work come from one of four causes: surface damage, incorrect torque, contaminated mating faces, or an unresolved ventilation fault. In a distribution or repair-chain environment, controlling these variables is just as important as selecting the correct part number.
Practical controls for workshops and distributors
Clean and inspect all sealing faces before assembly, including corners, grooves, bolt holes, and dowel locations
Replace one-time-use fasteners where the OE procedure requires it
Follow the correct torque sequence, staged tightening, and curing time for any sealant used
Do not over-apply RTV sealant to joints designed for gasket compression, oil galleries, or narrow return passages
Use installation sleeves or guides for crank seals where required to avoid lip rollover or spring displacement
Confirm that the pan, timing cover, or seal carrier sits flat before tightening fasteners
Verify breather system operation before final road test
Recheck for seepage after heat soak, a short drive cycle, and a final underbody inspection
Record photos and job notes for warranty traceability when servicing fleet or multi-branch accounts
Training also matters. Technicians should understand where sealant is required, where it is harmful, and how much clamp load the gasket is designed to receive. A lower engine gasket set can be damaged by dry installation when lubrication is required, by excess sealant at oil return areas, by immediate filling before sealant skin time, or by tightening bolts in a pattern that bows the cover.
For importers and repair chains, standardising these checks reduces warranty exposure and improves first-time fix rates. It also gives procurement teams better feedback: if failures concentrate around one engine code, one installer practice, or one regional application variant, the sourcing team can respond with a more precise kit, revised packaging notes, or additional fitment confirmation.
If you need a quotation for a confirmed application, use our request a quote page.
The same process applies whether the application is sold through aftermarket distribution, fitted in a multi-location repair chain, or supplied into an OEM/Tier-1 programme. Clear fitment data, traceability, and inspection discipline matter more than marketing claims. When the lower engine gasket set symptoms of failure are documented carefully before repair and verified after installation, both technical teams and buyers have a stronger basis for preventing repeat leakage.
Frequently asked questions
Yes. Excess crankcase pressure can force oil past otherwise serviceable seals. Check the PCV valve, breather hoses, oil separator, and blow-by condition before replacing the gasket set.
Clean the area, run the engine to operating temperature, and inspect the highest wet point after heat soak or a short road test. Add UV dye if needed. Do not assume the lowest drip point is the source.
Confirm engine code, production range, OE cross-reference, gasket material, compressed thickness, kit content, and any sealant requirements. Also check the supplier’s quality documentation, traceability, and fitment data.
If you need help matching a lower engine gasket set to a specific engine code or application, contact our team for fitment support and sourcing guidance: /contact.html