How to Diagnose Turbo Lag: Causes, Checks, and Fixes
Turbo lag is the delay between driver demand and boost response. On a healthy system, that delay is brief and predictable. When it becomes noticeable, the turbocharger is not always the root cause. Air leaks, weak vacuum control, restricted intake or exhaust flow, sensor faults, and worn actuators can all create the same complaint. A useful diagnosis starts with the symptom, then moves through measured checks before any parts are replaced.
For procurement teams, service chains, and repair workshops, the goal is to separate a control issue from a hardware failure. Doing that reduces unnecessary turbo returns and helps prevent repeat failures after installation. Driventus is an independent aftermarket manufacturer; brand names are referenced for fitment only. Our parts are produced under IATF 16949:2016 and ISO 9001:2015 controls, with material and process discipline suitable for B2B supply. Use this guide to trace the fault methodically and decide whether the repair needs seals, hoses, actuators, sensors, or a complete turbocharger replacement.
How to diagnose turbo lag without replacing the turbo first
Turbo lag is not every low-power complaint. It is the delay between throttle input, load increase, and the point where boost pressure reaches the expected target.
The first question is simple: is the engine slow to build boost, or is it failing to make boost at all? That split saves time. It also keeps buyers from ordering a turbo when the real issue is a split hose, a stuck actuator, or an exhaust restriction.
Common signs include:
Slow boost rise under load
Flat acceleration below the main boost threshold
Delayed response after a gear change
Audible leak, whistle, or flutter under acceleration
Fault codes tied to boost control, airflow, or pressure deviation
A quick comparison helps narrow the path:
Symptom
Likely area
First check
Slow response only at low rpm
Normal turbo spool range or control issue
Compare live boost to specified target
Weak power across the range
Air, fuel, exhaust, or sensor fault
Scan for DTCs and data drift
Sudden loss of boost
Hose leak, actuator fault, or cracked line
Pressure test and visual inspection
Smoke with poor response
Oil control, compressor damage, or engine issue
Inspect shaft play and intake tract
</tr></thead><tbody> </tbody></table>If the vehicle used to respond normally and now feels delayed, treat it as a fault until measured data says otherwise.
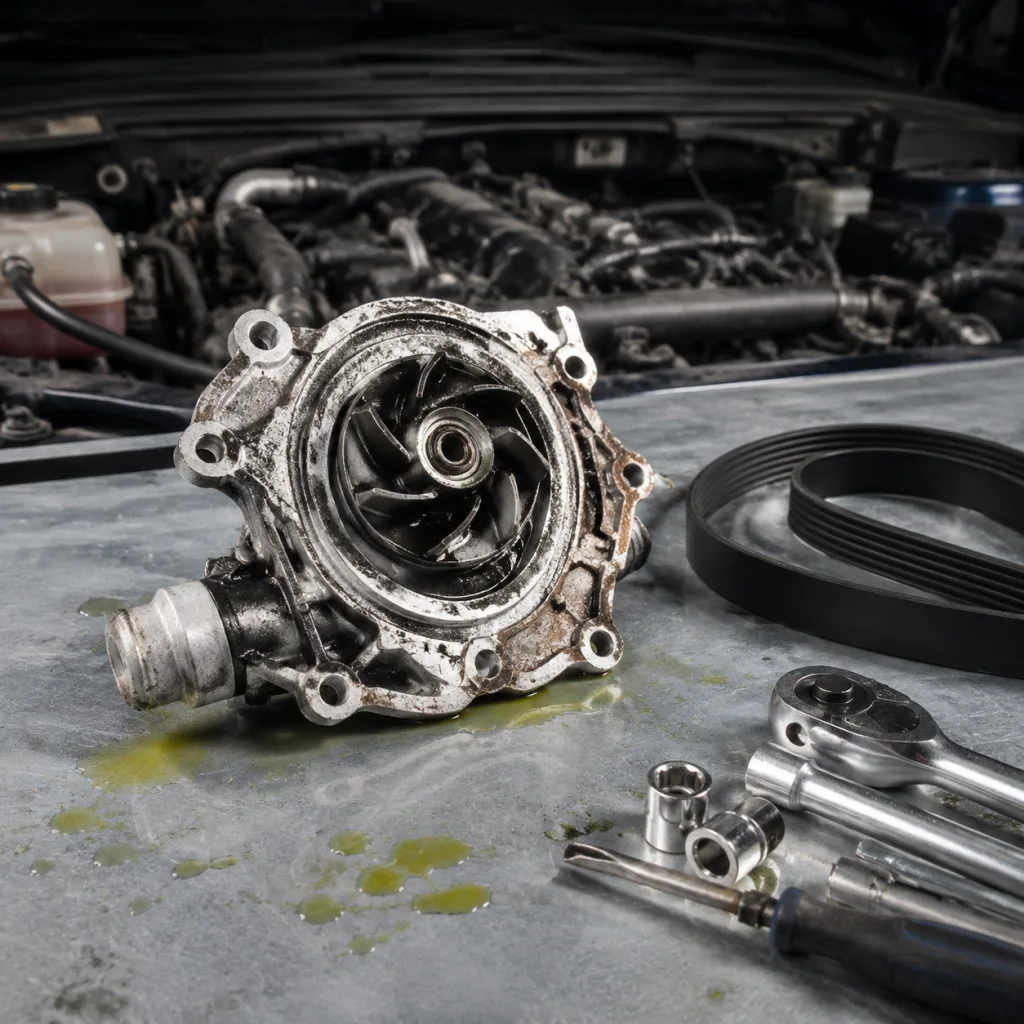
Trace the failure mode step by step
Start with the external system before touching the turbocharger. Most false turbo-lag complaints come from something outside the core unit.
1. Inspect all charge-air hoses for splits, soft spots, oil saturation, and loose clamps. 2. Check vacuum lines, solenoids, and electrical connectors where the turbo uses pneumatic control. 3. Verify the air filter, intake ducting, and intercooler for blockage or collapse. 4. Confirm the exhaust path is not restricted by a blocked DPF, crushed pipe, or failed catalyst. 5. Scan the ECU for stored or pending DTCs and compare live data to the specified boost request.
Useful data points during diagnosis:
Requested boost versus actual boost
Mass air flow reading under load
Manifold absolute pressure at idle and at snap throttle
Actuator duty cycle or commanded position
EGR position, if fitted
A large gap between requested and actual boost usually points to leakage, control loss, or a sticking actuator. A slow rise in both requested and actual boost can point to engine-side airflow restriction instead of the turbo itself.
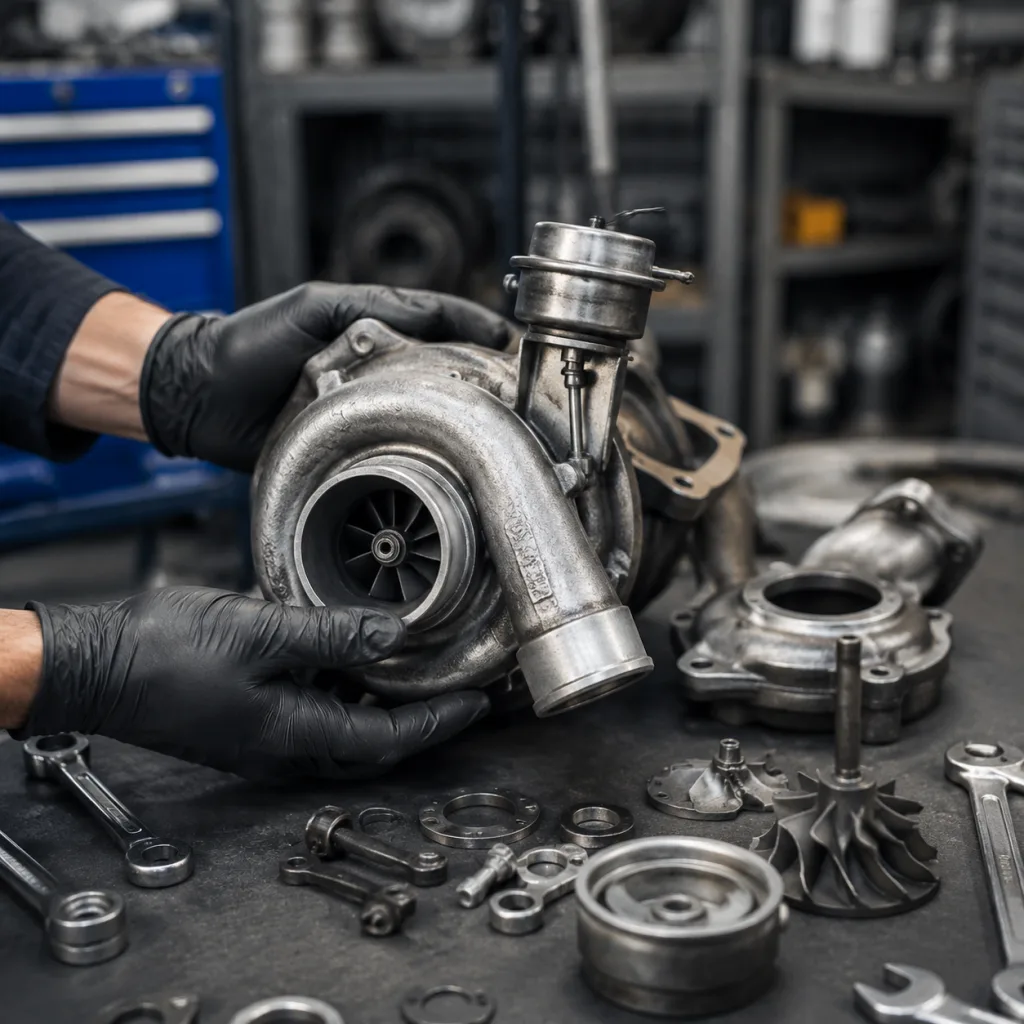
Read the hardware: what to inspect on the turbo assembly
If the external system checks out, inspect the turbocharger assembly itself.
Wastegate operation: opening pressure and return action
A hand pump or calibrated actuator tool is useful on vacuum-controlled systems. The actuator should move steadily and hold position without rapid loss. On electronic actuators, confirm calibration and learned position after replacement.
If the turbo is contaminated with oil or metal, do not assume the turbo is the only failure. Check crankcase ventilation, oil feed, oil drain slope, and intercooler pooling. Repeat failure often starts with the installation environment, not the core unit.
When replacement is the right call
Replacement is justified when the turbocharger fails mechanical inspection, cannot hold control position, or shows damage that affects efficiency and durability.
Typical replacement triggers:
Excessive shaft end play or wheel contact
Cracked housing, damaged blades, or seized vane mechanism
Repeated overboost or underboost after hose and sensor repair
Oil leakage that traces to turbo bearing wear rather than an upstream issue
Actuator failure that is not recoverable by calibration or repair
For buyers and workshops, OE part-number cross-reference control matters. Match by application, connector type, actuator style, flange geometry, and calibration needs. Driventus supports OE 06A107065-style cross-reference workflows when the original part number is already specified in the enquiry.
Driventus is an independent aftermarket manufacturer; brand names are referenced for fitment only. For programme-specific needs, see our custom manufacturing options when a standard catalogue item does not match the build requirement.
Spec checks before you order a replacement
A good replacement order should minimize comeback risk. Confirm the following before release:
Vehicle code, engine code, and model year
OE cross-reference and actuator type
Flange orientation, oil feed, and drain geometry
Sensor ports, vacuum routing, and mounting points
Required gasket set and fastener kit
Packaging and label traceability for warehouse intake
For corporate buyers, supplier controls matter as much as part fitment. Review the quality system for IATF 16949:2016 and ISO 9001:2015 alignment, incoming inspection expectations, and traceability coverage. That is especially relevant for multi-site repair groups and distributors handling mixed-fit applications.
If the repair scope also includes related engine components, browse our catalog for matched gaskets, pumps, and sealing parts that support a complete job. For a broader powertrain sourcing review, the engine components section is a practical starting point.
A workshop sequence that keeps comebacks down
Use one path from symptom to decision:
1. Confirm the complaint with a road test or dyno load. 2. Read DTCs and save freeze-frame data. 3. Compare requested and actual boost. 4. Pressure test the charge-air circuit. 5. Verify vacuum, solenoid, and actuator function. 6. Inspect the turbocharger for wear or contamination. 7. Replace only the failed item, then clear codes and retest.
If the vehicle returns with the same symptom after a turbo swap, the missed root cause is usually in the air path, exhaust restriction, or control system. Documenting the measured values before and after repair reduces repeat warranty claims and supports parts traceability across the fleet.
For sourcing support, technical clarification, or volume orders, you can request a quote.
FAQ
How do I know if the turbo is actually failing? Check boost request versus actual boost, inspect for leaks, and test the actuator. If the turbo has wheel contact, seized vanes, or cannot hold control position, failure is likely.
Can a boost leak feel like turbo lag? Yes. A split hose, loose clamp, or leaking intercooler often creates the same delayed response as a worn turbo.
Should I replace the turbo or repair the control system first? Repair the control system first if the turbo passes mechanical inspection. Replace the turbo only when wear, damage, or calibration failure is confirmed.
Frequently asked questions
Check boost request versus actual boost, inspect for leaks, and test the actuator. If the turbo has wheel contact, seized vanes, or cannot hold control position, failure is likely.
Yes. A split hose, loose clamp, or leaking intercooler often creates the same delayed response as a worn turbo.
Repair the control system first if the turbo passes mechanical inspection. Replace the turbo only when wear, damage, or calibration failure is confirmed.
If you need a fitment check, technical clarification, or bulk pricing, contact Driventus through /contact.html and we will help you match the correct part.