How to Diagnose Rough Idle in Petrol and Diesel Engines
Rough idle is a symptom, not a parts order. In a service network, that distinction has a direct cost: repeat labour, unnecessary replacements, disputed warranty claims and uneven repair quality between branches.
The practical question is how to diagnose rough idle without turning every vibration complaint into a coil, injector, sensor or gasket sale. The answer is a controlled process: define the idle condition, separate air, fuel, ignition, compression, exhaust and electronic-control faults, then order parts only when test data supports the decision.
This article gives technical managers, repair chains, distributors and fleet service teams a workshop-ready structure for petrol and diesel engines. It uses measurable checks such as rpm variation, fuel-trim limits, smoke-test pressure, compression spread, injector correction, return-flow balance and voltage readings.
Driventus supplies engine and powertrain components for the independent aftermarket and B2B programmes that require dimensional control, traceability and consistent packaging. Driventus is an independent aftermarket manufacturer; brand names and OE-style references are used for fitment identification only and do not imply vehicle manufacturer approval.
Start with the idle pattern, not the suspected part
A rough idle diagnosis becomes unreliable when the first line of the job card says only “engine shakes” or “customer says misfire.” Before any part is removed, the workshop should record the condition in measurable terms: engine speed, coolant temperature, fuel trim, air mass or manifold pressure, misfire counts, diagnostic trouble codes and operating load.
On many passenger petrol engines, a warmed stable idle is commonly in the 650-850 rpm range. Light-commercial diesel applications may sit around 700-900 rpm. The exact value is vehicle-specific, but the diagnostic report should still state whether the fluctuation is 20 rpm, 80 rpm or 200 rpm. It should also state whether the vibration is continuous, intermittent, cylinder-specific, cold-only or hot-only.
Petrol rough idle often shows as unstable rpm, vibration through the body, intermittent stalling, a single-cylinder misfire at low load or poor recovery when air-conditioning or electrical load is applied. Diesel rough idle may appear as uneven combustion noise, white smoke after start, slow stabilisation, excessive injector correction values or cylinder-to-cylinder imbalance. Short-term fuel trim near 0% is generally normal. Combined idle trims beyond about +10% point toward lean correction. Values beyond +20% usually justify air-leak or fuel-delivery testing before components are ordered.
Use this first filter:
Cold start only, hot idle only or both, with coolant temperature recorded in °C.
Neutral/Park idle versus Drive idle under torque-converter or clutch load.
Idle with air-conditioning, alternator load, heated screens or hydraulic steering load applied.
Recent battery disconnection, software update, timing work, fuel-system service or other repairs.
Confirmed, pending and history diagnostic trouble codes.
Smoke, fuel smell, coolant loss, oil contamination or overheating history.
This baseline protects the parts decision. A gasket kit, piston set, water pump, crankshaft sensor or turbocharger actuator can all be mentioned in a rough idle complaint, but they belong to different fault paths. For warranty review, the record should include scan data, freeze-frame information where available, fuel and compression results where relevant, and photos of failed or suspect parts before a credit request is raised. The task is to document the condition, not guess the component.
Failure-mode map: what the symptom is really telling you
A rough idle fault should be routed by failure mode. The table below is designed for service networks that need fewer no-fault-found returns and clearer stock signals. It is not a replacement for vehicle-specific service information, but it helps technicians and buyers speak the same language.
Symptom pattern
Likely system
First inspection
Replacement decision point
Misfire at idle, improves with rpm
Ignition, injector balance or compression
Check plugs, coils, injector pulse, cylinder misfire counters and compression if needed
Replace only the confirmed failed ignition, injector or mechanical component
High positive fuel trim at idle
Unmetered air or vacuum leak
Smoke test intake, PCV hoses, manifold gasket, brake booster hose and EVAP purge path
Replace cracked hoses, faulty valves or sealing gaskets after leak confirmation
Rough cold start, normal hot idle
Fuel pressure, coolant temperature input, deposits or diesel glow system
Check live coolant temperature, rail pressure, intake deposits, glow operation and start enrichment data
Replace sensor, pump, injector or clean intake only after measured deviation
Rough hot idle after overheating
Compression, valve sealing or head gasket
Compression test, leak-down test, cooling-system pressure test and coolant loss check
Replace gasket or internal engine components after mechanical proof
Diesel idle knock and smoke
Injector correction, fuel quality, compression or timing
Replace electrical or mount components only when testing confirms failure
</tr></thead><tbody> </tbody></table>Interpret live data against engine type and calibration. On a naturally aspirated petrol engine at hot idle, manifold vacuum often sits around 17-22 inHg, or MAP roughly 25-40 kPa. A large deviation combined with positive fuel trim is a strong lead for an air leak, incorrect valve timing or another airflow calculation problem.
Diesel data needs the same caution. Injector correction outside typical limits such as ±2.0 to ±3.0 mg/stroke, or return-flow imbalance greater than about 20-30% between cylinders, is a lead. It is not an automatic injector order. Fuel quality, compression, rail pressure control and timing correlation still need to be checked.
For emissions-related components, workshops should work within applicable regulations such as ECE R83 for vehicle emissions type approval and local inspection rules. The diagnostic principle is simple: control the test condition before judging the part. A cold engine, weak battery or unrecorded adaptation can make a good component look bad.
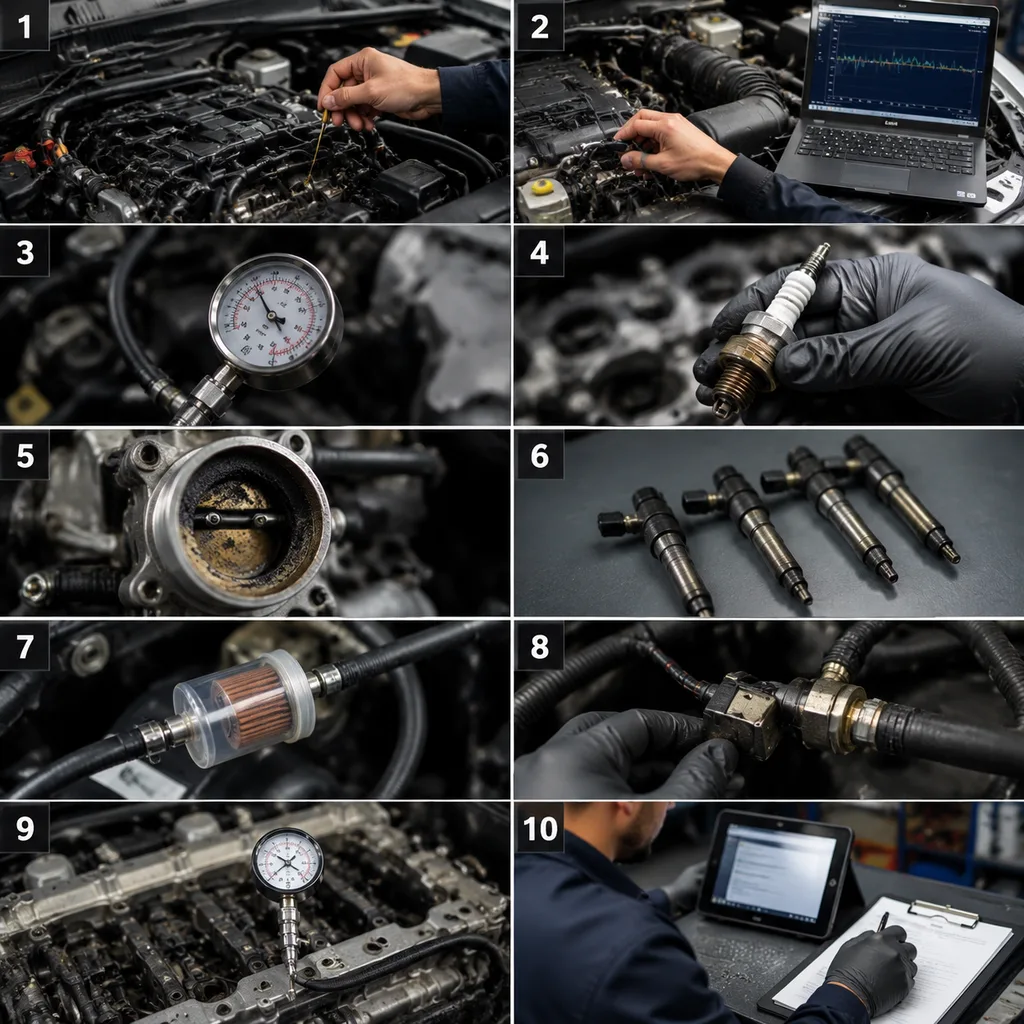
A 10-step workflow for diagnosing rough idle without parts roulette
This sequence is the operational answer to how to diagnose rough idle in mixed petrol and diesel service environments. It is designed to stop technicians from jumping from a code to a purchase order.
1. Verify the complaint. Record start temperature, fuel type, driving conditions, recent repairs and whether the malfunction indicator lamp is on. Reproduce the symptom instead of relying on the repair-order wording. 2. Scan all relevant modules. Save confirmed, pending and history codes plus freeze-frame data. Manufacturer-level data is preferable where available; generic P-codes alone are often too broad. 3. Check battery and charging voltage. Static battery voltage should normally be about 12.4-12.7 V. Charging voltage at idle is commonly 13.5-14.8 V, depending on smart-charge strategy. Low voltage can disturb throttle learning, injector control, sensor outputs and idle compensation. 4. Inspect visible air and vacuum paths. Check clamps, split intake boots, disconnected breather hoses, PCV valve faults, EVAP purge leakage and manifold gasket leakage. Small heat-hardened hoses under the intake are frequent offenders. 5. Review live data at idle. Fuel trims, mass air flow, manifold pressure, oxygen or air-fuel sensor activity, coolant temperature, throttle angle, EGR command and misfire counters are the core indicators. A coolant sensor reading 20 °C below actual temperature can create the wrong enrichment strategy. 6. Smoke test when air leakage is suspected. Use regulated low pressure, commonly 0.5-1.0 psi or about 35-70 mbar unless the vehicle procedure states otherwise. Small leaks can wreck idle quality while barely affecting higher-rpm running. 7. Test fuel delivery. Verify pressure, volume and injector balance. Port-injection petrol systems may operate around 3-4 bar. Direct-injection low-pressure supply is often around 4-7 bar, while high-pressure systems vary widely by load and design. For common-rail diesel engines, check rail pressure control, injector return flow, correction values and contamination using clean containers and timed measurement. 8. Check ignition quality on petrol engines. Inspect coils, spark plugs, plug wells and secondary insulation under the same load and temperature that reproduces the complaint. Compare plug gaps, deposits, oil entry and coil current ramping. A coil that passes cold can still fail hot. 9. Prove mechanical condition. Compression, leak-down, relative compression and timing correlation checks identify internal engine faults. Cylinder-to-cylinder compression variation above roughly 10-15%, or leak-down above about 20% on many engines, justifies deeper mechanical investigation. 10. Check exhaust, EGR and air recirculation. A sticking EGR valve, carbon-restricted intake, restricted exhaust or leaking turbocharger air path can disturb air calculation and combustion stability. Compare commanded and actual EGR position and check whether carbon is holding the valve open at idle.
After any repair, reset or perform required adaptations, road test the vehicle and recheck idle data under the original complaint conditions. Save before-and-after values. The rule is short: prove the system, then prove the part.
Replacement decision gates: when the evidence is strong enough
Replacement is justified when the fault is confirmed by inspection, measurement or repeatable signal failure. Cleaning, adaptation or adjustment should come first when the part is not damaged and the service procedure supports it. Driventus supplies engine and powertrain components used in many confirmed rough idle repairs, and buyers can review our catalog for applicable product families.
Use these decision gates before releasing stock or approving warranty replacement:
Sealing fault proven. Intake, throttle body or cylinder head gasket leakage should be confirmed by smoke test, pressure test, dye trace or fluid evidence. Buyers should confirm gasket material, thickness tolerance, bolt-hole alignment and surface finish compatibility.
Mechanical sealing fault proven. Piston ring, valve, cylinder wall or head sealing issues require compression, leak-down or borescope evidence. Piston and ring programmes should specify bore size, oversize options such as +0.25 mm or +0.50 mm where applicable, ring end-gap targets and coating requirements.
Cooling fault linked to idle instability. Water pump leakage, impeller damage or bearing noise can contribute to overheating-related rough idle or repeated coolant loss. Sourcing checks should include impeller material, bearing supplier grade, seal type, pulley runout and 100% leak-test requirements where specified.
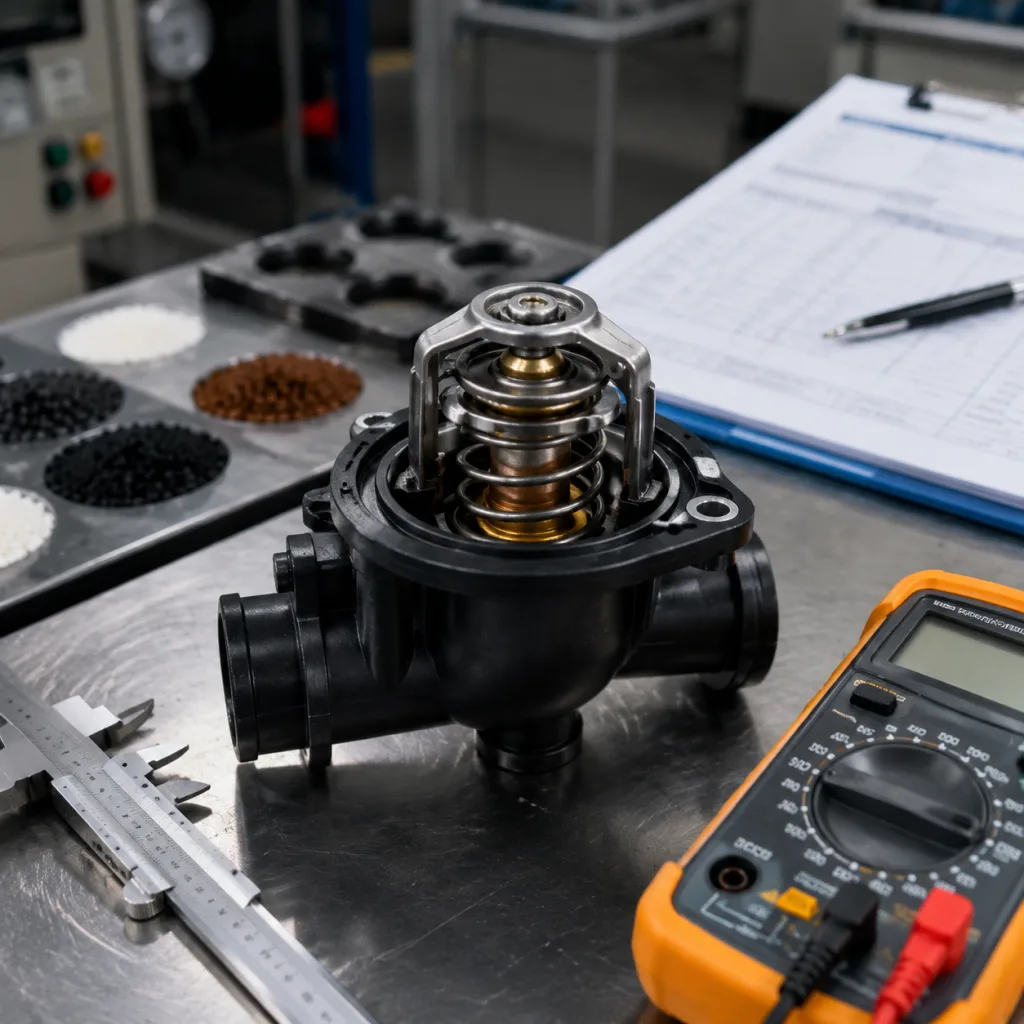
Position sensor signal failure captured. Crankshaft or camshaft position sensor dropout should be confirmed by oscilloscope pattern, scan data or repeatable no-signal condition. Sensor sourcing should define connector keying, resistance or output type, air-gap tolerance and heat-vibration validation.
Turbocharger or charge-air fault measured. Air-path leakage, actuator faults, charge-air hose splits or oil seal problems can affect measured air mass and idle stability. Hose and actuator programmes should define pressure rating, oil resistance, clamp-zone hardness and actuator calibration method.
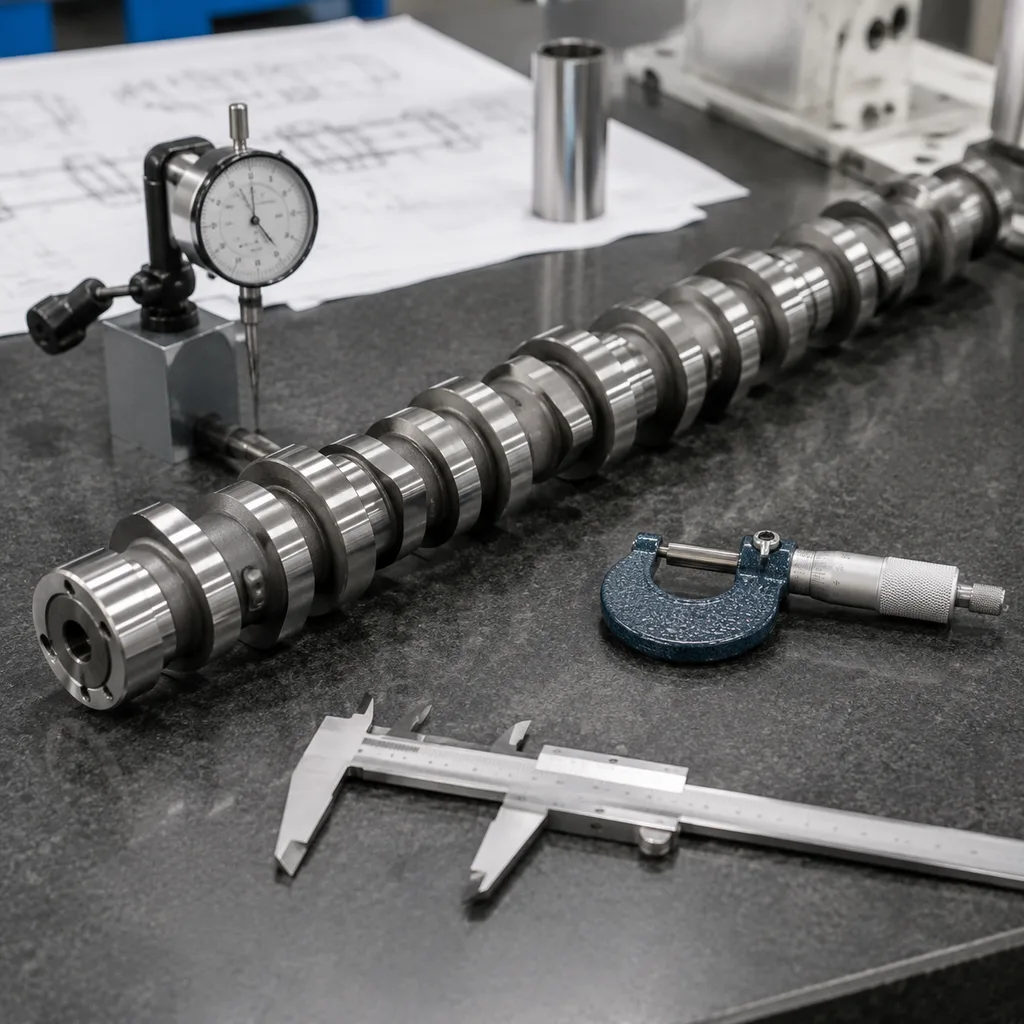
Timing deviation confirmed. Timing chain, belt, tensioner or phaser deviation should be proven by correlation data, physical timing inspection or the manufacturer test procedure. Avoid mixing chain, guide and tensioner sources unless interface tolerances are controlled as a kit.
Injector failure demonstrated. Internal leakage, poor spray pattern or excessive return flow should be confirmed by approved fuel-system testing. Fuel-system purchases should define test fluid, test pressure, flow tolerance and cleanliness level.
For OE service matching, Driventus uses drawing control, material verification, process inspection and fitment cross-reference management. Where customers request OE part-number cross-reference handling, the reference format should remain generic unless the programme provides a verified number, for example OE 06A… or OE 11251…. No vehicle manufacturer approval is implied by such references.
For non-standard packaging, private label supply, revised materials or dimensional changes, Driventus can support custom manufacturing after technical review. Useful project inputs include drawings or samples, annual volume estimate, target market, packaging standard, inspection plan and required documentation. The strongest programmes connect each part family to a documented diagnostic trigger, so replacement demand reflects real repair evidence rather than broad symptom categories.
Spec deep-dive: quality controls that prevent repeat rough-idle repairs
A correct diagnosis can still fail commercially if the replacement part is inconsistent. Poor sealing surfaces, unsuitable compounds, loose tolerances or weak traceability can send the vehicle back with the same idle complaint. Procurement teams should treat rough-idle-related parts as critical-to-function items, not simple catalogue lines.
Driventus operates under IATF 16949:2016 and ISO 9001:2015 management systems. Its quality system includes incoming material checks, in-process inspection, final sampling and production traceability. Export programmes may also require documentation aligned with REACH (EC) No 1907/2006 for substances, packaging labelling rules and customer-specific inspection plans.
A supplier specification should cover:
Material grade and heat-treatment records where applicable, including batch certificates for metal components.
Critical-to-function dimensions and tolerance plans for sealing lands, bore diameters, sensor seats and bolt-hole position.
Surface finish requirements for sealing faces, shafts, bores and rotating interfaces; machined sealing faces should have a defined Ra value rather than visual approval only.
Rubber, gasket or polymer compound specification, including temperature range, coolant or oil resistance and hardness tolerance.
Batch traceability from raw material to finished part, with carton label, production lot and inspection record linked where practical.
Functional testing for pumps, sensors, valves or actuated components, including pass/fail limits and test frequency.
Fitment control by engine code, production date range and market variant.
Packaging protection for sealing surfaces, connectors and machined areas, including caps, bags, dividers or corrosion protection.
Clear warranty evidence requirements from the repair site.
Inspection depth should match part risk. A low-risk gasket may use dimensional sampling by lot. A water pump, actuator or electronic sensor may require 100% functional checks plus AQL-based final inspection. Buyers should agree acceptance criteria in advance; common commercial ranges include AQL 1.0 or 1.5 for major defects and AQL 2.5 or 4.0 for minor packaging defects, although the correct level depends on the programme and market.
This documentation reduces disputes. Distributors can separate no-fault-found returns from true product defects. Repair chains can match diagnostic evidence to the claimed part. Supplier quality teams get cleaner data instead of vague “rough idle after fitting” complaints.
Scenario planning for multi-branch procurement teams
Rough idle becomes a sourcing problem when every branch interprets the complaint differently. One site stocks coils. Another orders injectors. A third replaces gaskets without a smoke test. The result is excess inventory, high returns and pressure to fit expensive parts before basic checks are complete.
A better procurement model groups parts by confirmed fault path:
Air sealing: gaskets, hoses, PCV components, intake boots and clamps.
Fuel delivery: pumps, filters, injector-related parts and pressure-control components.
Ignition: plugs, coils and related service items for petrol engines.
Engine mechanical: pistons, rings, valves, head sets, timing assemblies and compression-related parts.
Cooling: water pumps, seals, housings and coolant-control components.
Exhaust recirculation and air control: EGR-related parts, throttle and air-management items.
Turbocharger air path: charge-air hoses, actuators and sealing parts.
Control sensors: crankshaft, camshaft and selected programme-specific sensors.
Recommended purchasing controls include:
Stock fast-moving gaskets, sensors, hoses and ignition-related items based on confirmed repair data, not complaint wording.
Require pre-authorisation for high-value mechanical parts such as pistons, crankshafts, turbochargers, cylinder head sets and timing assemblies.
Use structured fault reports for warranty claims, including codes, freeze-frame data, live data, test results and repair confirmation.
Separate no-fault-found returns from confirmed manufacturing defects.
Maintain fitment data with engine code, model year range, fuel type, emissions variant and OE-style cross-reference notes.
Review branch-level return patterns to identify training gaps, catalogue errors or part-quality concerns.
Align stock depth with seasonal demand where cold-start complaints, battery weakness or coolant issues increase rough idle reports.
MOQ, price and lead time should be managed by part family rather than by one blanket purchasing rule. Fast-moving sealing and hose items can support higher carton quantities. Slow-moving pistons, pumps or turbocharger-related parts may need staged orders to avoid dead stock. Buyers often separate A-class lines with monthly replenishment, B-class lines with quarterly buys and C-class or engine-specific lines with confirmed-order supply.
Evaluate price as landed cost. Tooling amortisation, inspection depth, private-label packaging, carton strength, palletisation and warranty reserve can change the real cost by several percentage points. For new programmes, allow time for sample review, fitment confirmation and packaging approval before the first production order. A straightforward existing part may move through quotation and sample approval in 2-4 weeks; revised material, private label or new-tooling parts can require 8-16 weeks depending on validation.
MOQ will vary by process. Rubber moulding, casting, machining, electronics and gasket cutting have different economic batch sizes. Buyers should request tiered pricing at two or three quantities, such as trial order, standard replenishment and annual-call-off levels, so sales teams can compare margin against stock risk.
Driventus can support distributors and repair networks with B2B supply of engine components, sealing parts, cooling parts and turbocharger-related components. For sourcing review, technical data, MOQ discussion or application coverage, buyers can request a quote.
Frequently asked questions
Yes. Intake manifold, throttle body, cylinder head or vacuum-related gaskets can allow unmetered air, coolant leakage or compression loss. A smoke test, pressure test, compression test or leak-down test should confirm the failure before replacement.
No. Fault codes identify a circuit, condition or affected cylinder, but they do not always identify the failed part. Live data, mechanical checks, wiring inspection and component testing should be used before ordering replacements.
Yes. Driventus supplies engine and powertrain components including gaskets, pistons, selected sensors by programme, water pumps and turbocharger-related parts for B2B aftermarket supply. Fitment must be confirmed by application data, engine code and market variant.
If your team is building a standardised parts programme for rough idle repairs, Driventus can review drawings, samples, application data, MOQ targets and packaging requirements. Start a sourcing discussion at /contact.html