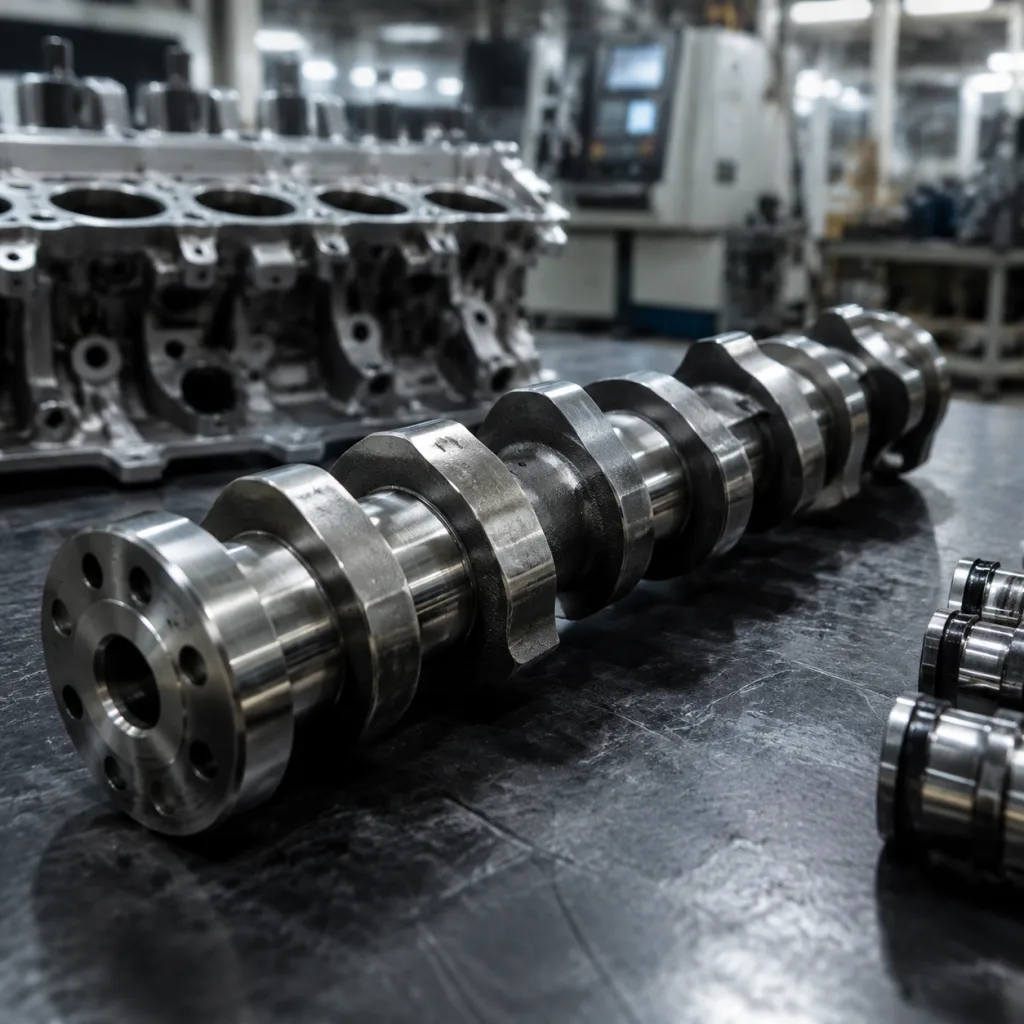
Piston Pin How to Replace: Workshop Steps, Tolerances and QC Checks
Replacing a piston pin is precision engine work, not a routine parts swap. The pin forms the joint between the piston and connecting rod, so mistakes in fit, alignment, lubrication, or retention can quickly damage the piston bosses, rod small end, or cylinder wall. For rebuilders, repair networks, and parts buyers running workshop programmes, the real challenge is repeatable process control: correct measurement, the right heating or pressing method, proper clip installation where used, and a reliable inspection before the engine goes back into service.
This guide explains piston pin how to replace in a practical workshop setting for both full-floating and interference-fit assemblies, along with the dimensional checks that should be completed before release. Because limits vary by engine family, always treat the OEM or rebuilder specification as the master reference. If engine-specific figures are not yet available during incoming inspection, buyers and workshops should at minimum control pin diameter, roundness, surface finish, hardness, weight consistency, and lot traceability. Driventus is an independent aftermarket manufacturer; brand names are referenced for fitment only.
When a piston pin should be replaced
Replacement is usually needed when inspection finds wear, scoring, heat bluing, ovality, out-of-round small-end bushings, or looseness at the piston boss or connecting rod bore. It is also common during a major overhaul when pistons or rods are already being renewed, since reusing a marginal pin can compromise the whole rebuild.
In workshop terms, a piston pin should be replaced any time the running surface or supporting bores can no longer hold a stable oil film. The pin works under alternating load and changes direction every engine cycle, so even small dimensional errors can quickly become knock, scuffing, or seizure. On some engines, only a few microns of extra clearance are enough to change noise behaviour at hot idle or under light load.
Common replacement triggers include:
Visible scoring, smearing or galling on the pin surface
Measured diameter below service limit
Excessive clearance between pin and piston bore
Excessive clearance between pin and connecting rod bushing
Distorted or cracked circlip grooves on full-floating designs
Heat discoloration caused by oil starvation or seizure
Noise traced to pin knock after ruling out bearing clearance
Rust etching or storage damage on unused service stock
Evidence that the pin has spun in a location where it should be fixed
It is also important to separate wear on the pin from wear in the surrounding parts. A new pin installed in a worn piston boss or an oval rod bushing will not restore the correct fit. In many failed assemblies, the pin is only the visible symptom. The root cause may be poor lubrication, overheating, detonation damage, small-end misalignment, or debris embedded in the bushing material.
For procurement teams supporting rebuild programmes, it is good practice to review piston, rings, rod bushing, and lubrication pathway condition whenever pins are being replaced. If an engine family has a known history of oil contamination or overheating, widen the inspection scope to include oil jets, piston cooling passages, and bush material condition. In fleet and reman programmes, this helps prevent repeat failures caused by treating the pin as an isolated wear part.
When comparing part programmes across multiple engine families, confirm whether the application uses a full-floating, semi-floating, or press-fit arrangement. Pins that look similar at a glance may use different tolerance classes, wall thicknesses, chamfer geometry, hardness depth, or clip-groove relationships depending on the original design. For application review, see our catalog and the wider /products/engine-components.html range.
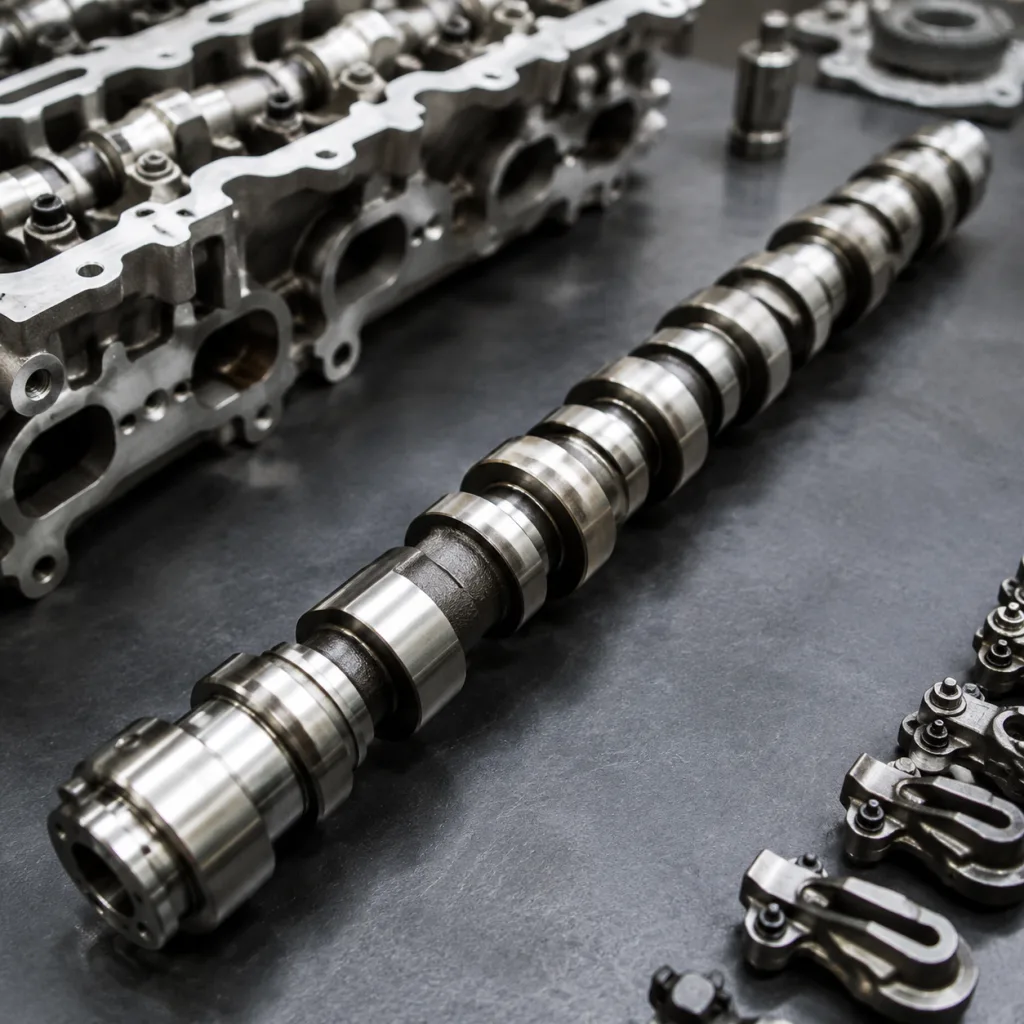
Tools, measurements and pre-replacement checks
Before removal, identify the joint type. Some assemblies use a full-floating pin retained by clips; others use a press-fit or semi-floating arrangement where the pin is fixed in either the rod or piston, depending on the design. This first step matters, because the safe removal method, heating requirement, and allowable assembly force all depend on it.
A sound piston pin how to replace procedure begins with measurement, not disassembly. Once the pin is removed, useful clues about wear pattern, offset, centring, and fit quality can be lost.
Recommended tools
Outside micrometer, typically 0.001 mm or 0.0001 in resolution
Dial bore gauge or internal micrometer for piston bosses and rod bushing bore
Pin removal/installation press fixture with close boss support
Controlled piston heater, rod heater or induction heater where specified by the repair method
Circlip installation tool for floating-pin assemblies
Surface plate and V-blocks for straightness or runout checks where needed
Clean assembly oil or specified engine assembly lubricant
Vernier or depth tool to confirm pin centring or side projection where applicable
Soft-jaw vice or dedicated holding fixture to avoid marking aluminium components
Magnification and good lighting for groove, crack and burr inspection
What to verify before disassembly
Check point
Why it matters
Typical action
Pin diameter at several points
Detect taper, wear and ovality
Compare with drawing or service data
Piston boss bore
Confirms fit class
Replace piston if bore is worn, bell-mouthed or cracked
Measure the old pin in more than one location and in more than one axis. A single reading at the centre can miss taper or local wear near the loaded zones. A common shop method is to measure near both ends and at the centre, then repeat at 90 degrees. Do the same for the rod bushing and piston bosses after thorough cleaning. Carbon, varnish, or burrs at the bore entry can distort readings and make a serviceable part appear undersize or oversize.
If no engine-specific figure is immediately available, use the following only as screening values, not universal limits:
Pin taper or out-of-round above about `0.003-0.005 mm` merits closer review
Roundness error in a new service pin is normally expected in the low micron range, often `<=0.002 mm`
Full-floating running clearance is commonly only a few microns to low hundredths of a millimetre, often around `0.003-0.015 mm` depending on design
Press-fit interference at the fixed member is usually controlled in hundredths of a millimetre, not tenths
Check the piston for cracks around the bosses, especially on engines that have seen seizure, detonation, or skirt collapse. On the rod, inspect the small-end bushing for wiping, embedded debris, loss of oil-groove form, and any sign that the bushing has rotated. If the design uses a bronze or CuSn-type bushing, contamination can score the new pin almost immediately after startup.
Also verify orientation marks before separating parts. Many pistons have a front mark, valve pocket asymmetry, bowl orientation, or pin offset. Many rods have a chamfered big end, oil-hole direction, or bearing tang position that must face a specific side. Losing track of orientation during disassembly is one of the most common rebuild mistakes.
For quality-managed supply, dimensional traceability and process records should align with a documented quality system. In automotive manufacturing, IATF 16949:2016 and ISO 9001:2015 are relevant frameworks for control of measurement, nonconforming product, and traceability.
Step-by-step replacement procedure
The exact sequence depends on whether the assembly is floating or press-fit, but the principle stays the same: remove the pin without damaging the piston bosses or rod bore, then install the replacement with controlled fit and correct orientation. In any piston pin how to replace job, improvised tooling usually causes more harm than the original wear.
Before starting, make sure all parts are clean, the replacement pin has been checked against the job specification, and the piston and rod are clearly marked for orientation. Lay out the parts in assembly order and keep left/right or cylinder-position sets separated if the engine build requires matched components.
Full-floating design
1. Clean and mark orientation. Note piston front mark, rod orientation and any offset design details. 2. Remove retaining clips. Discard old clips unless the service procedure explicitly allows reuse; many rebuilders replace them as standard practice. 3. Push out the pin. If the pin does not slide with light controlled force, inspect for burrs, carbon or local seizure. 4. Inspect piston and rod. Measure both bores after cleaning. Do not assume a new pin will correct wear in the mating parts. 5. Lubricate the new pin. Apply clean assembly lubricant to the pin and bearing surfaces. 6. Install rod to piston. Align the rod correctly relative to piston front or valve pocket orientation. 7. Insert the new pin. It should move smoothly through the first boss, rod bushing and second boss without binding. 8. Fit new clips. Confirm each clip is fully seated in its groove and correctly oriented per workshop procedure. 9. Check side movement and free articulation. The rod should pivot freely without noticeable roughness or excessive rock.
With floating pins, the key feel is smooth movement with no tight spots. If the pin drags heavily through one boss but not the other, the cause may be boss distortion, bore misalignment, or burrs at the entry chamfer. Do not polish or abrade the new pin just to make it pass. Find the mating part that is out of condition.
When fitting clips, shield the open crankcase area or workbench so a dropped clip is not accidentally reused without inspection. After seating, rotate the clip carefully only if the workshop method allows it, and verify that it is fully engaged in the groove. An incompletely seated clip can release in service, allowing the pin to walk sideways and destroy the cylinder wall.
Interference-fit or press-fit design
1. Set up a correct support fixture. Unsupported pressing can crack piston bosses. 2. Heat the specified component if required. Controlled heating is preferred over excessive press load. 3. Press out the old pin squarely. Misalignment can score the rod bore or distort the piston. 4. Measure all mating bores after removal. Any loss of roundness must be corrected before assembly. 5. Position the rod and piston in the correct orientation. This is critical where pin offset or asymmetric crown geometry exists. 6. Heat and/or press in the new pin using the approved fixture. Maintain alignment through the full stroke. 7. Allow the assembly to stabilise. Recheck movement once temperatures return to ambient. 8. Verify centring and projection. The pin must sit within the specified lateral position.
For press-fit designs, the main control points are temperature, alignment, and support. Heating should follow the workshop specification, not guesswork by colour or touch. Many steel-rod small-end procedures use dedicated rod heaters or induction systems, and typical process windows are often around `180-250 C`; some piston-warming steps are much lower, often around `60-90 C`. These are only broad industry ranges. Always use the engine-specific value, because alloy temper, coating type, and fixture design can change the safe limit.
Use a fixture that supports the piston close to the bosses and keeps the pin path square. During installation, make the press movement smooth and continuous. Stopping midway can create binding, local marking, or a partially seized fit. If assembly force rises sharply above the shop's normal baseline, stop and remeasure rather than forcing the job through. After the assembly cools to ambient temperature, check that the rod moves as specified for that design and that the pin is centred correctly.
Good practice during installation
Keep abrasives away from the pin and bores unless the repair method specifically calls for light deburring
Never strike the pin directly with a hammer
Do not mix old and new retention parts in one assembly set
If one cylinder shows abnormal pin wear, inspect the full engine for lubrication or detonation-related causes
Compare the removed part with the new part for chamfer, oil-hole relationship, overall length and edge form before fitting
For batch rebuild work, record the heater setting, assembly method and technician sign-off by lot
Do not machine the pin to force fitment. If the fit is outside specification, the problem is usually the mating bore, the wrong part, or a process deviation.
Fit, clearance and material points to control
A reliable repair depends on the interaction of three variables: pin hardness and finish, rod small-end geometry, and piston boss bore condition. A correct nominal diameter on its own is not enough. That is why piston pin replacement should be treated as a fit-system check, not just a part swap.
Key engineering points:
Material and hardening: Pins are commonly produced from low-alloy carburising steel or through-hardening steel, depending on application.
Surface finish: Rough or inconsistent finish increases scuffing risk during first start and accelerates bushing wear.
Roundness and cylindricity: Local high spots can create seizure even where nominal size appears correct.
Bushing material compatibility: The rod bushing alloy and final hone quality affect oil-film stability.
Mass consistency: Weight variation matters in multi-cylinder rebuilds where reciprocating balance is controlled.
Edge/chamfer condition: Incorrect chamfer form can damage bush entries or clip installation areas.
In service, the piston pin often sees oscillating contact rather than full continuous rotation. That means the load is repeated in specific zones. If hardness depth, finish, or roundness are inconsistent, those areas can show rapid polishing, wiping, or scoring. A pin may pass a basic diameter check and still fail early if its surface integrity or microstructure is poor.
The rod bushing is just as important. A good pin running in a poorly honed or misaligned bushing will struggle to maintain a stable oil film. Cross-hatch quality, bore geometry, and alignment to the rod axis all affect whether the pin can articulate smoothly under load. If the bushing closes up after being pressed into the rod, final sizing must be done correctly before assembly.
Typical points buyers and workshops should verify
Control point
Why it matters in service
What to request or inspect
Hardness range and effective depth
Supports wear resistance and fatigue life
Lab report or lot inspection record
Diameter tolerance
Determines fit class
Micrometer report by lot
Roundness/cylindricity
Prevents tight spots and local seizure
Precision inspection capability
Surface roughness
Affects running-in and oil film
Finish specification or sample approval
Material grade
Supports strength and heat-treatment response
Material certification
Weight spread by lot
Helps balance control in set builds
Lot average and max/min data
Lot identification
Supports field traceability
Batch code and packing control
</tr></thead><tbody> </tbody></table>For B2B buyers, supplier validation should include metallurgical control, hardness testing, dimensional inspection, and lot traceability. Credible incoming or PPAP-style data for a piston pin programme often includes:
Surface hardness typically in the range of about `58-64 HRC` for many hardened steel pins, subject to design
Surface roughness commonly around `Ra 0.10-0.25 um` on the bearing surface
Roundness and cylindricity often controlled to a few microns, such as `<=0.002-0.004 mm`
Weight matching commonly within `+/-0.5 g` or tighter for balanced multi-cylinder sets
Material examples such as `20MnCr5`, `16MnCr5` or equivalent grades where the application calls for carburised alloy steel
These figures are typical market benchmarks, not universal release limits. Always match the pin to the drawing, OEM specification, or approved sample. If a programme requires special dimensions, coating options, or private-label packaging, Driventus can support custom manufacturing.
Where compliance requirements apply to material declarations in export markets, REACH (EC) No 1907/2006 should be considered for chemical substance communication in the supply chain.
Post-installation checks before engine reassembly
After installation, complete a final inspection before fitting the piston-and-rod assembly into the engine block. This reduces rework and makes it easier to separate assembly problems from later lubrication or combustion issues. A careful final check is especially important after any piston pin how to replace operation, because many mistakes are far easier to correct on the bench than after the short block is assembled.
Post-installation checklist:
Confirm correct piston-to-rod orientation
Confirm clip seating on floating-pin assemblies
Confirm free rod articulation through full travel
Check for any metal pickup or fresh scoring after installation
Verify pin centring where applicable
Reconfirm small-end side alignment and twist if part of the rebuild process
Ensure oil holes or lubrication slots are not blocked
Record measured dimensions against the job card
Confirm matched sets remain with the correct cylinder or engine position if required
Functional checks to perform
Move the rod through its range by hand and feel for smooth, even resistance. There should be no notchiness, no stick-slip effect, and no abrupt tight spot at one part of the movement. On floating designs, the pin should remain properly retained with no sign of clip distortion. On press-fit assemblies, verify that the specified relationship between rod and pin remains correct after the assembly has fully cooled.
Inspect the boss faces and bushing edges for fresh witness marks. New scratches around the entry points often mean the pin was forced in over a burr or installed with poor alignment. Also check that assembly lubricant is present and clean. Dirt introduced at the final stage can quickly damage the new fit once the engine starts.
Where the workshop procedure includes dimensional release, record at least these values: pin diameter, piston-boss bore, small-end bushing bore, lateral pin position, and retention method used. On high-volume rebuild lines, many shops also record heater setpoint, assembly time window, and technician ID to support warranty traceability.
Dimensional and documentation checks
If the engine family uses a referenced fitment number, cross-check the supplied part against the required application data, for example in a format such as OE 06A107065 where the programme already specifies that reference. Do not rely on visual similarity alone. Record the pin size, measured bore sizes, bushing status, clip replacement status, and any heating or pressing method used. These records become valuable if there is later warranty analysis or field troubleshooting.
For buyers managing multi-site repair operations, it is useful to standardise incoming inspection, workshop instructions, and lot recording. That approach helps isolate field issues to installation, lubrication, or upstream component variation. In larger rebuild programmes, a simple signed checklist for each piston-and-rod assembly can materially improve repeatability across technicians and locations.
Common replacement errors and how to avoid them
Most early failures come from process mistakes rather than the pin itself. Put simply, many piston pin how to replace problems are avoidable when the workshop controls measurement, orientation, heating, and tooling properly.
Error
Result
Prevention
Pressing without proper fixture support
Cracked piston boss
Use dedicated support tooling close to the bosses
Reusing damaged clips
Pin drift and cylinder damage
Install new clips and verify seating
Ignoring rod bushing wear
Knock, seizure or rapid wear
Measure and rebush/hone as needed
Wrong orientation of rod to piston
Offset error, noise, abnormal wear
Mark and confirm before assembly
Installing dry
Scuffing on initial start
Apply assembly lubricant
Forcing an out-of-spec fit
Distortion and premature failure
Stop and remeasure all components
Overheating during press-fit work
Loss of material properties or distortion
Use controlled heating only
Mixing similar-looking parts from different applications
Wrong fit or retention method
Verify part number and dimensions before fitment
</tr></thead><tbody> </tbody></table>### How these errors appear in the field
A cracked boss may not fail immediately. It can first show up as unexplained pin movement, skirt noise, or oil contamination from aluminium debris. Reused clips often lead to catastrophic damage when the pin shifts outward and contacts the cylinder wall. Incorrect rod orientation can produce offset-related slap, abnormal thrust loading, or contact issues with valve pockets and combustion bowl geometry.
Ignoring bushing wear is especially common in cost-driven repairs. The engine may leave the workshop quietly, then return with knock or scuffing after limited service because the new pin was never properly supported. Dry assembly creates a similar risk, since the pin and bushing can be damaged during the first seconds of startup before full oil flow reaches the small end.
Another frequent mistake in cross-border sourcing programmes is assuming that nominal diameter alone is enough. Two pins can share the same outer diameter yet still differ in length tolerance, internal bore geometry, chamfer profile, hardness depth, or retention strategy. That is why incoming inspection should be tied to the drawing revision, approved sample, or OE cross-reference, not just the catalogue description.
Preventive process controls
To reduce error rates, workshops should standardise a few key controls:
Confirm joint type before removal
Measure and record before-and-after values rather than relying on feel alone
Separate old and new clips so they cannot be mixed accidentally
Use model-specific orientation references on the bench
Calibrate measuring tools and heating equipment regularly
Train technicians on support fixture placement for aluminium pistons
Quarantine any part that requires unusual force to install until dimensions are rechecked
Audit supplier lots for hardness, finish and roundness consistency, not just packaging label accuracy
A controlled workshop method matters as much as part quality. Buyers evaluating new suppliers should ask for inspection capability, heat-treatment control, PPAP support where required, and batch traceability. If you need technical data, fitment review, or sourcing support for piston pins and related engine components, you can request a quote.
Frequently asked questions
Yes, but only if the piston pin bores and circlip grooves remain within specification and show no cracking, distortion, or scoring. The decision should be based on measured boss-bore size, roundness, and groove condition, not appearance alone. If the boss bore is worn, bell-mouthed, or cracked, replacing only the pin is not a reliable repair.
In most rebuild practices, yes. Retaining clips are low-cost safety components, and reusing deformed, overstressed, or corroded clips increases the risk of pin migration and severe cylinder damage. Best practice is to install new clips from the same approved service kit and verify full seating in the groove.
Free and smooth articulation of the connecting rod, correct orientation, and secure retention are the priority checks. Also confirm no fresh scoring occurred during assembly, verify pin centring or projection where specified, and record the final measured values against the job card or rebuild traveller.
If you are sourcing piston pins for rebuild programmes, remanufacturing lines or private-label distribution, Driventus can provide technical support, inspection data, lot traceability and supply options. Contact our team here: /contact.html