Oil cooler replacement is a controlled service operation, not a simple drain-and-refit job. For repair chains, fleet workshops, and distributors supplying installers, the largest risk is repeat failure caused by contamination, incorrect sealing, inadequate flushing, or a cooler that does not match the engine’s oil and coolant circuits. This guide explains oil cooler how to replace procedures in a B2B context, with practical checks for diagnosis, installation, post-repair validation, and aftermarket sourcing. It focuses on engine-mounted oil-to-coolant heat exchangers and remote oil-to-air coolers used in passenger cars, light commercial vehicles, and selected heavy-duty applications. Driventus manufactures engine and powertrain components in Taizhou, Zhejiang, under IATF 16949:2016 and ISO 9001:2015 systems. Driventus is an independent aftermarket manufacturer; brand names and OE references are used for fitment identification only.
Confirm the Failure Before Removal
A reliable oil cooler replacement starts with diagnosis. A leaking gasket, cracked cooler core, blocked coolant passage, distorted adapter plate, or damaged oil filter housing can produce similar symptoms. Replacing the cooler without confirming the failure mode may leave the original fault in place and transfer the complaint to the new unit.
Common indicators include:
Oil film in the coolant expansion tank
Coolant contamination in engine oil, often visible as emulsion on the dipstick or filler cap
External oil seepage around the cooler body, adapter plate, or filter housing
Rising oil temperature under load
Coolant loss without obvious hose, radiator, or water-pump leakage
Low oil pressure warning after prolonged hot operation
Oil or coolant residue around hose connections, sealing faces, or threaded fittings
Before removal, technicians should record the engine code, production year, cooler type, gasket arrangement, and any fault-code or temperature data available from the vehicle. For aftermarket distribution, fitment should be checked against application data and OE part-number cross-references where available. If a buyer supplies a partial reference such as OE 06A…, the supplier should confirm dimensional data, port orientation, mounting pattern, seal profile, and housing configuration before shipment.
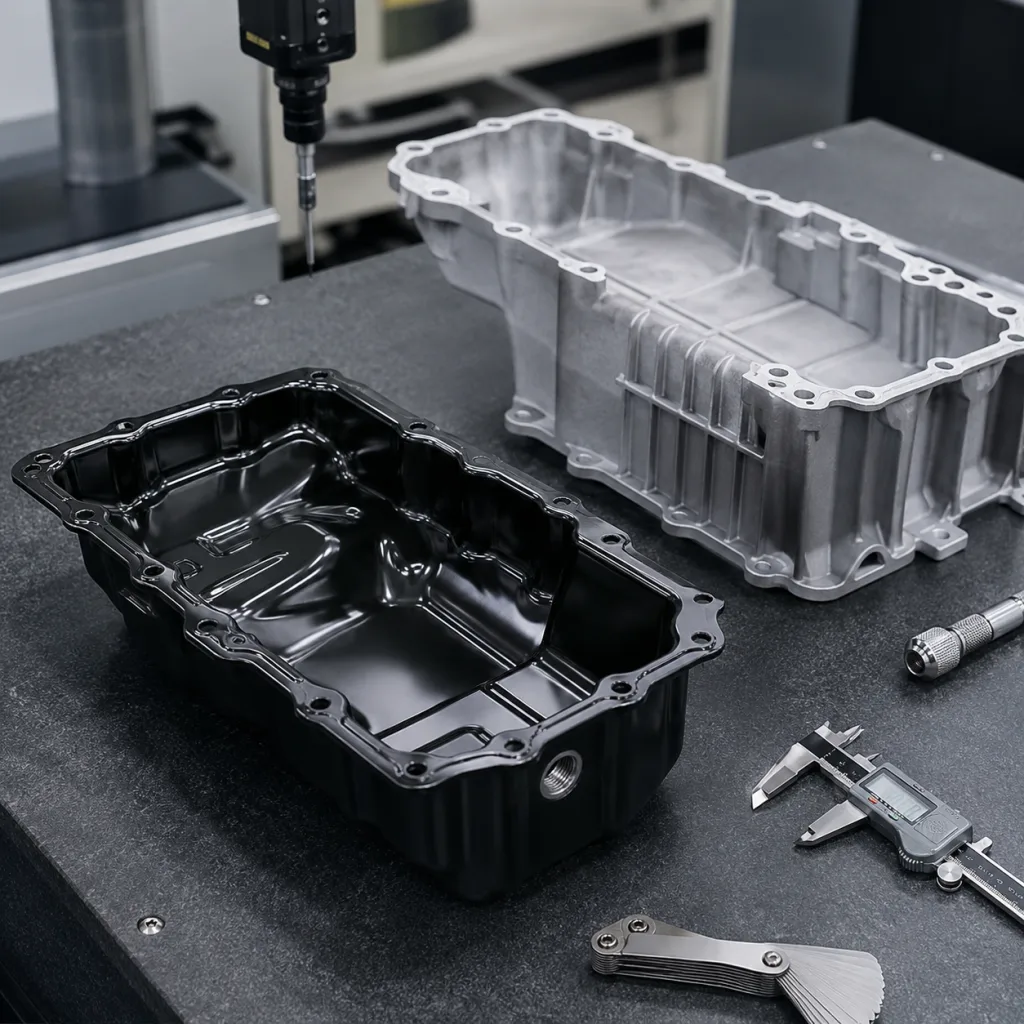
For B2B buyers, product listings should state whether the unit is supplied as a bare cooler, cooler with gasket set, cooler with housing, or complete module. These configurations affect labour time, installer expectations, warranty review, and inventory planning. Related oil coolers and adjacent engine components can be reviewed in our catalog.
Tools, Consumables, and Safety Controls
Workshops replacing oil coolers across multiple sites should standardise tools, consumables, and documentation. Consistent preparation reduces installation variance, supports technician training, and makes warranty cases easier to evaluate.
Item
Purpose
Procurement note
Torque wrench
Controlled tightening of cooler, housing, and line fasteners
Use vehicle service specifications, not estimated hand force
Drain pans
Separate recovery of engine oil and coolant
Prevent cross-contamination during inspection
Cooling system pressure tester
Leak check before and after repair
Helps identify non-cooler leaks before parts are blamed
Oil pressure gauge or scan data access
Verification after start-up
Useful where dashboard warnings do not provide enough detail
Correct gasket set
Sealing between cooler, housing, adapter, and block
Do not reuse compressed elastomer seals
Approved coolant and engine oil
Refill after repair and flushing
Match vehicle specification, climate, and local regulations
Flush agent or approved cleaning procedure
Removal of oil residue from coolant circuit
Essential after internal cooler rupture
Caps and plugs
Temporary protection of open oil and coolant ports
Limits debris entry during removal and inspection
</tr></thead><tbody> </tbody></table>Personal protection is required because hot oil and coolant can cause burns. Workshops should allow sufficient cool-down time, depressurise the cooling system before opening the circuit, and keep oil-contaminated coolant separate from ordinary waste streams. Waste oil, coolant, used filters, and cleaning fluids must be handled in line with local environmental rules. For parts supplied into the EU market, material compliance discussions may include REACH (EC) No 1907/2006 for restricted substances in articles and packaging.
Replacement Procedure for Engine-Mounted Coolers
The following workflow is general guidance. Always follow the vehicle manufacturer’s service information for torque values, tightening sequence, gasket position, oil grade, coolant specification, and refill method. Driventus does not claim approval or endorsement by any vehicle manufacturer.
1. Prepare the vehicle. Park on a level surface, isolate the ignition, and allow the engine to cool. Remove covers, undertrays, or splash shields as required for access. 2. Drain fluids separately. Drain engine oil and coolant into separate containers. If contamination is present, retain labelled samples for warranty documentation. 3. Remove adjacent components. Remove the oil filter, coolant hoses, intake ducting, brackets, heat shields, or lines blocking access. Cap open oil and coolant ports to limit debris entry. 4. Disconnect the cooler. Loosen fasteners in a controlled sequence. Avoid prying against machined aluminium faces because small scratches can become sealing paths. 5. Inspect the mounting face. Check for corrosion, old gasket residue, thread damage, distortion, and pitting around oil or coolant ports. Clean only with methods that do not gouge the sealing surface. 6. Compare the replacement part. Verify port location, plate stack height, bypass arrangement, hose connection diameter, fastener pattern, gasket geometry, and sensor or bracket provisions before installation. 7. Install new seals. Use new gaskets or O-rings. Light lubrication may be required for some seals, but sealants should not be used unless specified by service data. 8. Fit and torque. Seat the cooler squarely and tighten fasteners in the specified sequence to the specified torque. Uneven compression is a common cause of early leakage. 9. Reconnect lines and hoses. Replace hardened hose clips, swollen hoses, or damaged quick connectors. Confirm no hose is twisted, kinked, rubbing on sharp edges, or contacting exhaust parts. 10. Refill and bleed. Refill with specified oil and coolant. Bleed the cooling system using the prescribed method, especially on engines with high-mounted heater cores, electric pumps, or complex thermostat housings.
This procedure is the practical core of oil cooler how to replace work. A durable repair usually depends less on the physical installation time and more on preparation, surface condition, contamination control, and final verification.
Flushing and Contamination Control
Internal oil cooler failure can mix oil and coolant in either direction. If contamination remains after the new part is installed, residue can attack hoses, restrict radiator passages, reduce heat transfer, damage bearings, or trigger customer complaints even when the cooler itself is correct.
Coolant circuit cleaning
When engine oil enters the coolant circuit, the expansion tank, radiator, heater core, thermostat housing, coolant pump area, and rubber hoses may retain residue. A controlled flush should continue until visible oil film is removed and coolant flow is clear. Some workshops replace the expansion tank or affected hoses where deposits cannot be cleaned reliably, especially when rubber components have softened or swollen.
Lubrication circuit checks
If coolant has entered the oil circuit, the risk is more severe. Main and rod bearings, turbocharger bushings, hydraulic lifters, variable valve timing components, and timing-chain assemblies may be affected by diluted lubrication. After repair, workshops should consider a short-interval oil and filter change. For turbocharged engines, inspect oil feed and return lines for restriction, sludge, or evidence of coolant residue.
Documentation for dispute reduction
A supplier cannot validate field flushing after the part leaves the warehouse, but a B2B buyer can reduce disputes by including installation guidance in packaging, service bulletins, or installer portals. Useful documentation includes contamination photos, required fluid replacement notes, torque reminders, and guidance on when to replace related hoses or housings. Driventus can support private-label documentation and application-specific packaging through custom manufacturing, subject to drawing review and commercial scope.
Post-Installation Checks and Acceptance Criteria
Replacement is not complete until the repair passes functional checks. Clear acceptance criteria help multi-location repair chains standardise quality, reduce comebacks, and separate installation issues from product issues.
Recommended verification list:
Pressure-test the cooling system and confirm stable pressure with no external leakage.
Start the engine and inspect the cooler perimeter, hose joints, oil filter interface, and adapter plate.
Confirm oil pressure reaches the normal range within the expected start-up period.
Bring the engine to operating temperature and verify thermostat opening, fan operation, and stable temperature control.
Confirm coolant bleed completion: no gurgling, no sudden level drop, no trapped-air symptoms, and stable heater output.
Road test or load test where required, then recheck oil and coolant levels after cool-down.
Inspect coolant for renewed oil film and engine oil for renewed emulsion.
Record part batch, installation mileage, fluid type, technician ID, and retained sample status for traceability.
For product validation at the manufacturing level, oil coolers are typically assessed for leak tightness, burst resistance, thermal cycling, cleanliness, pressure-drop characteristics, brazing integrity, and dimensional conformity. Driventus operates under IATF 16949:2016 and ISO 9001:2015, with process control, incoming inspection, in-process checks, and final inspection integrated into the quality system. Exact test parameters depend on cooler design, customer specification, operating pressure, and the target application.
Sourcing Notes for Distributors and Repair Chains
For procurement teams, the replacement procedure directly affects product specification. A cooler that looks correct but differs in plate stack height, gasket compression, port machining, internal flow path, or housing depth can cause pressure drop, leakage, delayed warm-up, or temperature complaints.
When sourcing oil coolers, request the following data from suppliers:
Application list with engine codes, model years, and relevant production breaks
OE cross-reference format where applicable, such as OE 11251… when provided by the buyer
Overall dimensions, port diameter, mounting hole spacing, plate stack height, and gasket profile
Material description for aluminium core, brazing, housing, and elastomer seals
Leak test method, test pressure, and acceptance criteria
Cleanliness control process for oil-side passages
Packaging method that protects sealing faces, ports, threads, and sensor openings during export transport
Batch traceability, warranty evidence requirements, and sample-retention expectations
Availability of gasket kits, housings, or complete modules for different service channels
Supplier review should also cover how technical changes are controlled. For high-volume programmes, buyers may request drawings, first-article samples, dimensional reports, packaging drop-test information, and agreed labelling formats. This is especially important where the same vehicle platform uses multiple cooler variants across engine codes or emissions stages.
Driventus exports engine and powertrain components to more than 60 countries and supplies B2B customers including aftermarket distributors, OEM and Tier-1 programmes, and multi-location repair chains. For oil cooler programmes, buyers can request drawing review, sample inspection, packaging specification, and documentation aligned with their market. To discuss applications, quantities, and validation requirements, use request a quote.
Frequently asked questions
Yes in most failure cases. If the cooler leaked internally, both circuits may be contaminated. Replace engine oil, oil filter, and coolant, then flush the affected circuit until residue is removed. Some engines may also require a follow-up oil and filter change after short operation.
Only if diagnosis confirms the cooler core is intact and the fault is limited to the seal. Pressure testing, visual inspection, and contamination checks should be completed first. If oil and coolant have mixed, the cooler itself should be treated as suspect.
Buyers should verify application fitment, port layout, gasket geometry, mounting dimensions, material specification, leak test controls, cleanliness requirements, packaging protection, and traceability. Certification to IATF 16949:2016 and ISO 9001:2015 supports process discipline but does not replace part-level validation.
If you are standardising oil cooler supply for distribution or repair networks, Driventus can review drawings, samples, packaging requirements, and validation expectations. Contact our team at /contact.html