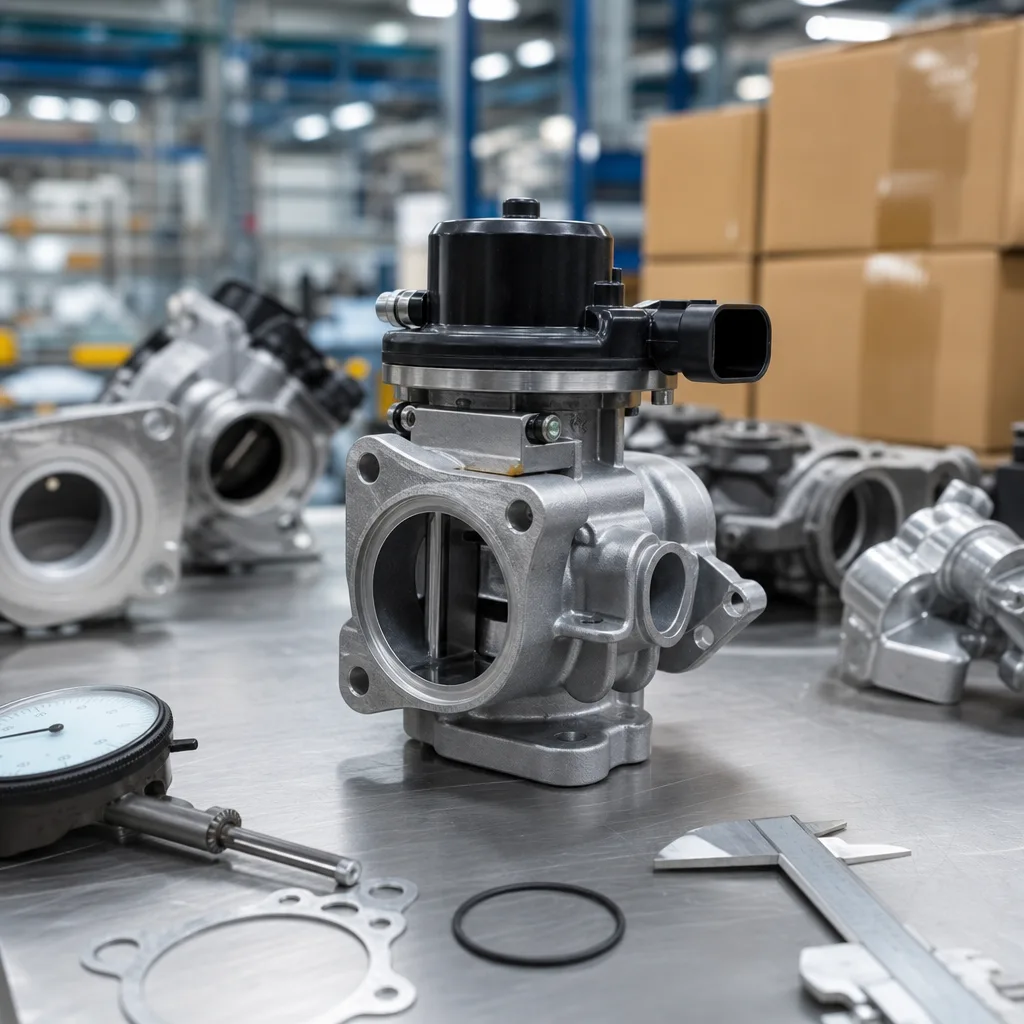
Replacing an engine valve is a controlled cylinder-head repair, not a simple parts swap. Before any new part is fitted, the fault has to be traced to the right area: the valve head, seat insert, guide bore, spring load, stem seal, cam timing, lash or preload, or cylinder-head flatness. A reliable repair depends on dimensional match, clean handling, measured guide clearance, accurate seat geometry, torque-angle control, and validation after the engine is closed. Driventus is an independent aftermarket manufacturer; brand names are referenced for fitment only. For procurement teams and workshop buyers, the question is not just whether the valve fits. It must seal under compression, transfer heat through the seat, resist stem and tip wear, and remain stable across the intended service interval. The steps below cover diagnosis, inspection, removal, installation, and post-build checks for passenger car, light commercial, and selected industrial engines. Where quality records matter, align the part and process with IATF 16949:2016 and ISO 9001:2015 controls, and confirm material declarations where REACH (EC) No 1907/2006 applies.
When replacement is justified
A valve should be replaced when the damage affects sealing, geometry, heat transfer, or stem control. Low compression alone does not prove a valve fault, so check the full combustion path first: piston rings, head gasket sealing, cam timing, hydraulic lash adjuster operation, valve spring load, and valve seat condition.
Common replacement triggers include:
Burned, pitted, cracked, or eroded valve face, especially on the exhaust side
Bent stem after timing belt, timing chain, over-rev, or piston contact damage
Stem wear, taper, scoring, chrome loss, or nitrided-layer damage beyond the engine maker's guide-clearance limit
Margin loss, head cracking, tuliping, seat recession, or abnormal valve tip wear
Uneven leakage on a cylinder leak-down test, vacuum test, or solvent retention test
Carbon deposits that cannot be removed without damaging the seating face or stem surface
Evidence of overheating, such as blue/grey discoloration, seat insert movement, guide pickup, or seizure marks
Before ordering parts, determine whether the failed valve caused the problem or was damaged by something else. A lean mixture, restricted injector, incorrect ignition timing, excessive exhaust backpressure, poor coolant flow, wrong valve lash, or incorrect hydraulic follower preload can burn a new valve quickly. On engines with variable valve timing, cylinder deactivation, or hydraulic lash adjusters, confirm that the valvetrain is not holding the valve off the seat.
If the engine has overheated, inspect the guide, seat insert, and cylinder-head surface together. A new valve installed into a worn guide or distorted seat will not center properly, will leak during compression, and may overheat because heat cannot move cleanly from the valve face into the seat. For catalog selection, start with our catalog and match the application by engine code, stem diameter, head diameter, overall length, keeper groove design, valve tip type, and face angle. For deeper component families, engine components can help your sourcing team separate valves, guides, springs, seals, retainers, collets, tappets, and related valvetrain parts before purchase.
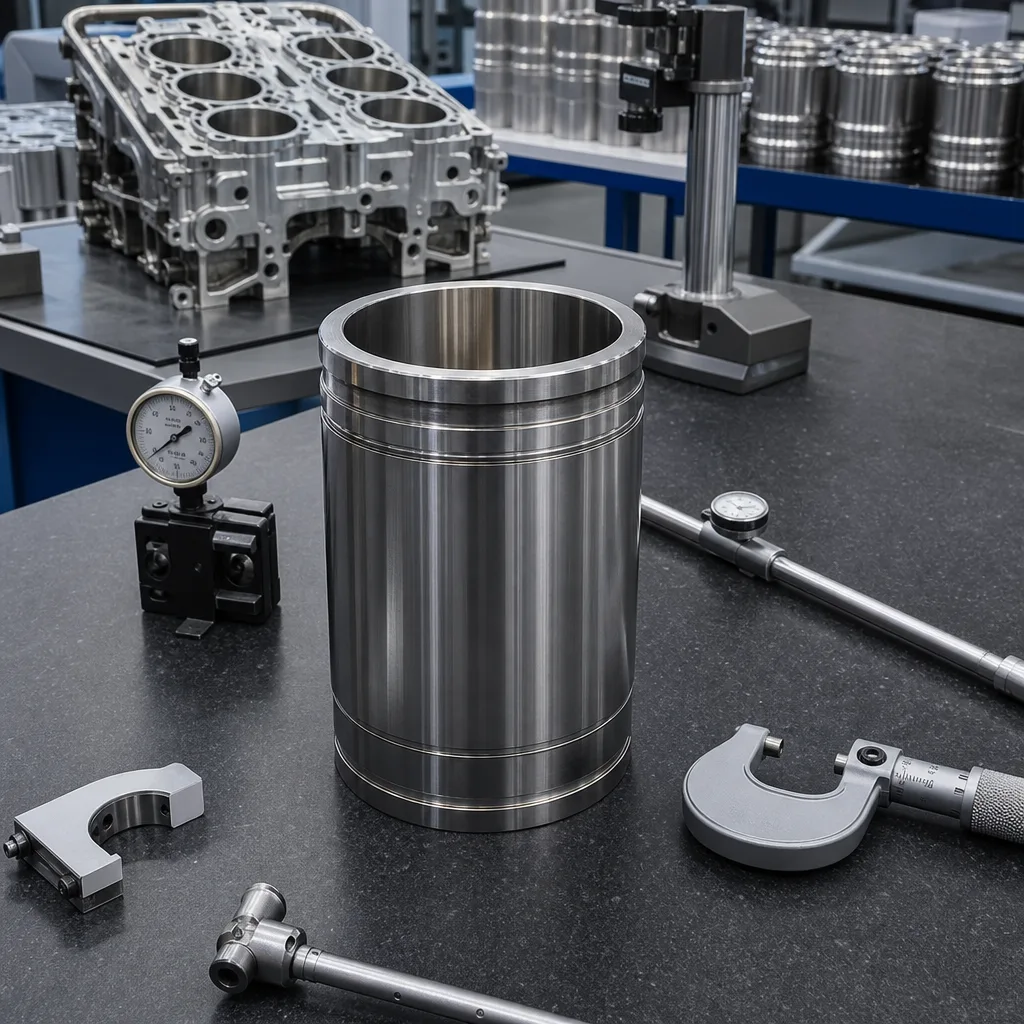
Tools and measurements to verify
Measure before final disassembly decisions are made. Many repeat valve jobs start with a correct replacement valve installed into a guide, seat, spring, or cylinder head that was already outside specification.
Check
Typical tool
What to confirm
Stem diameter
0-25 mm micrometer
Wear, taper, scoring, and ovality along the stem at several heights
Guide bore
Small-bore gauge, dial bore gauge, or ball gauge and micrometer
Face damage, margin thickness, tuliping, and correct face angle, commonly 30 degrees or 45 degrees depending on design
Seat contact
Prussian blue, vacuum tester, seat runout gauge, or optical inspection
Full contact band, contact width, concentricity, and no ridge wear
Valve runout
V-blocks and dial indicator
Bent stem or head distortion before reuse decisions; many service limits are in the 0.03-0.05 mm range, but use the engine specification
Spring load
Valve spring tester
Free length, installed height, seat pressure, open pressure, and spring fatigue
Head flatness
Precision straightedge and feeler gauge
Warpage after overheating or gasket failure
Leak integrity
Leak-down, vacuum, or solvent test
Seal quality after seat work and assembly
</tr></thead><tbody> </tbody></table>Record measurements by cylinder and position. Intake and exhaust valves often differ in material, head shape, stem length, tip hardening, and face treatment, so they should not be mixed during inspection or procurement. Sodium-filled, hollow-stem, bimetallic, austenitic stainless, martensitic, nitrided, hard-chromed, stellite-faced, or coated valves must be identified before cleaning, machining, or replacement because the service method may differ.
Replace the valve if the stem is scuffed, bent, cracked, or worn beyond specification, if the face is warped or burned, or if the keeper groove shows deformation. Replace the stem seal whenever it is removed. If guide clearance is outside specification, a new valve by itself will not correct oil consumption, poor sealing, or unstable seating. Typical light-vehicle clearances are often around 0.02-0.06 mm on intake valves and 0.04-0.09 mm on exhaust valves, but turbocharged, industrial, air-cooled, and heavy-duty engines may require different limits. If the spring is below load specification at installed height, replace the spring pair on that cylinder or follow the engine maker's matched-set recommendation so the valvetrain remains balanced.
Removal and installation sequence
Practical sequence
1. Disconnect the battery, drain fluids if required, and remove the cylinder head only if the engine design requires it for access. 2. Set the engine at the specified timing reference and mark cam, chain, belt, rocker, follower, bucket, and shim positions before disassembly. 3. Label all components by cylinder and position so intake and exhaust parts, springs, retainers, keepers/collets, tappets, buckets, and shims are not mixed. 4. Compress the valve spring with the correct tool and remove the keepers, retainer, spring, spring seat, and stem seal without scratching the stem or guide bore. 5. Remove the valve and inspect the face, stem, keeper groove, guide, retainer, spring pocket, and seat insert before fitting the replacement valve. 6. Clean the port, chamber, seat area, and guide with approved tools only. Avoid abrasive residue that can remain in the guide and damage the replacement stem. 7. Measure the replacement valve against the removed part and specification, including stem diameter, head diameter, overall length, margin, keeper groove, tip configuration, and face angle. 8. Check guide clearance, valve protrusion or recession where specified, and seat contact before final assembly. Machine or replace the seat/guide if measurement is outside specification. 9. Lubricate the stem lightly with clean engine oil or assembly lubricant unless the OEM procedure specifies a dry assembly point. 10. Fit the new stem seal using the correct driver, then install the valve, spring seat, spring, retainer, and keepers in the correct order. 11. Tap the retainer lightly with an approved tool after spring release to confirm the keepers are seated, then verify free valve movement. 12. Verify installed height, spring seat load, coil-bind clearance, retainer-to-seal clearance, valve tip height, and rocker/follower contact pattern before the head is closed. 13. Refit the head with the specified gasket, new torque-to-yield fasteners where required, and the correct torque-plus-angle sequence. 14. Restore cam timing, timing chain or belt tension, valve lash, shim thickness, or hydraulic follower preload according to the engine procedure.
Cleanliness matters throughout the job. Keep abrasive paste, blasting media, gasket debris, and metal chips away from the guide, seat, oil galleries, cam journals, and hydraulic components. Do not lap a coated valve or any valve/seat combination where the OEM procedure forbids it. If the seat needs machining, cut the primary seat and correction angles to the correct width and location instead of trying to make a worn face seal by force. Many modern heads use a three-angle or multi-angle seat, with a controlled contact band centered on the valve face. The final band must be concentric, wide enough for heat transfer, and narrow enough to maintain sealing pressure; for many passenger-car applications this is commonly about 1.0-1.5 mm on intake valves and 1.5-2.0 mm on exhaust valves, subject to the service manual.
Post-assembly validation
After assembly, check the engine as a complete system rather than treating the new valve as the whole repair. A valve can be dimensionally correct and still fail if cam timing, lash, lubrication, cooling, fuel delivery, detonation control, or exhaust flow is wrong.
Recommended validation steps include:
Rotate the engine by hand through at least two full crankshaft revolutions and confirm there is no piston-to-valve contact.
Perform a compression test, cylinder leak-down test, vacuum test, or solvent check before first start if access allows.
Confirm cold cranking speed, oil pressure rise, and fuel pressure are normal before extended running.
Check idle quality, misfire counters, short-term fuel trim, long-term fuel trim, manifold vacuum, and exhaust oxygen sensor behavior after warm-up.
Listen for valvetrain noise that could indicate incorrect lash, collapsed hydraulic followers, retainer contact, coil bind, or spring problems.
Inspect for intake air leaks, coolant leaks, exhaust leaks, oil feed issues, and valve cover seepage.
Recheck lash, shim selection, or hydraulic follower operation after the first heat cycle if the engine design requires it.
Confirm cooling fan operation, thermostat behavior, radiator flow, and coolant circulation on engines that previously overheated.
A successful repair should show stable compression across the cylinder bank, no repeat leakage through the intake or exhaust port, and no abnormal temperature pattern around the affected cylinder. A typical acceptance target is compression variation within about 10 percent across comparable cylinders, while leak-down results depend on engine design, test pressure, and mileage. On turbocharged, LPG/CNG, high-compression, or high-load engines, also confirm boost control, air-fuel correction, knock activity, and exhaust backpressure because excess exhaust temperature can shorten exhaust-valve life.
If the repair sits inside an emissions-critical application, the final calibration and compliance path must remain within the vehicle programme requirements. In applicable markets, that means attention to ECE R-83 as well as local inspection rules. For surrounding assemblies, some corrosion validation plans reference SAE J2527, especially where exhaust proximity or under-hood exposure matters. The valve itself must survive heat, maintain sealing, and remain compatible with the full combustion and emissions system, not just pass initial fitment.
Sourcing and documentation for B2B buyers
Procurement teams should treat engine valves as controlled technical parts, not generic hardware. A strong supply package includes dimensional data, material disclosure, process control, lot traceability, and packaging that protects the stem, tip, keeper groove, and sealing face during transport and warehouse handling.
Key purchasing and quality records include:
Material and heat-treatment records aligned with IATF 16949:2016 and ISO 9001:2015 controls
REACH (EC) No 1907/2006 declarations where required for EU supply
Dimensional reports for stem diameter, head diameter, overall length, valve tip height, keeper groove, margin, face angle, and head concentricity
Surface finish and coating information for the stem, face, tip, or head where applicable, including nitriding, hard chrome, stellite facing, or tip hardening
Lot traceability, inspection status, batch code, and clear carton labelling for warehouse intake
Fitment references tied to engine family, engine code, OE cross-reference, and technical dimensions, not only to a consumer-facing brand claim
Packaging specifications that prevent stem bending, face impact, mixed-part errors, humidity exposure, and corrosion during storage
For volume programmes, clarify whether the requirement is a direct aftermarket replacement, a private-label supply package, or an engineered variant. Changes to stem length, head diameter, keeper groove geometry, tip hardening, material grade, coating, or seat-face alloy can affect guide clearance, installed height, spring load, installed tip height, and seat compatibility. Sample approval should therefore include drawing review, dimensional inspection, seat contact verification, material confirmation, surface/coating review, and packaging drop/handling review before production release.
For validated supply, review the quality system before placing volume orders. If your programme needs revised stem lengths, head geometry, coating changes, material upgrades, or private-label packaging, custom manufacturing is the right path. That is also where your team can align drawing control, PPAP-style sample approval where required, production release, carton marking, and ongoing lot traceability before scale-up. For a current technical quote, use request a quote.
Frequently asked questions
Yes, if the damage is isolated and the seat, guide, spring, retainer, keepers, seal, and related valvetrain parts still measure within specification. In practice, overheated, high-mileage, or timing-damaged engines often need matched inspection of the full valve set on that cylinder or cylinder head.
Not always. Follow the OEM procedure and the valve supplier's guidance. Some coated, nitrided, stellite-faced, hard-seat, or precision-machined assemblies should not be lapped. The correct contact pattern is verified by seat width, concentricity, contact location, and leak testing, not by habit.
Confirm stem diameter, head diameter, overall length, face angle, keeper groove design, valve tip configuration, material grade, coating, seat compatibility, and engine code. For B2B supply, also ask for traceability, inspection records, material declarations, and packaging that protects the stem and sealing face.
For fitment data, drawing control, or volume supply, use [request a quote](/contact.html).