Valve cover oil leaks are among the most common upper-engine sealing problems seen by aftermarket repair networks, fleet workshops, and parts distributors. The impact extends beyond a simple gasket replacement: repeat leaks can create warranty claims, bay rework, parts write-offs, customer downtime, smoke complaints, and ignition misfire returns. Accurate diagnosis separates a worn gasket from connected faults such as crankcase overpressure, a distorted cover, damaged bolt seals, blocked breathers, or incorrect RTV use. This guide explains valve cover oil leak causes and fixes through a practical symptom-to-inspection workflow for technical buyers, sourcing engineers, and service program managers. It also outlines what to verify when specifying valve cover gaskets, spark plug well seals, bolt grommets, integrated PCV covers, and complete engine sealing kits. Driventus is an independent aftermarket manufacturer; brand names and OE references are used for fitment identification only.
Typical Symptoms and Failure Locations
Valve cover leaks normally start at the joint between the valve cover and cylinder head, then spread downward with gravity, fan airflow, and road movement. This can make the source look like a camshaft seal, timing cover, turbo oil feed line, oil filter housing, or even a rear main seal. Before replacing parts, technicians should clean the engine, run a controlled idle or road test, and inspect the highest fresh oil trace first.
Common indicators include:
Oil film along the valve cover-to-cylinder head joint
Oil dripping onto the exhaust manifold, often causing burning odour or smoke
Oil pooled in spark plug wells on coil-on-plug engines
Misfire codes from oil-soaked ignition coils, plug boots, or connectors
Wet residue around breather ports, PCV diaphragms, oil separators, or hose connections
Dust collecting on damp gasket edges after road use
Oil smell inside the cabin after idling or low-speed driving
An upper-engine oil trace does not automatically prove that the perimeter gasket has failed. If oil appears at the rear corner of the cylinder head, the source may be a filler cap seal, breather hose, PCV housing, or oil separator above the apparent leak point. For procurement teams managing gasket lines, this distinction is important because unnecessary gasket replacement increases claim rates and hides the real root cause.
Main Causes of Valve Cover Oil Leaks
The most common cause is gasket compression set after long exposure to heat, oil additives, fuel vapour, blow-by gases, and repeated temperature cycling. As the rubber or elastomer loses elasticity, the sealing bead can flatten, harden, crack, or stop following small movements between the cover and cylinder head.
Cause
Inspection sign
Corrective action
Hardened gasket
Flat sealing bead, cracks at corners, brittle rubber
Replace gasket and clean mating surfaces
Crankcase overpressure
Oil pushed from multiple seals, whistling PCV, unstable idle
Test PCV valve, oil separator, breather hoses, and crankcase vacuum
Warped plastic cover
Leak returns after gasket replacement, uneven bead contact
Measure cover flatness and replace cover if outside service limit
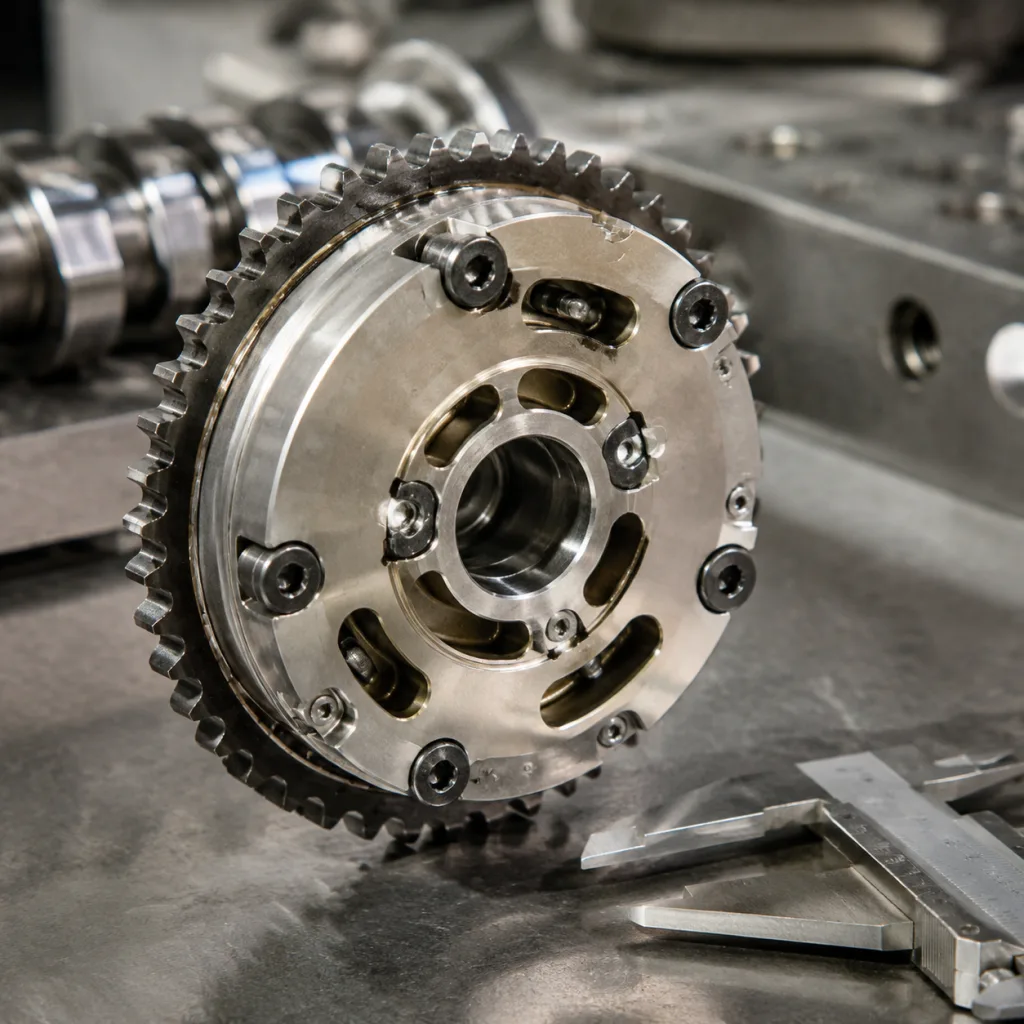
Damaged bolt grommets
Oil around fastener heads or washer seals
Replace grommets, sleeves, or fastener seals as specified
Replace the diaphragm or complete cover assembly depending on design
</tr></thead><tbody> </tbody></table>Plastic valve covers need extra attention because many late-model units integrate PCV channels, oil separators, pressure-control diaphragms, and breather fittings. A split diaphragm or blocked passage can raise crankcase pressure and force oil past an otherwise serviceable gasket. In those applications, replacing only the perimeter gasket may not solve the complaint.
For buyers sourcing replacement programs, review application coverage in our catalog and confirm whether the part family requires a gasket-only kit, a gasket with bolt seals, spark plug well seals, or a complete cover assembly.
Diagnostic Workflow Before Replacement
A consistent inspection process reduces repeat repairs, improves warranty analysis, and helps multi-location service networks separate part defects from installation or engine-system faults. The same workflow should be reflected in technician training, service bulletins, and claim review forms.
Recommended diagnostic sequence:
1. Confirm the customer complaint and record mileage, engine code, operating conditions, and previous repairs. 2. Check oil level and verify that the engine has not been overfilled. 3. Clean the suspected leak area with an approved degreaser and dry the surface. 4. Inspect the oil filler cap, breather hoses, PCV valve, oil separator, vacuum lines, and turbo oil lines where fitted. 5. Run the engine until normal operating temperature is reached. 6. Inspect the valve cover perimeter, bolt seals, spark plug wells, front timing-cover corners, and rear cylinder-head corners. 7. Use UV dye only when visual confirmation remains uncertain after cleaning and retesting. 8. Measure crankcase vacuum or pressure if oil appears at multiple sealing points. 9. Remove the cover and inspect gasket compression, hardening, swelling, tears, and corner damage. 10. Check the mating surface for scratches, corrosion, old sealant, nicks, or distortion before installing new parts.
Technicians should avoid aggressive scrapers or rotary abrasive tools on aluminium cylinder heads because they can cut the sealing face and create a permanent leak path. Plastic covers should be checked for flatness around bolt bosses, breather chambers, and hot zones near the exhaust side. A cover that no longer clamps evenly can leak again even with a correctly installed gasket.
Repair urgency increases when exhaust components sit close to the valve cover. Oil contacting a hot manifold can create smoke, odour, customer safety concerns, and in severe cases a fire risk. ECE R-83 emissions-related durability requirements and OBD expectations also make oil vapour control and misfire prevention relevant for fleets and inspection-sensitive markets, although a replacement gasket itself is not a type-approved emissions device.
Replacement Parts and Material Specifications
Replacement selection should be based on validated fitment, material stability, sealing geometry, and production control rather than unit price alone. A gasket can look correct on the bench, install without difficulty, and still fail after heat cycling if compression-set resistance, hardness, or bead dimensions are not controlled.
Key specification points for valve cover gasket programs:
Material options: FKM for higher heat and oil resistance; ACM or NBR for selected lower-temperature applications where validated by application testing
Hardness control: Shore A range defined by drawing, material compound, and production batch
Dimensional checks: sealing bead height, corner radius, bolt-hole position, plug-well seal diameter, and groove fit
Compression behaviour: controlled bead deformation under the specified bolt load without tearing or excessive squeeze-out
Oil compatibility: resistance to engine oil, fuel vapour, blow-by condensate, crankcase acids, and common cleaning fluids
Assembly content: clear confirmation of whether the kit includes perimeter gasket, plug-well seals, bolt grommets, sleeves, or half-moon seals
Packaging: deformation-free packing for sea freight, long-distance export, and warehouse storage
Traceability: batch coding by production date, cavity, material lot, inspection record, and retained sample where required
Driventus produces engine sealing components under IATF 16949:2016 and ISO 9001:2015 controls. Material compliance programs should also consider REACH (EC) No 1907/2006 for EU importers, plus customer-specific restricted-substance lists where applicable. Our quality system covers incoming material inspection, in-process dimensional control, final sampling, nonconforming product handling, and corrective action tracking.
For OE part-number cross-references, procurement teams should provide the target reference in generic form where applicable, such as OE 06A107065 or OE 11251…, together with engine code, model year range, vehicle platform, and destination market. Driventus does not claim approval or endorsement by any vehicle manufacturer.
Fixes That Reduce Repeat Leakage
A durable repair depends on the replacement part, the condition of the surrounding engine system, and the installation method. The best valve cover oil leak causes and fixes programs therefore combine service controls with sourcing controls, so technicians receive the right kit and buyers can interpret return patterns accurately.
Installation controls
Replace the perimeter gasket, spark plug well seals, bolt grommets, and fastener sleeves as a matched set where the application requires them.
Apply RTV only at specified half-moon joints, timing cover corners, cam cap transitions, or factory-designated points.
Seat the gasket fully in the cover groove before installation, especially at corners and plug-well openings.
Tighten bolts in the specified sequence, commonly from the centre outward when required by the service procedure.
Use a calibrated torque wrench; small fasteners are easy to over-tighten and plastic covers can distort.
Allow sealant cure time where the service procedure requires it before oil exposure or road testing.
Recheck breather hoses, PCV function, and crankcase pressure before releasing the vehicle.
Procurement controls
For distributors and repair chains, leakage complaints should be tracked by application, installer, mileage after repair, engine condition, and returned-part appearance. Returned gaskets with uneven crush, torn corners, displaced beads, or heavy sealant contamination often point to installation problems or cover distortion. Returns showing consistent bead hardening, swelling, or dimensional drift across multiple batches require supplier corrective action.
Driventus supports custom manufacturing for engine sealing programs where buyers need private-label packaging, application consolidation, drawing review, or modified kits for regional vehicle populations. Supply options can include gasket-only items, gasket and grommet kits, plug-well seal sets, complete valve cover assemblies, or broader engine component assortments linked to /products/engine-components.html.
Sourcing Checklist for Importers and Repair Networks
When selecting a supplier for valve cover gasket and cover assembly programs, request evidence that the factory can maintain consistency across production batches, not just provide an attractive sample. Long-term performance depends on material control, tooling condition, dimensional repeatability, packaging, and claim response.
Recommended sourcing checklist:
Confirm the supplier’s IATF 16949:2016 and ISO 9001:2015 certification scope for engine sealing or related rubber components.
Request material data, hardness range, compound family, and ageing test summary for the target gasket family.
Verify dimensional inspection points against the drawing, approved sample, or agreed control plan.
Review export packaging for carton strength, inner bags, anti-deformation support, labelling, and pallet configuration.
Ask for batch traceability format, production record retention, and retained sample policy.
Confirm MOQ, lead time, private-label options, forecast handling, and warranty claim process.
Provide OE cross-reference, engine code, VIN sample where permitted, market destination, and expected annual volume.
Clarify whether kits must include bolt grommets, spark plug well seals, sleeves, or installation notes.
For North America, Europe, the UK, Australia, and Brazil, buyers should also check labelling, customs documentation, restricted-substance declarations, and any customer-specific packaging rules before shipment. These controls reduce border delays, improve distributor onboarding, and help repair networks standardise installation quality.
A structured approach to valve cover oil leak causes and fixes helps separate supplier quality issues from installation errors and engine-system faults. It also gives category buyers a practical basis for supplier audits, warranty analysis, kit specification, and long-term aftermarket program planning.
Frequently asked questions
Yes. Immediate leakage is usually linked to contaminated mating surfaces, incorrect torque, a warped cover, a misplaced gasket, damaged bolt grommets, missing plug-well seals, or excessive RTV. Crankcase overpressure from a blocked PCV system can also force oil past a new seal.
Use a gasket-only repair when the cover is flat, undamaged, and has no integrated PCV or breather fault. Replace the complete cover if the plastic is warped, cracked, oil-soaked, or the built-in diaphragm, oil separator, or breather channel has failed.
Provide the target application list, OE cross-references such as OE 06A107065 or OE 11251…, engine codes, annual volume, kit contents, packaging requirements, destination market, and any material or testing requirements. Samples or drawings improve quotation accuracy.
For gasket kits, valve cover assemblies, or diagnostic-focused sealing programs, share your application list and volume forecast to [request a quote](/contact.html).