Valve cover gasket symptoms of failure often start with an oil smell after warm-up, visible seepage at the cover edge, misfire complaints, or contamination around ignition coils and spark plug tubes. For distributors, repair chains, and OEM service-channel buyers, these signs are more than workshop observations. They can influence warranty rates, part returns, customer downtime, technician confidence, and supplier qualification.
Although a valve cover gasket is a relatively low-cost engine component, it operates in a demanding sealing environment. It must withstand hot oil splash, crankcase vapour, repeated heat cycling, vibration, and gradual bolt-load relaxation while maintaining compression between surfaces that may age or distort over time. A poor compound match, weak bead geometry, or inconsistent moulding process can create leakage long before the expected service interval.
This guide explains the main valve cover gasket symptoms of failure, the mechanical causes behind them, practical inspection steps for service teams, and sourcing controls for replacement programmes. Driventus is an independent aftermarket manufacturer; brand names and OE references are used only for fitment identification.
Common Symptoms and What They Indicate
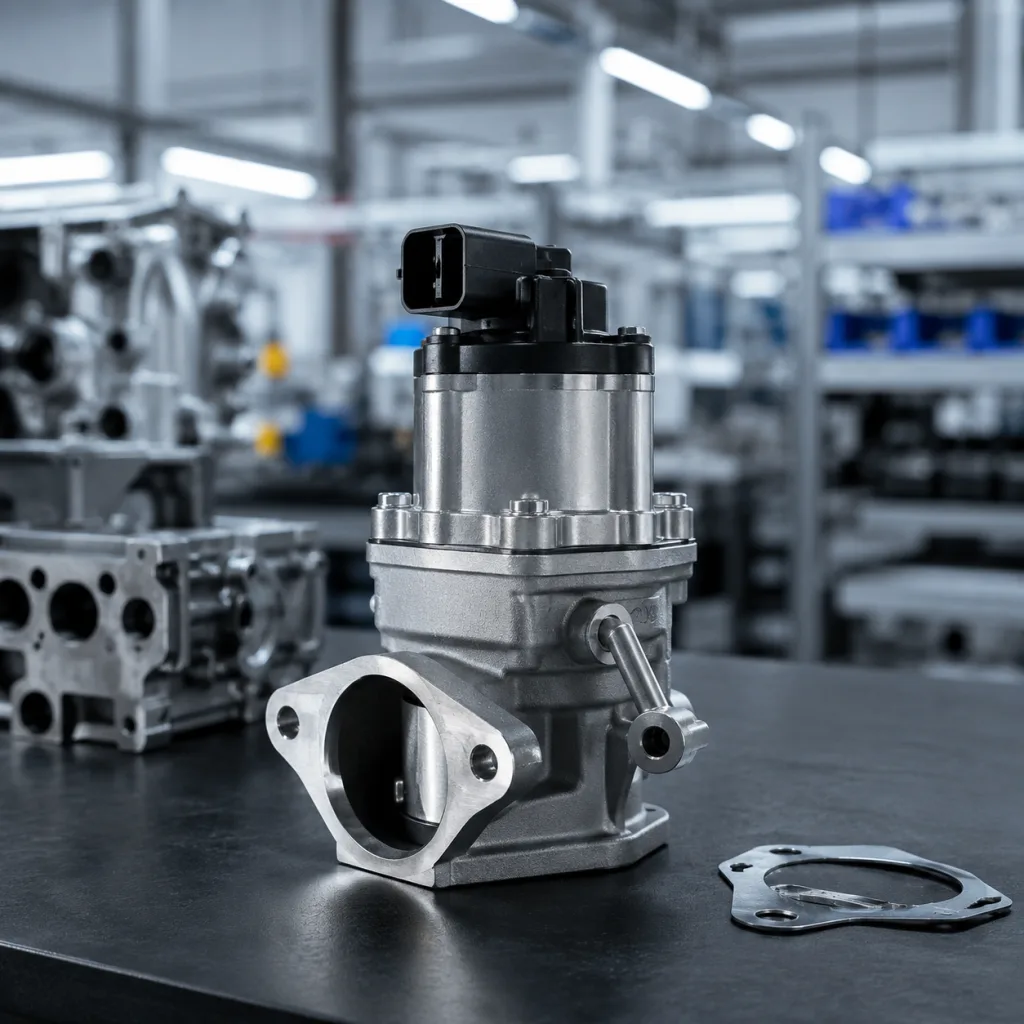
A valve cover gasket seals the joint between the cylinder head and valve cover. It must compensate for casting variation, cover movement, temperature cycling, oil exposure, and changes in clamp load. When sealing force drops or the elastomer loses recovery, leakage can appear externally along the perimeter or internally around spark plug tubes.
Check perimeter bead, bolt bosses, and cover flatness
Possible material, geometry, or application mismatch
Burning oil smell
Oil dripping onto exhaust manifold, heat shield, or hot engine surfaces
Inspect rear and exhaust-side edges after heat cycle
High customer complaint and comeback risk
Misfire or rough idle
Oil entering spark plug wells and contaminating coils, boots, or plugs
Remove coils and inspect plug tubes and inner seals
May drive false ignition-part warranty claims
Low oil level between services
Persistent external seepage or repeated oil loss under load
Clean engine, run heat cycle, and recheck leak path
Higher repeat-service and labour-claim exposure
Smoke from engine bay
Oil contacting hot exhaust-side components
Inspect immediately and confirm no active drip on hot surfaces
Urgent safety, fitment, and sealing review
Hardened or cracked gasket
Heat ageing, chemical attack, or unsuitable compound selection
Bend and surface-check removed gasket; inspect bead corners
Supplier material validation required
</tr></thead><tbody> </tbody></table>These observations should be recorded with engine code, mileage, oil grade, service history, installation date, torque method, and photographs where available. For multi-location repair chains, consistent evidence helps separate product nonconformity from installation practice, ageing covers, blocked PCV systems, or unrelated oil sources.
Failure Mechanisms Behind Oil Leaks
Most valve cover gasket oil leaks begin with a loss of elastic recovery. The gasket is compressed between the valve cover and cylinder head and must rebound as the joint expands, contracts, and vibrates. If the material takes excessive compression set, the sealing bead no longer maintains enough contact pressure to block oil migration.
Common technical causes include:
Heat ageing: Continuous operation near cylinder head temperatures accelerates hardening, cracking, shrinkage, and loss of flexibility.
Oil and additive exposure: Engine oil, fuel dilution, detergent additives, and crankcase vapours can swell, soften, or embrittle unsuitable rubber compounds.
Bolt-load variation: Over-tightening can crush the bead or distort the cover; under-tightening leaves low-pressure zones. Both conditions can create early seepage.
Cover distortion: Plastic valve covers may warp after long service life, and aluminium covers can show damaged rails or pulled threads. A new gasket cannot fully compensate for an uneven mating surface.
Poor moulding control: Flash, underfill, short moulding, uneven bead height, weak corner radii, or cavity imbalance can create local leak paths.
PCV system faults: Restricted crankcase ventilation can raise internal pressure and push oil past an otherwise acceptable gasket.
Surface contamination: Oil residue, old sealant, abrasive cleaning damage, or debris on the sealing rail can interrupt bead contact during installation.
For replacement programmes, the gasket should be evaluated as part of a sealing system rather than as an isolated rubber profile. A reliable supplier will review material hardness, bead geometry, compression set, tensile properties, oil resistance, heat-ageing performance, and fitment on representative covers.
Diagnostic Walkthrough for Repair Networks
A structured diagnostic process reduces unnecessary returns and improves claim evidence. It also helps importers and category buyers understand whether field reports point to part quality, installation practice, engine condition, or application data.
1. Confirm the leak source. Clean the valve cover, cylinder head joint, oil filler area, PCV connections, camshaft seals, timing cover area, and nearby hoses. Oil can migrate across the engine and mislead the diagnosis. 2. Run a controlled heat cycle. Bring the engine to operating temperature, allow cool-down, and inspect the gasket perimeter with suitable lighting. Some seepage appears only after expansion and contraction. 3. Inspect spark plug wells. Oil in plug tubes often points to inner gasket seals rather than the outer perimeter. Check coil boots and plug insulators for contamination. 4. Check crankcase ventilation. A blocked or malfunctioning PCV system can raise pressure and create repeat leakage after a correct gasket replacement. 5. Assess cover condition. Check for cracks, warped sealing rails, damaged bolt sleeves, pulled inserts, hardened grommets, and distorted plug-tube areas. 6. Review installation practice. Confirm correct torque sequence, clean mating surfaces, correct fastener hardware, and no use of excess sealant unless specified by the service procedure. 7. Compare application data. Verify engine code, production year, cover material, plug-tube design, and OE reference data before treating the case as a product defect.
Claim evidence checklist
For B2B warranty review, request photographs before removal, photographs after cleaning and heat cycle, installation mileage, oil type, torque method, application details, and removed-part images showing the suspected failed area. This information allows supplier quality teams to distinguish genuine product nonconformity from installation issues, cover distortion, crankcase-pressure problems, or misidentified leak sources.
Material and Design Factors to Specify
The correct gasket material depends on engine design, operating temperature, oil chemistry, cover construction, and expected service environment. Procurement teams should avoid selecting only by visual similarity. Small differences in bead height, Shore hardness, plug-tube geometry, or corner profile can change clamp load distribution and long-term sealing performance.
Typical specification points for valve cover gaskets include:
Material family: NBR, ACM, FKM, silicone, or application-specific rubber compound
Hardness range: commonly specified by Shore A according to project requirements
Compression set target: validated after heat ageing and oil exposure
Oil resistance: assessed for swelling, weight change, hardness change, and retained elasticity
Bead height and width: controlled by drawing, mould cavity inspection, and sample measurement
Dimensional inspection: perimeter length, bolt-hole position, plug-tube seal diameter, cover-interface profile, and corner radii
Surface quality: no cracks, underfill, excessive flash, contamination, or parting-line defects at the sealing bead
Packaging control: gasket retained without twisting, compression damage, permanent deformation, or ozone exposure
Traceability: material batch, mould cavity, production date, inspection record, and packaging lot where required
Driventus manages valve cover gasket production under IATF 16949:2016 and ISO 9001:2015 based processes, with incoming material control, mould maintenance, in-process inspection, and final sampling. Chemical compliance requests may include REACH (EC) No 1907/2006 documentation where applicable for EU market supply. Buyers can review related engine sealing items in our catalog and see process controls in our quality system.
Replacement Controls That Reduce Repeat Failures
Replacement quality depends on both part design and installation control. A gasket with suitable material properties can still fail if installed on a damaged cover, contaminated sealing rail, incorrect application, or engine with excessive crankcase pressure.
Service instructions should normally include:
Remove old gasket material, oil residue, and sealant traces without scratching aluminium or plastic sealing rails.
Replace related grommets, bolt seals, or plug-tube seals where supplied or required by the service procedure.
Apply sealant only at specified joint transitions, corners, or half-moon areas if the engine design requires it.
Tighten fasteners in the correct sequence and to the specified torque, using calibrated tools where possible.
Check PCV hoses, valves, and breathers when repeat leakage is reported.
Allow any specified sealant cure time before full operation.
Reinspect after warm-up for perimeter seepage, oil smell, plug-well contamination, or smoke near hot surfaces.
For buyers managing private-label or programme supply, kit content should match the service requirement for each application. This may include the perimeter gasket, spark plug tube seals, bolt grommets, half-moon seals, related washers, and installation notes. OE part-number cross-references may appear in buyer data as formats such as OE 11251… or application-linked references, but they must be validated against engine code, model year, cover design, and regional specification. Driventus does not claim approval or endorsement by any vehicle manufacturer.
Sourcing Considerations for Distributors and OEM Service Channels
When valve cover gasket symptoms of failure increase across a fleet, distributor network, or repair chain, procurement should review field data and supplier controls together. A lower purchase price can be offset quickly by repeat labour claims, oil-contamination complaints, inventory quarantine, customer dissatisfaction, and loss of installer confidence.
Useful supplier audit questions include:
Can the supplier provide compound traceability and batch records?
Are bead dimensions measured against controlled drawings and retained inspection standards?
Is compression set tested after heat and oil exposure?
Are oil resistance, hardness change, and heat-ageing results available for the selected compound?
How are mould wear, cavity balance, short moulding, underfill, and flash limits controlled?
Are trial-fit checks performed on representative covers or validated fixtures?
Are packaging trays, sleeves, or inserts designed to prevent gasket deformation during storage and transport?
Can PPAP-style documentation, IMDS data, or REACH-related declarations be supported when required by the customer programme?
Driventus manufactures engine and powertrain components in Taizhou, Zhejiang, and exports to 60+ countries. For gasket programmes, our team can support application review, drawing-based development, sample validation, private-label packaging, and custom manufacturing for distributors, OEM/Tier-1 service channels, and multi-location repair groups. If your team is seeing repeated valve cover gasket failure symptoms, the first step is to compare field evidence with material data, bead geometry, cover condition, crankcase ventilation, and installation records.
Frequently asked questions
The earliest signs are usually oil film around the valve cover edge, a burning oil smell after warm-up, or oil inside spark plug wells. Some vehicles also show misfire complaints when oil contaminates coils, plug boots, or spark plugs.
Yes. A new gasket may not seal correctly if the plastic or aluminium cover has distortion, cracked bolt bosses, damaged plug-tube areas, uneven sealing rails, or pulled fastener inserts. Cover inspection should be part of the replacement procedure.
Request material specification, dimensional inspection data, compression set validation, heat and oil ageing evidence, batch traceability, packaging controls, application validation, and quality-system documentation such as IATF 16949:2016 or ISO 9001:2015 certificates.
If you need valve cover gasket samples, drawing review, or programme pricing, contact Driventus to [request a quote](/contact.html).