Lower Engine Gasket Set: How to Replace It Correctly
Replacing a lower engine gasket set is less about speed than control. The job succeeds when the leak source is correctly identified, the kit matches the exact engine revision, and the sealing surfaces are prepared to spec before reassembly. For workshop groups, rebuilders, and parts buyers, the biggest risks are usually misdiagnosis, flange damage, sealant used in the wrong places, and fasteners reused outside service limits. A lower set commonly covers the oil pan, front cover, rear main seal carrier, crankshaft seals, and related lower-end sealing points, but kit content varies by engine family. Before ordering, confirm scope against the engine code, production date, OE supersession history, and any cross-reference already supplied in the enquiry. Buyers should also check material compatibility, compression-set performance, lip-seal runout tolerance, and batch traceability under IATF 16949:2016 and ISO 9001:2015 controls. This guide explains lower engine gasket set how to replace work in practical terms, shows where repairs usually fail, and outlines the supplier documentation procurement teams should request, including MOQ, price-break, and lead-time logic for repeat supply. Driventus is an independent aftermarket manufacturer; brand names are referenced for fitment only.
Start with kit scope, not the wrench
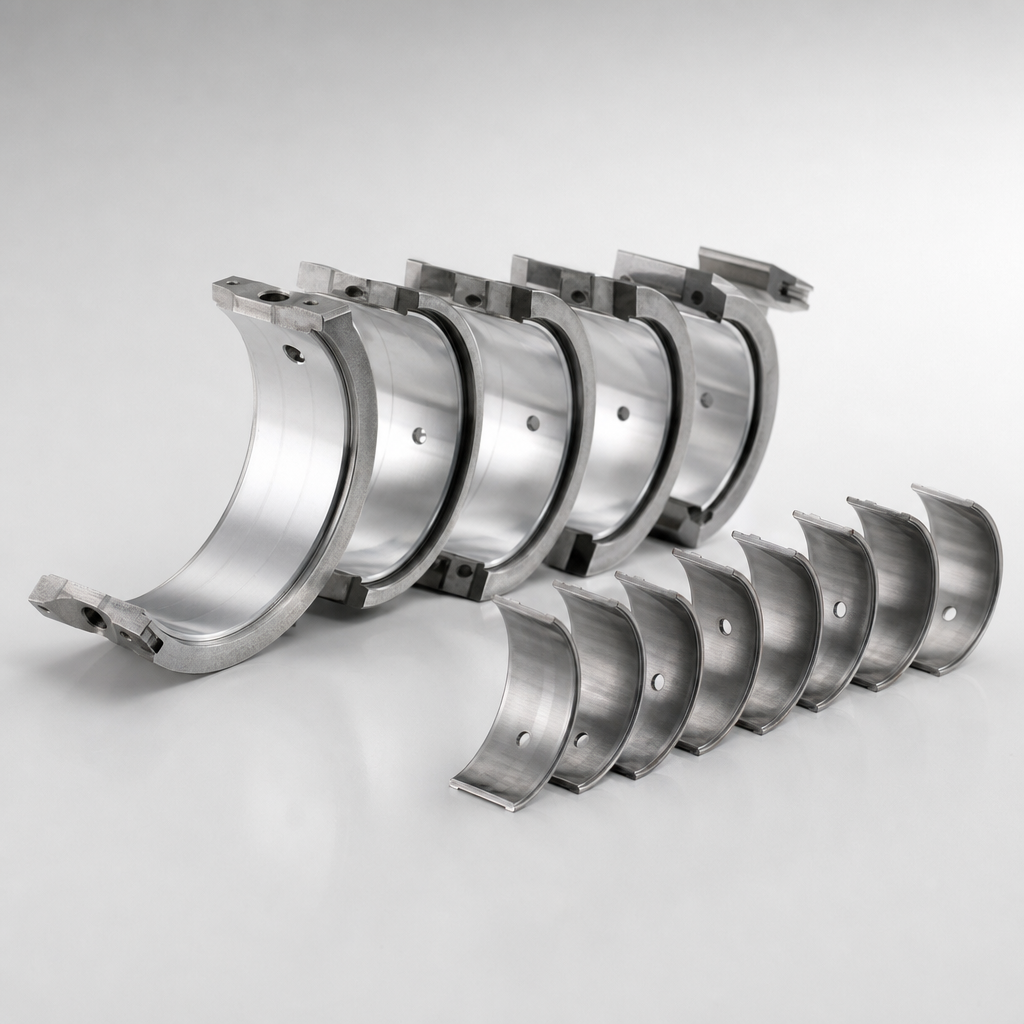
Before discussing lower engine gasket set how to replace procedure, define what is actually being replaced. A lower engine gasket set covers crankcase-area sealing points, but the contents are not standardized across all engines or suppliers. Most kits include:
Oil pan gasket or an equivalent formed-in-place sealing profile
Front timing cover gasket
Rear seal housing or carrier gasket
Front crankshaft seal
Rear crankshaft seal
Oil pump O-rings or pump body gaskets where applicable
Drain plug washer and smaller lower-end sealing rings
For procurement teams, kit definition matters as much as price. A cheaper set may omit radial shaft seals or secondary O-rings. That looks acceptable on paper until a workshop has the engine apart and finds a missing rear main seal or pump O-ring. In B2B supply, the price gap between a partial and complete kit may be only 8-20%, while the labour claim from one missing component can exceed that many times over.
Item
Typical material
Main check before installation
Oil pan gasket
NBR, ACM, silicone rubber over steel carrier, or fibre composite
Flange flatness within about 0.15-0.30 mm across the rail, bolt-hole crush, oil resistance
Front cover gasket
Fibre composite, rubber-coated metal, or FKM sealing bead
Coolant and oil passage alignment, bead continuity, thickness tolerance often within +/-0.10 mm
Crankshaft seals
NBR or FKM
Lip integrity, spring retention, shaft surface condition, seal ID/OD within drawing tolerance
O-rings
NBR, ACM, FKM
Chemical compatibility, hardness consistency, typical Shore A control such as 70 +/-5
Small washers/seals
Aluminium, copper, elastomer
Size match, seating face condition, torque seating
</tr></thead><tbody> </tbody></table>Also check revision level. Engines with running changes in seal depth, carrier shape, or pan profile can turn a seemingly correct part number into the wrong kit. Buyers should ask whether the set is packed one engine application per box, whether mixed-family consolidation is used, and whether the supplier controls critical dimensions such as seal width, radial lip preload, and carrier-hole spacing lot by lot.
Commercially, complete lower sets are often quoted on volume tiers such as 100-300 sets for trial orders, 500-1,000 sets for standard distributor purchases, and 3,000+ sets for private-label runs. Tooling-free repeat orders usually ship faster than first-run custom kits because packaging approval, fitment confirmation, and label data are already locked. If you are comparing kit scope across applications, see our catalog and the engine sealing range within /products/engine-components.html.
Decision gate before teardown: is the lower set really the leak source?
A durable repair starts with diagnosis. Oil migration regularly makes an upper leak look like a lower-end failure. A rocker cover leak can track down the block and collect at the pan rail. A front seal leak can spread across the cover and appear at the sump edge.
Confirm the leak path first
Clean the exterior of the engine, then inspect:
Oil pan rail and corner joints
Front cover to block interface
Rear main seal area at the bellhousing edge
Oil pressure switch and filter housing above the suspected leak
Crankcase ventilation faults that may raise internal pressure
UV dye, talc tracing, or a controlled post-clean road test is often enough to separate a true lower-end leak from oil migration. For fleet operators and workshop groups, this matters because repeat labour is frequently caused by opening the wrong area of the engine.
On high-mileage units, also check crankcase pressure and PCV function before teardown. Excess internal pressure can push oil past a new seal even when installation is correct.
Confirm the exact repair path
Before disassembly, verify:
Engine code, model year, and build date
Whether torque-to-yield fasteners must be replaced
Whether the application uses RTV only at corner joints or a full formed-in-place seal
Whether a shaft wear sleeve is needed if the crank running surface is grooved
Service manual torque values and tightening sequence
Then check access-related parts likely to turn a simple job into a longer one: subframe bolts, one-time-use pulley bolts, disturbed exhaust hardware, or mounts that must be removed. On some engines, the labour difference between pan-only access and full front-cover access is 1.5-3.0 hours. Buyers planning workshop programs should align kit content with the real repair path, not a generic catalog label.
Before opening the engine, measure or confirm:
Visible flange distortion, especially around over-tightened oil pan bolt holes
Crankshaft seal journal wear groove depth; many rebuilders use about 0.05-0.10 mm as a practical trigger to consider a sleeve, depending on OE guidance
Mating surface flatness with a straightedge and feeler gauge
Whether bolt holes are oil-contaminated or thread-damaged, which can skew clamp load
From a sourcing standpoint, request from the supplier:
Material declaration and restricted substance compliance, including REACH (EC) No 1907/2006 where relevant for EU supply
Dimensional inspection records for critical seal IDs, ODs, cross-sections, and gasket thickness
Batch traceability and packaging controls under the supplier's quality system
MOQ, sample policy, and standard lead time for both stock and made-to-order kits
That front-end discipline reduces fitment disputes, unnecessary teardown, and repeat claims.
The replacement sequence that usually determines whether it stays dry
Below is a general workshop sequence for lower engine gasket set how to replace work. Details vary between transverse and longitudinal layouts, and between open-deck, bedplate, and ladder-frame block designs. The order matters because most repeat leaks are created during surface prep, seal positioning, or final tightening.
1. Isolate the vehicle or engine assembly. Disconnect battery power if the engine is still installed. Drain engine oil and coolant if the front cover intersects coolant passages. Record fluid condition; metallic debris or coolant contamination may point to a larger problem than sealing alone. 2. Remove obstructing components. This may include undertrays, exhaust sections, shields, accessory drives, crank pulley, flywheel cover, crossmembers, or subframe sections. Tag hardware by location so bolt length and shoulder type are not mixed during reassembly. 3. Support the engine correctly. If mount removal is required, use approved support points. Mis-support can twist the assembly enough to affect cover and seal alignment. 4. Remove the oil pan and lower covers. Loosen bolts in sequence. Do not force sharp tools between aluminium mating faces. Even minor gouges can create a permanent leak path. If RTV is used, work from OE release points or with a soft wedge tool. 5. Remove old seals and gaskets. Use the correct puller or installer system for crank seals. Discard deformed elastomer parts, crush washers, and all specified single-use fasteners. Do not pry against a crankshaft seal journal or housing bore. 6. Inspect mating surfaces. Look for corrosion pitting, flange waviness, thread pull-out, impact damage, and old sealant residue in bolt holes, oil return channels, and joint corners. Pan rails should be checked for local distortion around bolt holes; even 0.20-0.30 mm of pull-up can be enough to compromise gasket compression. 7. Measure critical areas. Verify shaft sealing surfaces, groove wear, cover flatness, and bolt stand-off. If the crankshaft seal land is worn beyond service limit, replace or sleeve the component before reassembly. Confirm housing bore size and seal width match the new parts supplied. 8. Clean surfaces fully. Use non-abrasive methods and solvents compatible with the substrate. Mating surfaces should be dry, oil-free, and lint-free before any new gasket or sealant is installed. Clean threaded holes as well; trapped oil can hydraulically alter torque readings. 9. Install the new components. Fit seals square to bore depth and lubricate seal lips where specified. Apply RTV only where the service procedure requires it, commonly at block-to-cover or cover-to-pan corner transitions. Typical corner-joint bead sizes are often around 2-4 mm, but follow the engine manual rather than a generic rule. 10. Torque fasteners in sequence. Follow the engine manufacturer's pattern, angle method, and staged torque process where specified. Many lower-end fasteners are low-torque items in the 8-25 Nm range. That is exactly why overtightening with an uncalibrated tool is so common. 11. Refill and prime. Refill oil and coolant as required. Prime the lubrication system if the engine has been fully stripped or the oil pump has been disturbed. On rebuild jobs, disable ignition or fuel as required and crank until oil pressure is established. 12. Run and inspect. Bring the engine to operating temperature, then inspect for seepage, oil pressure stability, and abnormal crankcase pressure. Check again after cool-down because some leaks only appear once the sealant has cured and the housing has thermally cycled.
If the repair fails, the cause is often simple: residue left in a corner joint, a cover pulled down unevenly, or a seal driven slightly off-axis. On radial shaft seals, even a small tilt can overload the lip and shorten service life.
For buyers supporting workshop networks, the main returns driver is usually installation error rather than kit defect. Fitting notes inside the box, including seal orientation, corner-joint sealant points, and one-time-use hardware requirements, can reduce claims materially.
Why fresh gaskets still leak: the five failure modes to audit
If an engine still leaks after replacement, the failure usually falls into one of five categories:
Surface damage not corrected: scratches, dents, or warped flanges leave a leak path even with a new gasket installed
Wrong sealant placement: excess RTV may block oil passages, while too little at joint corners can leave a capillary gap
Seal installed off-axis: radial shaft seals must enter squarely and sit at the specified depth
Crankshaft surface wear: a new lip seal cannot compensate for a grooved running surface for long
Incorrect bolt strategy: reused torque-to-yield bolts or uneven tightening can distort covers and pans
Misdiagnosis remains a major sixth issue in practice. A repaired engine may still show oil because the original leak was above the lower set, or because residual oil trapped on cast surfaces is burning off and mimicking an active leak. A proper clean-and-monitor step after repair is the easiest way to separate these cases.
In workshops, repeat leaks are commonly process failures, not raw material failures. Typical examples include RTV applied over an oil film, seal lips installed dry when lubrication was required, bore corrosion left untreated, or the seal driven 1-2 mm deeper or shallower than the intended land. On stamped pans, local flange distortion near bolt holes is another regular problem because clamp load becomes uneven even when final torque appears correct.
A robust supplier should validate elastomer hardness, compression recovery, and fluid resistance. Depending on design and application, verification may include heat ageing, oil immersion, dimensional stability, and lip-wear checks, all controlled through IATF 16949:2016 and ISO 9001:2015 process discipline. Buyers can ask for specific test windows such as hardness retention after heat ageing, compression set after timed exposure, and dimensional inspection of seal OD, width, and free lip diameter.
For importers and distributors, this is where documentation becomes commercial protection. Ask for incoming material controls, in-process inspections, final lot identification, and retained-sample policy. If the kit is being private-labelled or adapted for a market-specific range, discuss custom manufacturing before the first production run. That discussion should also cover claim thresholds, replacement-credit logic, and whether the supplier can segregate high-risk applications into tighter inspection plans.
Supplier comparison: what matters beyond the gasket itself
For a how-to topic, repair method is only half the story. The other half is supply reliability. A lower engine sealing kit should be evaluated on fitment performance and control of the supply program, especially when the buyer supports workshop groups, rebuild programs, or multi-country distribution.
Use this checklist when qualifying a supplier:
Certified management system: IATF 16949:2016 and ISO 9001:2015
Defined kit scope by engine code and revision level
Controlled elastomer compounds such as NBR, ACM, and FKM by application temperature and fluid exposure
Stable thickness tolerance for composite gaskets and dimensional control for radial seals
Packaging that prevents lip damage, fold marks, and contamination in transit
Batch traceability from raw material to finished kit
Restricted substance compliance documentation for the destination market
Claim handling process with retained samples and inspection reports
It is also worth asking how the supplier handles supersessions and platform overlap. Engines with similar displacement or family names may still require different seal carriers, gasket bead layouts, or bolt kits. A supplier working from engine code and revision data, rather than broad catalog assumptions, will usually prevent more ordering mistakes.
For concrete qualification, ask the supplier to state:
Standard MOQ for stocked kits and separate MOQ for custom packaging or private label
Price-break structure, for example prototype quantity, distributor quantity, and annual contract quantity
Typical lead time for stocked items versus production orders, such as 2-4 weeks from stock release and 30-60 days for scheduled manufacturing, subject to material availability
PPAP or equivalent submission scope if the supply program supports OEM or Tier-1 channels
AQL or outgoing inspection method for kit completeness and critical dimensions
Whether radial seals are 100% visually checked for lip damage and garter spring displacement before packing
MOQ, price, and lead time should be read together. A very low MOQ can help with range testing, but the unit price may include higher packing cost and weaker freight efficiency. A larger MOQ can reduce per-set cost, yet that saving disappears if the buyer carries slow-moving variants for the wrong engine revision. In practice, the target is often a batch size matching 2-4 months of real demand by engine family, unless the application is unusually stable.
If your enquiry includes an existing OE reference such as OE 11251..., provide it together with engine displacement, year range, engine code, and photos or dimensions where available. That shortens cross-reference work and reduces the chance of ordering a partial kit when a full lower set is required.
Driventus supports B2B programmes for distributors, OEM/Tier-1 supply, and repair-chain purchasing teams. Product scope, quality controls, and manufacturing capability are listed in our catalog and the published quality system.
Release scenario: the checks to complete before the engine leaves the bay
Before the engine goes back into service, complete a documented close-out:
Confirm all mating surfaces were inspected and cleaned
Record replaced bolts and sealants used
Verify oil fill, coolant fill, and drain plug torque
Check crankshaft rotation by hand before first start where applicable
Run the engine to temperature and inspect with adequate lighting
Recheck for seepage after cool-down and one short operating cycle
Where possible, record torque stages, sealant specification, installed seal depth, and the installed kit batch number on the job sheet. Generic pass/fail notes are weak evidence when a unit comes back later with a leak complaint. Actual values are more useful, especially across multiple sites or technicians.
For fleet repair groups and rebuilders, a simple inspection sheet tied to the kit batch number helps separate installation error from component non-conformance. That matters when the same engine family is serviced across several locations. Useful fields include engine code, mileage, leak source confirmed before teardown, sealant cure time observed, torque wrench ID, and post-repair road-test result.
From a process standpoint, allow for the sealant manufacturer's cure guidance before full-load release where RTV is used. After warm-up, inspect common leak points again at idle and after a short drive or load cycle. A 10-20 minute post-repair inspection often prevents a return visit that costs far more than the original kit.
Driventus is an independent aftermarket manufacturer; brand names are referenced for fitment only. For application review, kit scope confirmation, or supply discussion, use the product and engineering channels before placing the first volume order.
Frequently asked questions
No. Some sets include front and rear crankshaft seals, while others cover only static gaskets and O-rings. Confirm the bill of materials against the engine code, production date, and repair scope before ordering. For distribution purchases, ask for a line-by-line kit content sheet so the quote clearly distinguishes a partial lower set from a full-service kit.
FKM is generally the better choice where the engine sees higher temperatures, longer drain intervals, or more aggressive fluid exposure. The correct choice depends on thermal load, oil chemistry, shaft speed, and expected service life. FKM usually costs more, so it should be specified where the operating window justifies the upgrade, not as a blanket default.
Request kit content definition, dimensional inspection data, material declarations, traceability records, and certification details under IATF 16949:2016 and ISO 9001:2015. For EU programmes, ask for REACH compliance information as well. It is also practical to request MOQ, quoted lead time, packaging specification, and claim-handling procedure before approving the supplier for recurring orders.
If you are reviewing lower-end sealing kits for distribution or workshop supply, send the engine code, required kit scope, target MOQ, and annual volume to [request a quote](/contact.html).