A leaking head gasket is not a diagnosis; it is a hypothesis. White exhaust vapour, unexplained coolant loss, overheating, pressurised hoses, or contaminated oil can point toward the gasket, but they can also come from an oil cooler, EGR cooler, cracked head, weak cap, blocked radiator, or poor combustion control. Fleet teams need proof before they authorise teardown, and buyers need that proof before they specify replacement kits across branches.
The key question is not simply how to diagnose head gasket leak symptoms. It is which leakage path exists: combustion gas into coolant, coolant into a cylinder, oil and coolant cross-contamination, external seepage, or fire-ring leakage between cylinders. Each path changes the parts list and the root-cause review. Loss of gasket crush, cylinder-head distortion, liner protrusion error, detonation, corrosion, rough machining, or incorrect torque procedure can all produce a similar complaint at the driver level.
This guide turns diagnosis into a purchasing-quality process: triage first, non-invasive tests next, teardown confirmation only when the evidence supports it, and parts specification based on measured findings. Driventus manufactures independent aftermarket engine and powertrain components in Taizhou, Zhejiang, under IATF 16949:2016 and ISO 9001:2015 systems. Driventus is an independent aftermarket manufacturer; brand names are referenced for fitment only.
Decision Framework: Identify the Leakage Path Before Naming the Gasket
Do not start with the cylinder head. Start with the pattern. A head gasket can fail in several directions, and each one leaves different evidence. The first 15–30 minutes should sort the complaint into a leakage path, not confirm a preferred theory.
Check coolant level cold. Note whether the reservoir remains pressurised after an overnight cool-down. Record oil level before starting. Compare behaviour at idle, at 2,000–2,500 rpm, and after a road-load or dyno-load event. Short observations matter: a hose that hardens within minutes, a single steam-cleaned piston, or coolant pushed from the reservoir under load often tells more than a general “overheats” note.
Symptom pattern
Probable leakage path
First check
Sourcing implication
Coolant expelled within 5–10 minutes
Combustion gas to coolant jacket
Cap rating, hose hardness, CO₂ test
Review fire-ring design and clamp-load margin
White vapour after full warm-up
Coolant to combustion chamber
Plug or injector bore, borescope after soak
Confirm bore seal, thickness grade, and head flatness
Milky oil or oil level rising >3–5 mm
Coolant to oil gallery or crankcase
Dipstick, drained oil, cooler isolation
Do not buy gasket sets until cooler failure is ruled out
Oil film in coolant without misfire
Oil gallery to coolant jacket
Expansion tank, heat exchanger, cooler test
Separate gasket demand from cooler demand
External trace at block/head joint
Coolant jacket to atmosphere
UV dye, cold and hot pressure test
Match coating and surface-finish requirements
</tr></thead><tbody> </tbody></table>One symptom is not enough. White vapour on cold start may be condensation if it clears quickly. Oil in coolant may come from a cooler because engine oil pressure is usually higher than coolant pressure during operation. Overheating may be the cause of gasket damage, not the first fault. The decision point is simple: prove the leakage path, then decide whether the gasket, head, block deck, fasteners, liner height, cooling system, or combustion event caused the seal loss.
Step-by-Step Checks That Avoid Premature Teardown
Before any head bolts are touched, create a diagnostic record. Capture engine code, mileage or operating hours, coolant type and concentration, recent overheating, cap pressure rating, prior repair history, and branch location. Photograph coolant condition, plug or injector-bore condition, pressure readings, and test setup. For repair chains and distributors, this evidence prevents one location’s guess from becoming another location’s purchasing rule.
Use calibrated tools. A 0–2.5 bar cooling-system tester with 0.05 bar graduations and a leak-down tester supplied by regulated shop air at 6–7 bar are enough for most light-duty and medium-duty programs.
1. Pressure-test the cooling system. Pressurise to the cap-rated value, commonly 0.9–1.4 bar for passenger cars and up to about 1.5–2.0 bar on some commercial applications. Hold cold for 10–15 minutes. A drop above 0.1–0.2 bar without a visible external leak needs follow-up. Inspect heater cores, EGR coolers, hoses, water-pump weep holes, radiator seams, reservoir caps, and clamps before blaming the gasket. 2. Run a combustion-gas block test. Use approved CO₂ test fluid at the expansion tank or radiator neck with the engine at operating temperature. Draw vapour for 1–2 minutes without pulling in coolant. A colour change supports combustion gas in coolant. No colour change does not clear the gasket if the leak opens only under load, boost, or high temperature. 3. Perform cylinder leak-down. Set each cylinder at top dead centre on compression, lock the crankshaft, and apply regulated air. Many healthy engines show less than 10–15% leakage. Readings around 20–30% require investigation. Bubbles in the coolant neck are more important than the percentage because they show a cylinder-to-coolant path. 4. Compare compression readings. Disable fuel and ignition, use a fully charged battery, and crank with throttle open where applicable. A spread above 10–15% or two adjacent low cylinders may indicate fire-ring leakage between bores. One low cylinder still needs valve, ring, and bore checks. 5. Inspect with a borescope after soak. After overnight cooling, look for one unusually clean piston crown, droplets, steam-cleaned valve areas, rust staining, or washed carbon. Mark the suspect cylinder and store the images with the job file.
ISO 9001:2015 does not define acceptable engine pressure values, but it does require controlled process evidence where the activity sits inside the quality system. That discipline is useful here. It makes warranty files comparable, supplier reviews faster, and SKU decisions less emotional.
Spec Deep-Dive: What Teardown Evidence Must Prove
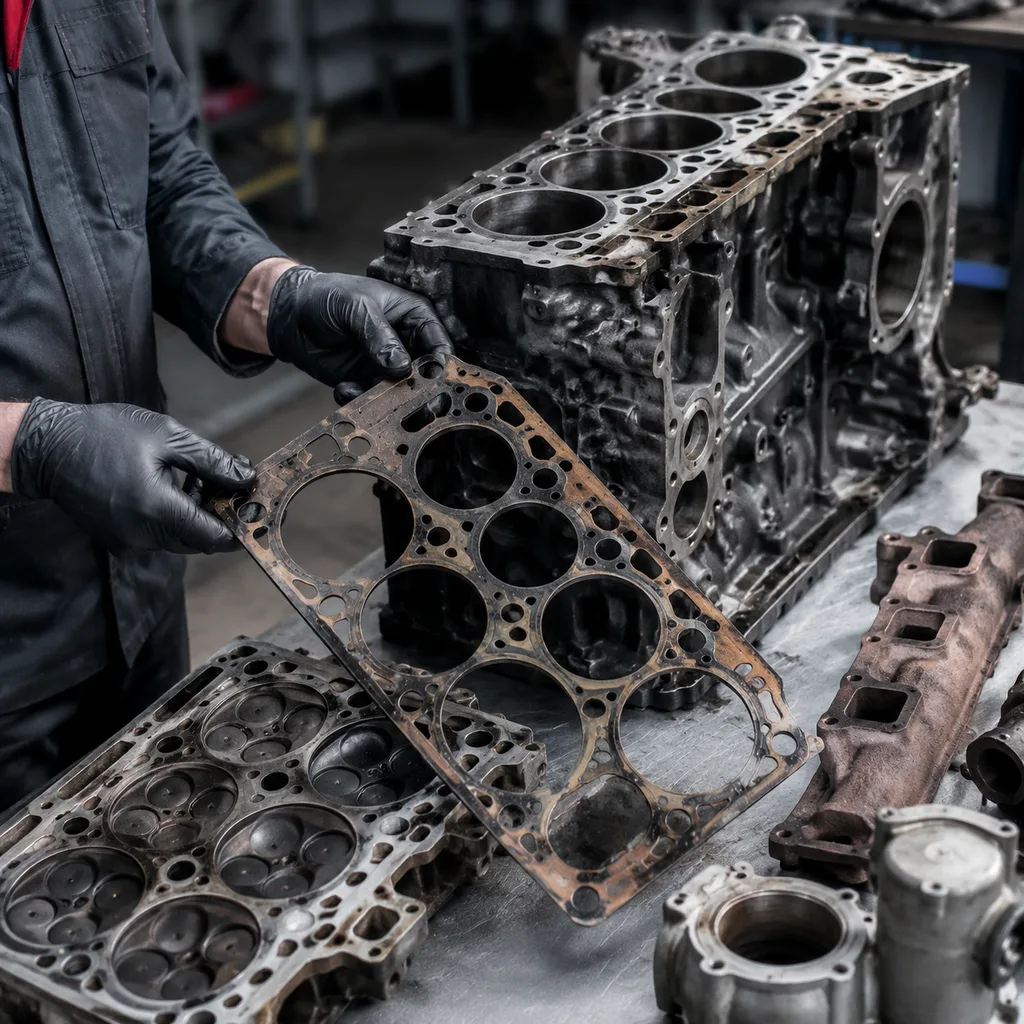
Teardown is not a fishing expedition. It should confirm or reject the test result already recorded. Before cleaning, photograph the gasket in installed orientation. Include fire rings, coolant holes, oil galleries, dowel locations, coating condition, and witness marks. Bag the gasket flat, label cylinder position, and retain bolts in order if stretch, lubrication, or torque procedure may be disputed.
Look for the hard evidence:
Fire-ring erosion, black tracking, or gas cutting between the bore and coolant passage
Coating loss around coolant ports, especially where coolant chemistry is poor
Fretting from head movement, weak clamp load, or incorrect torque-angle procedure
Corrosion at coolant passages from mixed coolant, low inhibitor level, or stray current
Uneven imprint showing variable gasket crush or distorted castings
Sealant residue where no sealant is specified
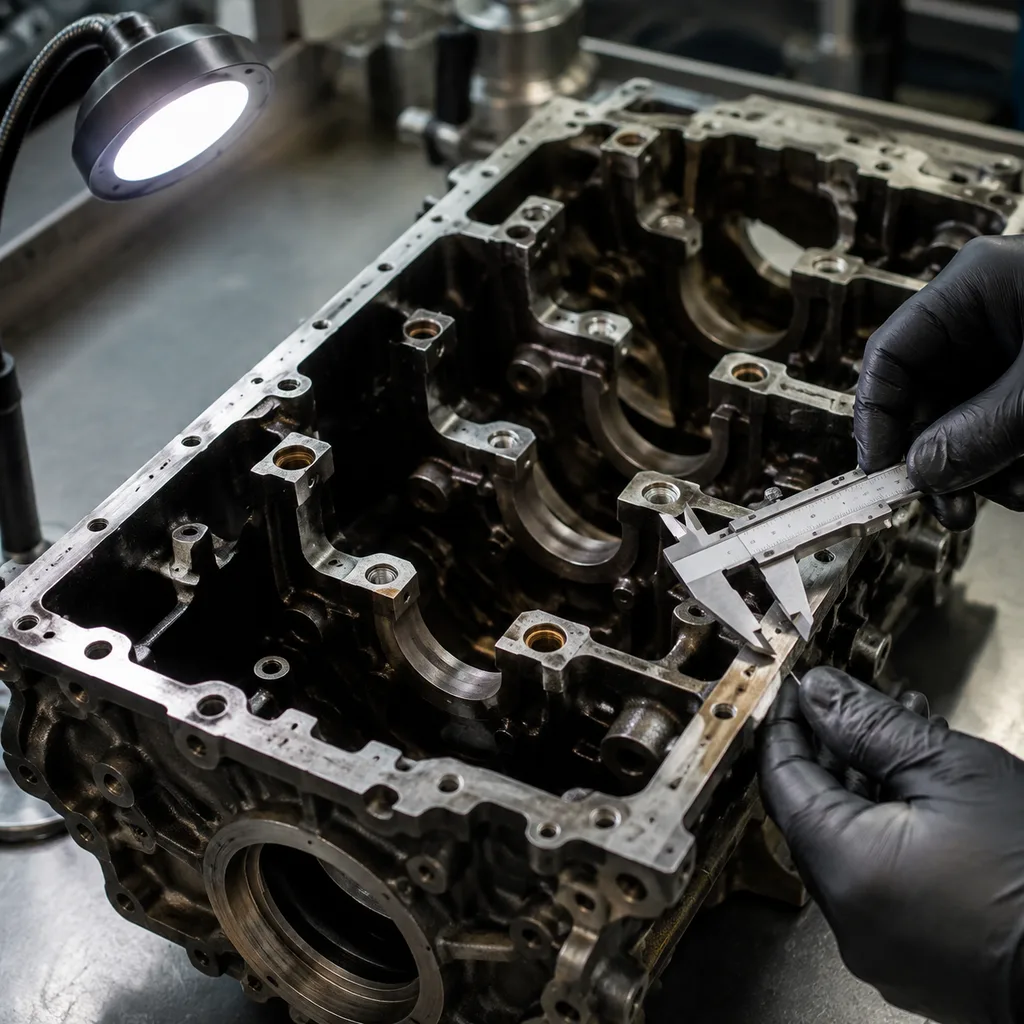
Then measure. Use a precision straightedge with 0.02–0.10 mm feeler gauges, a surface plate, or CMM where available. Always follow the engine maker’s service limit. As practical warning signs, many aluminium heads deserve closer review above 0.05 mm distortion across a short span or 0.10 mm across full length. Check the block deck the same way, especially around fire rings, coolant passages, and bolt holes. Clean blind holes; trapped oil or coolant can hydraulic-lock the hole and fake a correct torque reading.
Surface finish is not cosmetic. Many MLS gaskets need a controlled finish around Ra 0.4–1.2 µm. Some composite designs tolerate rougher finishes, such as Ra 1.5–3.0 µm. Confirm the target from the engine or gasket specification. Do not “polish until shiny.” Rotary abrasive discs can round deck edges, contaminate oil passages, and leave a profile that cannot hold the gasket coating.
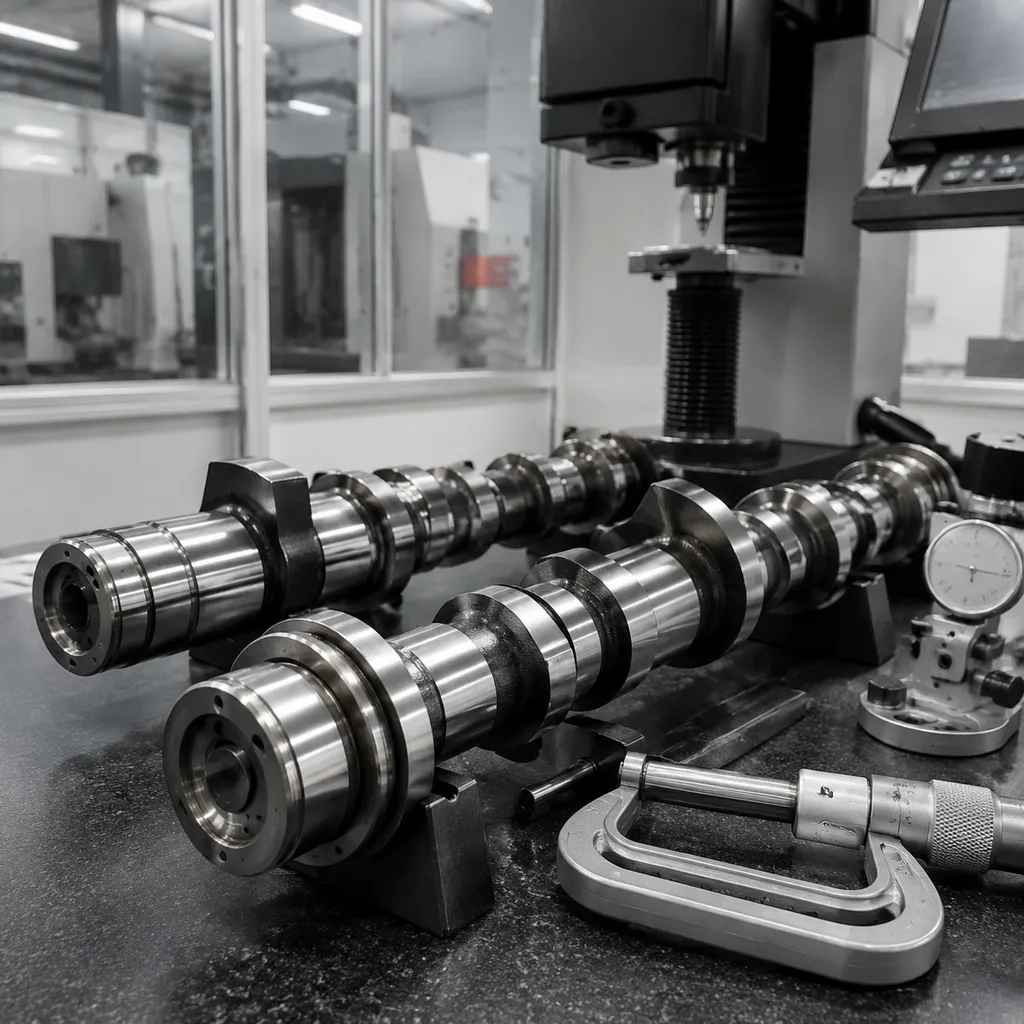
Wet-liner engines need one more measurement before parts are ordered: liner protrusion. Measure four points per liner with a dial indicator reading at least 0.01 mm. A typical range may be only 0.03–0.10 mm, and cylinder-to-cylinder variation above about 0.02–0.03 mm can reduce fire-ring loading. Fasteners also matter. Torque-to-yield bolts are commonly single-use; if free length exceeds the service limit, threads are necked, or washer faces are galled, specify a complete bolt set rather than mixing hardware.
Failure Modes That Imitate a Head Gasket Leak
The gasket often gets blamed because it is expensive, visible, and familiar. That does not make it guilty. Many repeat repairs start with a correct symptom and the wrong cause. Replacing only the gasket can produce another failure within 5,000–20,000 km or one service interval if the thermal, combustion, lubrication, or coolant-system trigger remains.
Check these suspects before closing the repair:
Restricted radiator cores, weak water pumps, blocked passages, slipping belts, failed fans, late thermostats, or reservoir caps opening below rated pressure
Detonation or pre-ignition from incorrect calibration, poor fuel quality, carbon deposits, injector imbalance, lean running, or wrong spark plugs
Excessive boost pressure, high exhaust backpressure, or abnormal cylinder pressure in turbocharged engines
Cracked heads between valve seats, around injector bores, near pre-chambers, or in thin bridge areas
EGR cooler, oil cooler, heat exchanger, or integrated transmission-cooler leakage
Wrong gasket thickness, bore profile, dowel position, or grade after head or block machining
Mixed coolant chemistries, concentration below about 40%, air pockets, hard-water scaling, or depleted corrosion inhibitor
Use isolation tests when symptoms overlap. Oil coolers can often be pressure-tested separately at 3–6 bar air under water, subject to design and service limits. EGR coolers should be checked cold and hot because some cracks open only with thermal expansion. Thermostats should begin opening near their rated temperature, often 82–92°C, and reach full travel within the specified range; a late-opening thermostat can create local hot spots while the dashboard gauge still looks normal.
Emissions hardware can also reveal the mistake. Coolant entering the combustion chamber may damage oxygen sensors, reduce catalyst efficiency, and affect particulate-control performance. In markets where it applies, emissions-related repairs may need to consider local inspection rules and vehicle regulations such as ECE R-83 for light-duty emissions type approval.
The buying list should reflect the failure mode, not the word “gasket.” Depending on the platform, it may include the gasket set, head bolts, thermostat, water pump, coolant seals, oil cooler seals, EGR cooler gaskets, radiator cap, and known platform-specific parts. Buyers can review relevant engine-component families in our catalog, including gasket kits and cooling-system parts.
Parts Comparison: Gasket-Only Purchase vs Complete Repair Kit
Once diagnosis confirms a sealing fault, the sourcing decision becomes technical. A gasket that looks close may still fail if bore diameter, thickness, bead geometry, stopper-layer design, emboss height, coating, or coolant-hole layout is wrong. Visual matching is not an approval method.
A purchasing specification should include:
Vehicle application, engine code, displacement, fuel type, aspiration type, production range, and regional fitment notes
OE part-number cross-reference where already used in the program, for example OE 06A… or OE 11251…, plus approved aftermarket interchange numbers
Gasket construction: MLS, composite, graphite-faced, copper-faced, or another specified type
Bore diameter, installed thickness, thickness grade, and notch, hole, or tab identification; request dimensional tolerance such as ±0.05 mm for critical profiles where drawings allow
Head bolt scope: included, excluded, or supplied separately, with quantity, length, thread, washer style, and torque-angle instruction reference
Related seals: valve-cover, manifold, thermostat, coolant, oil cooler, EGR cooler, and injector seals where required
Export packaging: humidity protection, barcode, carton strength, pallet height, and label format
Material compliance, including REACH (EC) No 1907/2006 where applicable, plus asbestos-free or restricted-substance declarations
Batch traceability, inspection report format, retention-sample policy, and warranty evidence requirements
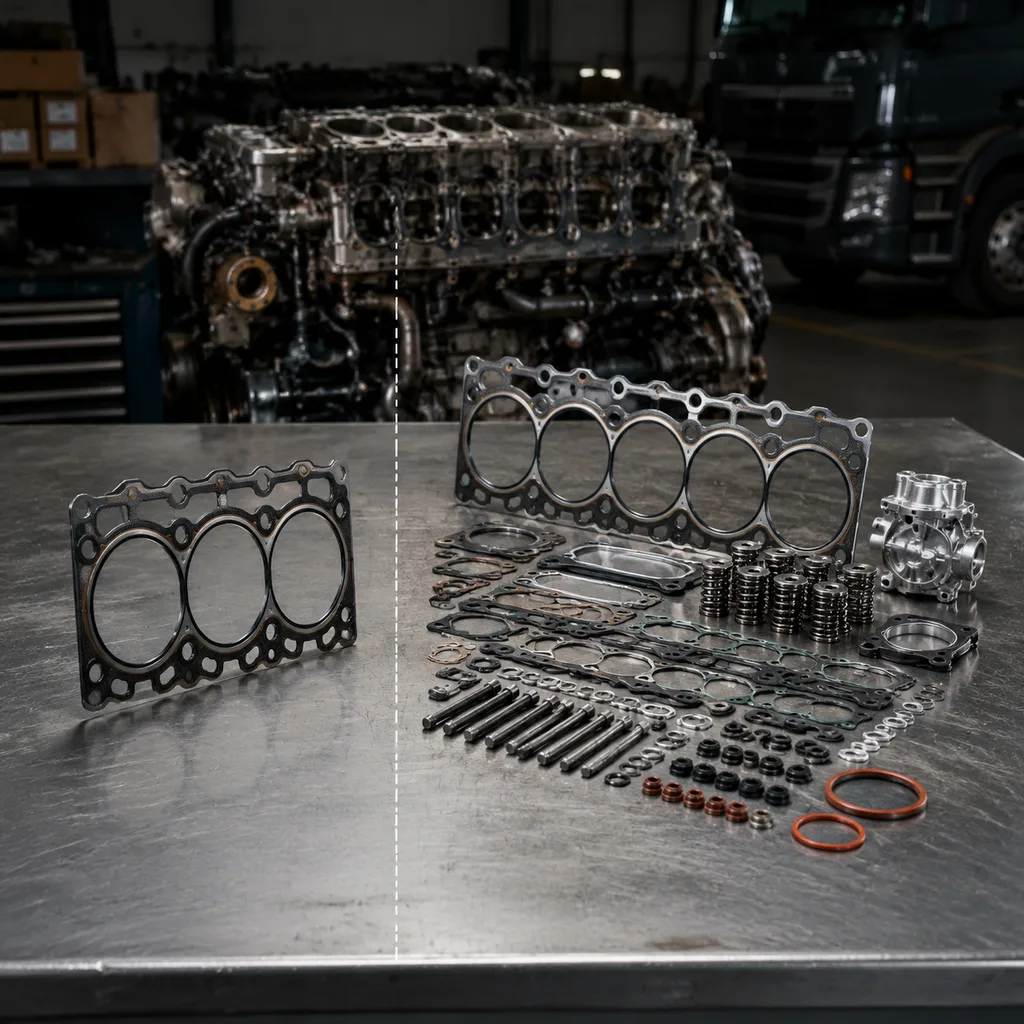
Compare kit logic before comparing unit price. A gasket-only purchase may reduce landed cost per item, but it can increase claims if the repair usually requires torque-to-yield bolts, valve-cover gaskets, coolant seals, or cooler seals. Standard catalogue gasket sets usually suit mixed-SKU distributor replenishment. Custom gasket programs need stable demand, confirmed drawings or samples, and an approval route.
Clarify the commercial frame before sampling: target annual volume, forecast split by SKU, MOQ per part number, MOQ per shipment, and whether head bolts are kitted or purchased separately. For stocked references, confirm available quantity and replenishment cycle. For new or customised programs, allow time for sample production, dimensional review, installation validation, packaging approval, and first-article inspection.
Driventus production controls are managed under IATF 16949:2016 and ISO 9001:2015. Incoming material checks, in-process dimensional inspection, coating control, final sampling, and batch traceability are part of our quality system. For distributors and repair-chain programs, that supports repeat replenishment rather than one-off buying.
Scenario Workflow: Turn One Diagnosis Into a Fleet Standard
A useful head gasket process should survive beyond one repair bay. It should help procurement see which kits move quickly, which claims are installation-related, and which applications need design, material, or application review. The same evidence pack should work at branch level, warranty level, and supplier-review level.
Use this workflow for each suspected case:
1. Record symptoms, engine details, mileage or hours, operating history, recent overheating, coolant concentration, cap rating, and coolant condition. 2. Perform pressure, gas, compression, leak-down, and borescope checks where applicable, recording readings in bar, psi, percentage leak-down, and cylinder number. 3. Rule out oil cooler, EGR cooler, heat exchanger, water pump, thermostat, radiator, cap, hose, belt, and fan faults before cylinder-head removal. 4. Photograph the gasket and mating surfaces before cleaning, including fire rings, coolant ports, oil passages, and bolt-hole areas. 5. Measure cylinder-head flatness, block deck condition, surface finish, bolt-hole condition, and liner protrusion where relevant. 6. Specify gasket type, bore, thickness grade, bolt kit, and related cooling-system or sealing parts from the diagnostic evidence. 7. Retain failed parts, photographs, readings, installation records, torque-angle sheets, and coolant or oil samples until warranty or supplier review is closed.
Tie the record to the SKU decision. High-repeat applications should have an approved kit bill of materials, target defect threshold, claim evidence pack, reorder point, MOQ, and lead-time class. A simple ABC split keeps the stocking policy clean: A-items are fast-moving gasket sets with forecasted replenishment and safety stock; B-items are periodic-demand kits grouped by engine family; C-items are slow-moving or special-order references where MOQ and shelf-life risk must be checked before stocking.
Driventus can support standard gasket programs or custom manufacturing for distributors, OEM service channels, and Tier-1 aftermarket programs that require defined materials, drawings, packaging, and traceability. We do not claim approval or endorsement by any vehicle manufacturer. Driventus is an independent aftermarket manufacturer; brand names are referenced for fitment only.
Frequently asked questions
No single test is conclusive in every case. A strong diagnosis combines cooling-system pressure testing at cap-rated pressure, combustion-gas testing, compression or leak-down results, and teardown evidence. Bubbles in coolant during leak-down or visible fire-ring tracking after removal are stronger indicators than white vapour alone.
Yes. Oil coolers, heat exchangers, transmission coolers integrated into radiators, and some EGR cooler faults can contaminate coolant. Isolate these components with pressure testing before cylinder-head removal. Misdiagnosis increases repair cost and may lead to repeat claims.
Often yes, especially where torque-to-yield bolts are specified. These fasteners stretch during installation and may not provide correct clamp load if reused. The repair procedure for the engine should define whether bolts, washers, or studs are reusable, and buyers should specify bolt kits separately when they are not included.
If you need gasket kits, head bolts, or related cooling-system components for a defined engine program, share the application list, target annual volume, MOQ expectation, packaging requirement, and lead-time target to [request a quote](/contact.html).