Transmission mounts are small parts with a large effect on driveline noise, shift quality, and perceived vehicle condition. For distributors, repair chains, and importers, a mount failure pattern can trigger warranty returns that are often blamed on the clutch, gearbox, driveshaft, or engine mounts. A structured diagnostic process helps separate normal rubber ageing from incorrect installation, fluid attack, bracket deformation, or a mismatched durometer specification. This article explains transmission mount symptoms of failure from a procurement and service-support perspective: what technicians report, how to confirm the root cause, and what to specify when sourcing replacement mounts for aftermarket programs. Driventus supplies engine and powertrain components to B2B customers in more than 60 countries under IATF 16949:2016 and ISO 9001:2015 controlled processes. Driventus is an independent aftermarket manufacturer; brand names are referenced for fitment only.
How to interpret transmission mount symptoms of failure
Transmission mount complaints usually point to one of four buckets: the mount is worn out, the installation is wrong, another component is driving the load, or the part spec does not match the vehicle. That matters for B2B buyers because the wrong conclusion can turn a valid warranty claim into avoidable friction.
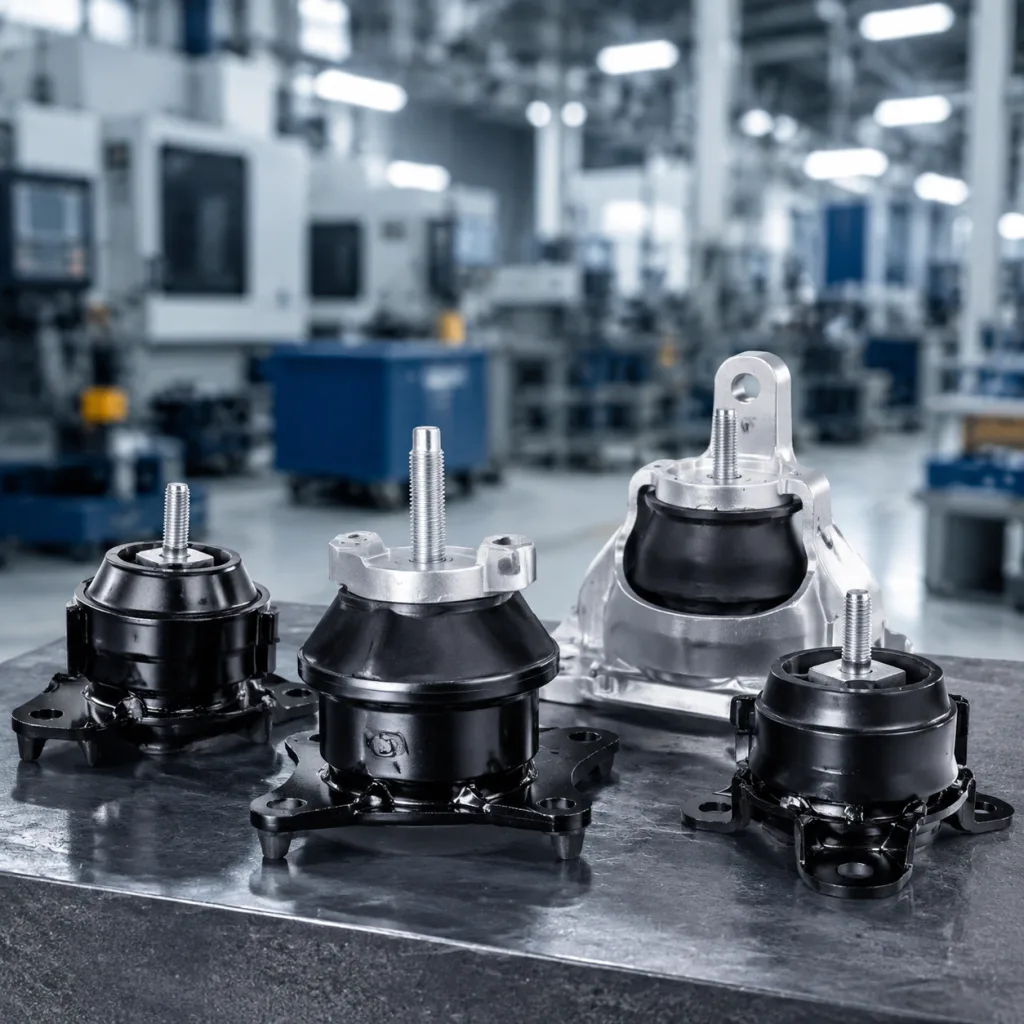
A mount supports the gearbox or transaxle and limits movement under torque, braking, and road input. Most designs combine a steel or aluminium bracket with bonded rubber, and some applications use hydraulic damping cavities. In practice, the part is doing two jobs at once: holding weight and controlling movement. When either job slips, drivers notice clunking, vibration, or shift feel changes fast.
Before accepting a return, separate symptom from cause. A soft idle shake can come from a mount that is too stiff. A clunk on take-off can come from broken rubber, but it can also come from a loose fastener or an adjacent mount that has already collapsed. Buyers should ask for measured dimensions, installed height, and hardness data, not just catalog references.
Symptom, cause, or false alarm?
The table below helps teams sort common field reports without over-committing to the mount as the only failure point.
Reported symptom
Likely mount-related cause
What to check first
Clunk during gear engagement
Rubber separation, loose fastener, collapsed mount
Mount too stiff, wrong application, driveline preload
Application match, ride height, opposite-side mount
Knock on acceleration or deceleration
Mount bottoming out under torque reversal
Contact marks, compression set, stopper clearance
Gearshift lever movement or poor shift feel
Gearbox displacement under load
Mount alignment, linkage or cable adjustment
Visible fluid contamination
Oil or ATF attack on rubber
Leak source, contamination path, replacement need
</tr></thead><tbody> </tbody></table>Transmission mount symptoms of failure should not be diagnosed from one sign alone. A collapsed mount can look similar to a worn engine mount, loose subframe bolt, cracked exhaust hanger, or failed torque rod. The best confirmation is a short inspection note with photos showing rubber separation, leakage on hydraulic mounts, bracket damage, or installed height deviation.
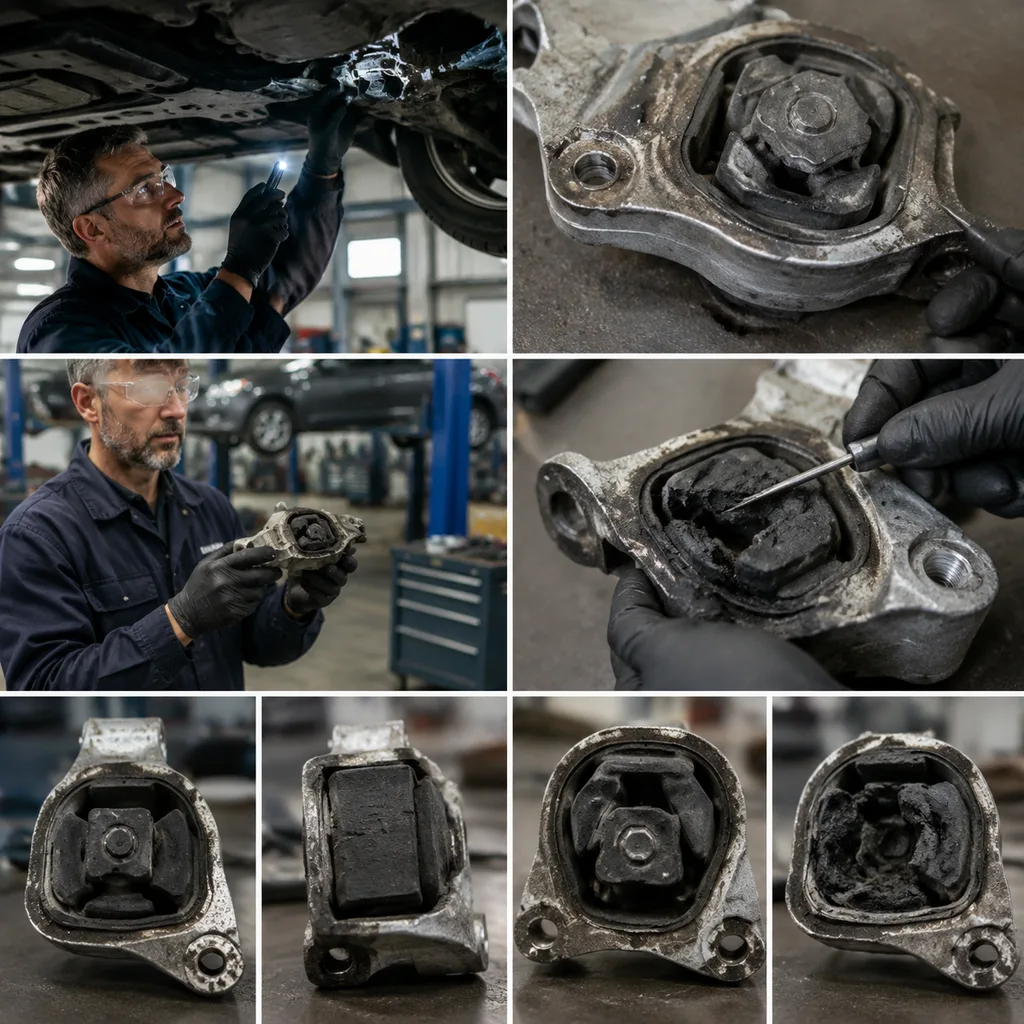
Step-by-step inspection workflow for repair networks
A repeatable workflow reduces false returns and gives warehouse and warranty teams cleaner evidence.
1. Confirm when the complaint happens. Record whether the issue appears at idle, reverse engagement, acceleration, deceleration, or road impact. Capture mileage and whether the symptom started immediately after replacement or after a period of use. 2. Check adjacent parts first. Inspect engine mounts, torque struts, exhaust hangers, subframe fasteners, driveshaft joints, and gearbox brackets. A torn dogbone bushing or oil-soaked adjacent mount often shifts the load to the transmission mount. 3. Inspect the mount both unloaded and loaded. Look for cracked rubber, separation at the bonded interface, hydraulic fluid leakage, excessive sag, or metal-to-metal contact marks. If workshop procedure allows, record movement against a fixed reference point. 4. Verify application accuracy. Compare engine code, gearbox type, body style, and production period. Similar-looking mounts can use different rubber rates, bracket offsets, or heights. 5. Check installation conditions. Confirm whether bolts were tightened at the correct ride height. Tightening a rubber mount while the powertrain is hanging can preload the system and create a repeat complaint. 6. Document before replacement. Capture batch code, box label, application reference, odometer reading, and photos of the failed part and installed orientation.
For high-volume programs, build a minimum evidence set into the claim form: failed-part photo, vehicle identification, mileage, and torque or installation notes. That makes pattern analysis much easier when one symptom starts repeating across a platform.
What failure looks like in the part itself
Some mounts fail cleanly. Others fail in a way that points back to usage or specification.
Torn rubber at the edge: often linked to excessive movement, incorrect torque sequencing, or a compound that is too hard for the application.
Rubber swelling or softening: usually caused by engine oil, gear oil, ATF, coolant additives, or cleaning solvents.
Immediate vibration after installation: often tied to a mount that is too stiff, dimensionally off, or installed under preload.
Bracket cracking or hole elongation: may indicate overload, poor stamping, missing washers, incorrect bolt grade, or weld weakness.
Not every failed mount means poor manufacturing. That is why failure mode analysis matters before changing supplier or issuing a corrective action. If the same damage appears across multiple vehicles, buyers should ask whether the part is being loaded in the correct orientation and whether the assembled height matches the approved drawing. If the damage is fluid-related, the leak source has to be corrected first; replacing the mount alone usually creates repeat claims.
Specification checks that prevent repeat returns
For sourcing, “OE quality” is too vague. A controlled transmission mount program should spell out the characteristics that actually change performance.
Dimensional control: bolt-hole position, bracket flatness, locating pin position, and installed height checked against approved drawings or samples.
Bond integrity: surface preparation, adhesive process, peel or tear inspection, and acceptable failure mode.
Corrosion protection: coating thickness, edge coverage, and salt-spray requirement appropriate to the target market.
Traceability: batch code, production date, tool or cavity identification, and packaging label control.
Fitment validation: sample assembly checks or vehicle checks where available, including clearance and NVH observations.
Buyers should also define the acceptance plan. How many samples are measured per lot? Which dimensions are critical? What happens when one characteristic drifts? If that is not written down, the supplier and the buyer will argue about the same part for different reasons.
A sourcing comparison: generic replacement vs controlled program
A generic replacement strategy looks cheaper until returns start. A controlled program costs more up front, but it gives the distributor fewer fitment disputes and cleaner warranty data.
Application-specific validation, packaging control
Higher engineering and tooling effort
</tr></thead><tbody> </tbody></table>For importers and repair chains, the decision usually comes down to volume and claim exposure. Low-volume applications can tolerate more manual review. High-volume SKUs need tighter controls because one bad batch can affect many outlets quickly. If the supplier can quote a standard lead time, confirm whether it excludes packaging print approval or lab-test completion.
Commercial controls that reduce claims
The commercial cost of a mount complaint is often higher than the part value. A returned part can trigger labour reimbursement, negative installer feedback, and catalogue distrust.
Recommended controls:
Control point
Why it matters
Evidence to request
Application data review
Prevents wrong fitment across similar platforms
Engine/gearbox matrix, cross-reference list
Sample approval
Confirms dimensions before bulk shipment
Dimensional report, photos, material summary
Rubber batch control
Reduces variation in stiffness and durability
Compound batch record, hardness results
Bonding process control
Prevents rubber-to-metal separation
Surface treatment record, cure parameters
Packaging validation
Avoids bracket deformation and mixed parts
Carton drop check, label approval
Claim feedback loop
Identifies real field failure trends
Batch traceability, installation evidence
</tr></thead><tbody> </tbody></table>Driventus supports distributors with application review, drawings, and samples through our catalog and technical consultation. Buyers can also align quality expectations with our quality system and request custom manufacturing for special programs.
When replacement is justified
Replacement is normally required when rubber is torn, separated from the metal insert, swollen by oil, permanently compressed, or leaking fluid in a hydraulic design. Replacement is also justified when movement exceeds the vehicle service limit, even if the rubber is not fully detached.
If a mount shows more than about 25% compression set versus the approved sample, or if a hydraulic mount has visible fluid loss, the part should be treated as failed rather than serviceable. For buyers, the key is to tie the decision to a measurable reference point. The mount should be judged against the approved sample, drawing, or service limit, not only against visual appearance.
Frequently asked questions
Yes. Excessive gearbox movement can stress exhaust joints, driveshafts, shift cables, hoses, and adjacent engine mounts. It can also create abnormal noise under torque reversal. The full mounting system should be inspected before replacement. In severe cases, repeated movement can also fatigue brackets or elongate bolt holes, which raises repair cost beyond the mount itself.
Not always. Replacement should follow inspection results, mileage, and vehicle condition. However, if one mount has collapsed from ageing or fluid contamination, adjacent mounts should be checked because load transfer can accelerate wear. As a rule, the buyer or workshop should replace as a set only when the inspection shows similar ageing, matching mileage, or multiple mounts near the end of service life.
Provide application list, OE cross-reference conventions if available, samples or drawings, annual volume, packaging needs, target markets, and any known field complaints. This allows dimensional, material, and fitment checks before production approval. It also lets the supplier quote MOQ, tooling lead time, and sample pricing against the correct specification instead of guessing from a catalog photo.
For transmission mount sourcing, fitment review, or application-specific samples, send your requirements and target volumes through our contact page: /contact.html