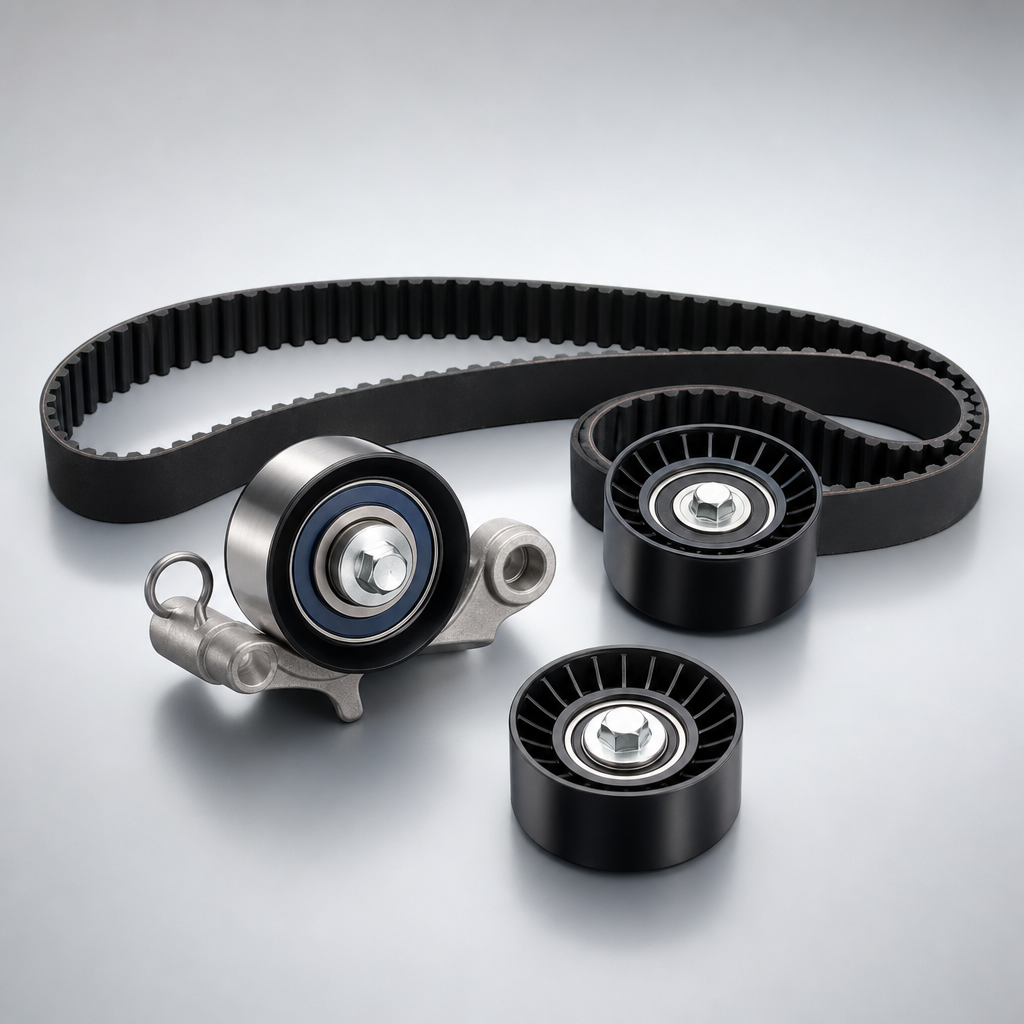
Timing Belt Symptoms of Failure: What Buyers Should Check
Timing belt complaints are easy to misread. A hard start can look like fuel delivery. A misfire can look electronic. A noise behind the timing cover can be dismissed as accessory drive trouble. For repair chains, distributors, and fleet-focused buyers, that guesswork is expensive, because a missed belt issue can escalate into bent valves, piston contact, engine downtime, and avoidable warranty claims.
This article breaks down timing belt symptoms of failure through a more practical lens: what the symptom suggests, what usually goes wrong next, and what should be verified before parts are ordered. It also looks at replacement decisions and the sourcing checks that matter when buying aftermarket timing belt kits. For procurement teams, the job is not just identifying a failed belt. It is making sure tooth count, pitch, width, contamination limits, kit scope, MOQ, ex-works pricing, and lead-time planning all support a repair that stays fixed. Driventus is an independent aftermarket manufacturer; brand names are referenced for fitment only.
Read the symptom first, then decide the risk
A timing belt problem usually leaves a pattern. The useful question is not simply, “Is the belt bad?” It is, “Does this symptom point to immediate stop-use risk, near-term replacement, or a broader system failure involving tensioners, idlers, seals, or the water pump?”
Symptom
Likely cause
Immediate risk
Recommended check
Hard starting or no start
Camshaft timing out of phase, stripped or skipped teeth
Engine may not run, or may run poorly enough to cause further damage
Verify timing marks, inspect tooth condition, and confirm cam/crank offset before cranking repeatedly
Rough idle or misfire
Belt stretch, tension loss, skipped tooth, weak tensioner
Progressive timing deviation and unstable combustion
Check tensioner operation, belt tracking, pulley wear, and correlation data
Loss of power
Cam timing advanced or retarded from specification
Reduced combustion efficiency and drivability complaints
Confirm cam/crank synchronisation and compare with known-good values
Ticking, slapping, or rubbing noise from timing cover area
Low belt tension, worn idler, misalignment, bearing deterioration
Belt jump, edge wear, or accelerated component failure
Remove cover and inspect full belt path, especially idler and tensioner bearings
Engine warning light with correlation fault
Cam/crank timing mismatch
Intermittent running issue or no-start condition
Scan for timing-related DTCs and compare live data against service specs
Visible cracks, glazing, frayed edges, or missing teeth
Replace belt and inspect all driven components, seals, and cover condition
</tr></thead><tbody> </tbody></table>Some signs move the job out of diagnosis and into mandatory replacement immediately. Missing teeth, exposed cord, and oil saturation are the clearest examples. On an interference engine, even one skipped tooth can be enough to turn a running complaint into internal engine damage.
That is why fitment checks matter after diagnosis. The replacement belt still has to match OE-equivalent geometry exactly: tooth profile, tooth count, width, and pitch. A small mismatch can change meshing, noise, and load distribution, so approval should never rest on a reference number alone.
How belts usually fail before they actually break
Most timing belts do not go from healthy to broken in one step. The final event can feel sudden, but the deterioration usually starts earlier through age, thermal cycling, contamination, pulley wear, or incorrect tension.
Common failure modes include:
Tooth shear caused by overload, seized driven components, poor belt engagement, or incorrect installation tension
Back-side cracking from age, repeated flexing, ozone exposure, or high operating temperatures
Edge fray caused by pulley misalignment, flange damage, or unstable tracking
Glazing and hardening linked to heat exposure, material ageing, and long service intervals
Oil or coolant contamination that reduces rubber durability, weakens bonding, and changes friction behaviour
Failure mode 1: contamination
Oil from camshaft or crankshaft seals can shorten belt life quickly. Coolant from a water pump in the same drive path can do the same. Replacing the belt without fixing the leak is not a finished repair; it is a repeat failure waiting to happen. For buyers reviewing claims, contamination should trigger root-cause review before the belt itself is treated as the origin of the problem.
Failure mode 2: weak system components
A belt depends on the rest of the drive system. Worn idlers, weak tensioners, damaged sprockets, poor guides, or a failing water pump can push a new belt off track long before its expected service life. This is where belt-only purchasing can look cheaper on paper and cost more in the field.
Failure mode 3: poor installation history
Not every early failure is material-related. Incorrect tension setting, reused worn hardware, missed alignment steps, or poor prior repair work can all create premature failure conditions. If a belt fails far ahead of the normal interval, installation history deserves the same scrutiny as the product.
For sourcing teams, this is the point where process control separates credible supply from generic catalogue coverage. A serious manufacturer should be able to explain how pitch, width, tooth form, cord placement, and curing are controlled by batch, and how those records connect to lot traceability if field returns occur.
A shop-floor diagnosis sequence that reduces guesswork
When a vehicle arrives with suspected timing-related issues, the inspection should follow a fixed sequence. That makes workshop decisions more repeatable and gives buyers cleaner failure data for internal quality review, warranty analysis, and supplier discussions.
Start with the intake facts: mileage, age in service, engine code, customer complaint, DTCs, visible leaks, and whether the last service used a belt-only replacement or a full kit.
#### Step 1: inspect what can be seen
Remove covers where practical and inspect the full accessible belt width rather than only the exposed outer edge
Look for transverse cracks, missing teeth, polished tooth fabric, glazing, and edge wear
Check belt tracking on each pulley; the belt should not ride heavily against a flange or show signs of lateral instability
Rotate the engine manually where appropriate and observe tension consistency through the belt path
Inspect tensioner arm position, spring force, and damping behaviour if applicable
Check idler and water pump bearings for roughness, noise, or axial/radial play
Inspect for oil mist, coolant staining, rubber debris, or dust accumulation inside the cover
Review related components for evidence of misalignment, wobble, or fastener issues
#### Step 2: confirm timing relationship
Compare camshaft and crankshaft timing marks at the specified service position
Use scan data for cam/crank correlation where the vehicle platform supports it
Note any DTCs related to timing correlation, variable valve timing plausibility, or repeated misfire patterns
Where relevant, compare observed data with known-good values for that engine family
#### Step 3: apply reject thresholds A useful checklist needs hard stop points. Any missing tooth, visible cord exposure, persistent off-center tracking, bearing roughness felt by hand, coolant residue inside the cover, or timing marks that no longer align after manual rotation should move the job to replacement.
If the belt has skipped, assume a wider system issue until proven otherwise. Limited visible belt wear does not rule out a seized pulley, a defective tensioner, contamination, improper previous installation, or abnormal load from another driven component.
For multi-site service networks, standardising this process improves claim consistency and RFQ quality. It also helps buyers compare products in our catalog using exact kit contents, dimensional controls, and application notes instead of treating all timing belt kits as interchangeable.
When delay becomes the expensive option
Some decisions are straightforward. Replacement should generally not be delayed when any of the following are found:
Missing, chipped, or damaged teeth
Cracks across the belt backing
Frayed edges or visible cord exposure
Oil or coolant contamination
Noise from tensioner or idler bearings
Timing marks no longer align correctly
Unknown service history beyond the vehicle maker's interval
Time matters as much as mileage. Rubber compounds and reinforcement materials degrade through heat, ozone, and repeated flexing, even when mileage looks modest. That is why procurement teams should pay attention not only to fitment, but also to stock rotation, packaging integrity, and traceability. Poor storage can shorten usable shelf life before the belt ever reaches the engine.
The same logic applies to supplier control. A manufacturer working to IATF 16949:2016 and ISO 9001:2015 should be able to provide process control records, incoming material inspection, lot traceability, corrective action procedures, and non-conformance handling. For some export programmes, material compliance documentation aligned with REACH (EC) No 1907/2006 may also be required.
Commercially, urgent replacement categories should shape stocking policy. High-volume fleet applications are often better held locally with low-MOQ replenishment. Slower-moving references may fit consolidated ordering better. Buyers also need to compare belt-only SKUs with full-kit pricing by total installed cost, because an unreplaced tensioner or pump can erase any unit-price saving.
Lead time matters too. Stocked fast movers may ship quickly, while private-label or non-stock references can take weeks once packaging approval, artwork, and kit assembly are included. MOQ often shifts with the supply model: plain-box parts may support smaller trial orders, while custom-labelled programmes usually need larger batch volumes.
On interference engines, the case for quick action is stronger still. Once timing belt symptoms of failure are confirmed, postponing repair can turn a manageable service job into a major engine rebuild.
Driventus maintains a documented quality system and supports programme-specific requirements through custom manufacturing for private-label and OE-equivalent aftermarket supply.
Comparing aftermarket timing belt suppliers beyond catalogue coverage
A timing belt programme should not be judged on fitment lookup alone. For distributors, importers, repair chains, and fleet service groups, the better comparison is this: who controls dimensions, validates materials, manages application data accurately, and supplies the right kit scope for the repair?
A practical supplier assessment should cover:
Tooth profile accuracy against application requirements
Length and pitch tolerance control across production batches
Cord material and rubber compound suitability for thermal load, flex fatigue, and long service intervals
Bond strength between tooth fabric, elastomer, and tensile member
Kit logic: whether tensioners, idlers, seals, and water pump are bundled where appropriate
Packaging and traceability for stock handling, batch control, and warranty tracking
Application data management to reduce catalogue error and returns
Validation capability for endurance, thermal ageing, and tooth shear performance
The key is to ask for measurable answers. Buyers should request tooth count confirmation, nominal width and pitch by application, production tolerance limits, batch identification format, validation frequency, and clarity on whether each kit component is sourced under one control plan or assembled from mixed suppliers. If those answers stay vague, warranty exposure rises.
Cross-reference discipline matters as well. If an enquiry uses an OE format such as OE 06A107065, treat it as a fitment index only. It still needs verification against dimensions, tooth profile, tooth count, and vehicle application data before order release. It is not proof of vehicle manufacturer approval.
Commercial comparison should happen at the same time as the technical review. Buyers usually want clear answers on:
MOQ by reference and by private-label programme
Price breaks by carton, pallet, or annual volume
Lead time for stocked versus made-to-order kits
Cost difference between belt-only and complete-kit supply
Label, barcode, and packaging approval process
Return and claim handling by lot number
For larger programmes, it is worth digging deeper into tensile performance, tooth shear resistance, accelerated ageing, support-component validation, and endurance standards used in internal control plans. That is how buyers distinguish broad catalogue coverage from durable programme reliability.
If you are reviewing line extension options, see our catalog.
Why repeat failures happen after a new belt is fitted
A new belt does not guarantee a successful repair. Many repeat claims trace back to what stayed wrong around the belt rather than the belt itself.
Post-installation risk can be reduced through the following controls:
Replace tensioners and idlers with the belt where the application requires it
Replace the water pump if it shares the timing drive and service practice supports it
Correct oil and coolant leaks before fitting new components
Use the specified locking and timing tools for the engine family
Follow installation torque values, alignment procedures, and belt tension instructions
Rotate the engine manually after installation and re-check timing marks
Record batch traceability on the repair order
Confirm that covers, seals, and ancillary components are refitted correctly to avoid contamination or misalignment
For multi-location workshops, a standard installation protocol reduces variation between sites and makes quality issues easier to isolate. For distributors, complete kits can reduce mismatch rates, cut missed companion-part replacement, and improve first-time repair completion.
A useful control point is installer documentation. Logging engine code, installed kit number, lot number, replaced companion parts, leak correction status, and final timing confirmation creates a clean trail for warranty review. It also helps procurement teams separate product defects from installation variance.
When repeat failures do happen, the review should cover contamination source, tensioner condition, installation method, application accuracy, and service interval history before the belt alone is blamed. If claims cluster around one SKU, buyers should also check for lot-specific issues, packaging changes, supplier subcomponent changes, or catalogue mismatch.
If you need application review, supply planning, or private-label support for timing components and related [/products/engine-components.html], Driventus can support technical discussions and sourcing requests. Driventus is an independent aftermarket manufacturer; brand names are referenced for fitment only.
Frequently asked questions
Yes. Some belts show visible cracking, tooth wear, or internal damage with little or no audible warning. That is why service interval control and visual inspection are important, especially on interference engines where a quiet failure can still cause severe internal damage. Buyers should not rely on noise complaints alone when setting preventive replacement policy.
In most applications, yes. A new belt running with a worn tensioner or rough idler can lose alignment or tension quickly, which increases the risk of early failure. For procurement teams, complete kits are often more reliable than sourcing the belt alone because they simplify ordering, reduce missed companion-part replacement, and improve installed-cost control.
In practice, usually yes. Oil can degrade belt materials, weaken durability, and alter friction behaviour. The leak source should be repaired first, then the contaminated belt and any affected drive components should be replaced. From a claims perspective, documenting the contamination source is also important before evaluating any warranty responsibility.
If you are reviewing timing belt supply for distribution, repair networks, or private-label programmes, Driventus can provide application support, kit-scope guidance, and production information including MOQ, lead-time, and packaging options. To discuss your requirement, please [request a quote](/contact.html).