Learning how to diagnose valve cover oil leak complaints correctly starts with one rule: visible oil is evidence, not proof. On high-mileage petrol and diesel engines, residue may start at the valve cover gasket, but it may also come from the cam carrier, upper timing cover, PCV system, spark plug tube seals, cam sensor area, or even an oil-fill spill. Heat, fan wash, and road airflow can move oil 150-300 mm from the true source, especially after sustained highway driving.
For repair chains, importers, distributors, and technical buyers, that distinction matters commercially. Replacing a gasket before confirming cover condition, crankcase pressure, fastener load, or cylinder-head rail quality can add 0.8-2.5 labor hours, inflate parts returns, and create repeat claims that get blamed on the gasket supplier. Good diagnosis separates normal seal aging from warped covers, blocked ventilation, poor prior installation, or the wrong sealing parts.
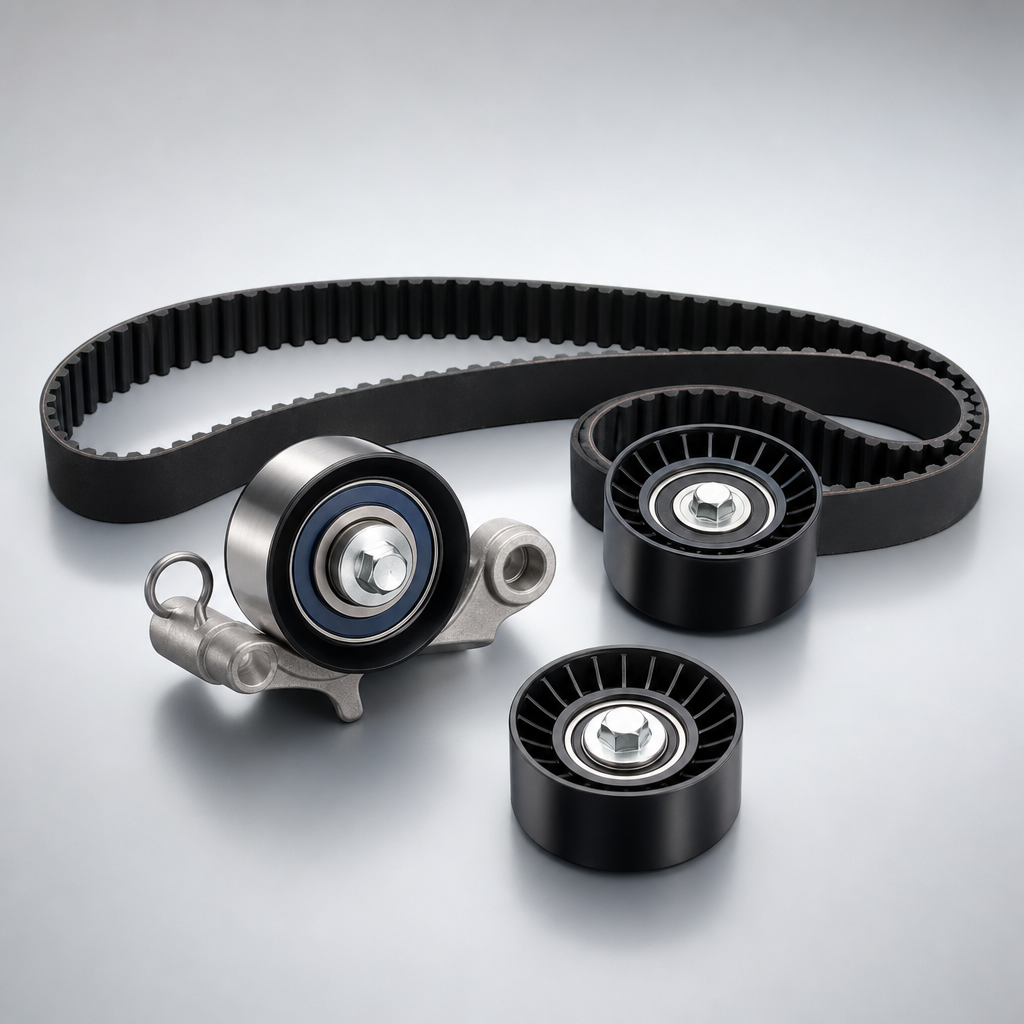
This article explains how to diagnose valve cover oil leak cases with a practical workflow: read the symptom pattern, clean and trace the source, pressure-check the system around it, and decide whether the fix is a gasket, related hardware, PCV service, or a complete cover. It also shows what B2B buyers should verify when sourcing valve cover gaskets or full cover assemblies, including MOQ, lead time, validation, and traceability. Driventus is an independent aftermarket manufacturer; brand names and OE references are used for fitment identification only.
Start with the leak pattern, not the assumption
If you want to know how to diagnose valve cover oil leak complaints properly, first classify what you are seeing. Oil around the top of the engine is a pattern to read, not a verdict to accept.
Before removing parts, record:
where fresh oil first appears
whether it reaches hot exhaust parts
how fast it returns after cleaning
whether it changes after warm-up, load, or a road test
A useful shop note includes mileage, engine temperature, first wet point, distance driven since cleaning, and whether the condition is light sweating, a visible bead, or an active drip.
Common patterns in the field:
Wetness along the valve cover perimeter: often points to gasket compression set, aged elastomer, uneven clamp load, or fastener issues
Oil in spark plug wells: usually indicates failed spark plug tube seals or damage to the cover's integrated seal carrier
Burning oil smell after warm-up: often means oil is reaching the exhaust manifold, turbo heat shield, or nearby shielding once metal temperatures rise above roughly 180-250 C
Leak appears after sustained highway driving: often suggests elevated crankcase pressure from restricted PCV flow or excessive blow-by
Oil tracking down the rear of the engine: can be misread as a valve cover leak when the actual source is a cam plug, vacuum pump, cam carrier, or upper timing cover
Dust sticking to a damp edge with no drip: may be minor sweating rather than a repair-immediate leak
Fresh oil shortly after recent gasket service: often traces back to poor surface prep, pinched gasket sections, reused grommets, wrong torque sequence, or missed cover distortion
A simple triage table helps:
Symptom pattern
Most likely explanation
Best next check
Even seepage around the full perimeter
Aged gasket or low clamp load
Clean, heat-cycle, and reinspect
Local leak at one corner or radius
Surface damage or missing sealant at a transition
Inspect corner joints and timing-cover intersections
Oil in plug wells
Tube seal failure
Remove coils and inspect wells directly
Leak after recent repair
Installation error or reused hardware
Review repair history and fastener condition
Repeat leak after gasket replacement
Warped cover, PCV restriction, or pressure issue
Check cover flatness and ventilation function
Oil below upper timing area
Adjacent component leak
Confirm the highest fresh wet point
</tr></thead><tbody> </tbody></table>In warranty or fleet work, "valve cover leak" is too vague. Ask for a source code: perimeter gasket, tube seal, bolt grommet, PCV overpressure, cover crack, or adjacent upper-engine leak. That one change makes later root-cause review much more useful.
A step-by-step workflow to confirm the true source
The core of how to diagnose valve cover oil leak cases is finding the first point of escape, not the dirtiest area. Oil runs downhill. Airflow pushes it sideways. Heat spreads it. Diagnosis gets easier only after you remove old residue from the picture.
Allocate about 20-40 minutes on accessible inline engines and 45-90 minutes where intake ducting, rear banks, or covers block the view.
1. Clean the whole upper leak area
Use a suitable non-residue cleaner on the valve cover, cylinder-head rail, nearby timing cover joints, oil filler neck, ignition coil area, and PCV connections. Let the area dry for 5-10 minutes, or use low-pressure air where workshop procedure allows.
Old oil makes old leaks look active. Solvent trapped in the rail can also distort what you see next.
2. Inspect under strong light before running the engine
Check:
valve cover perimeter
bolt grommets and sleeves
spark plug wells
PCV ports and breather hose connections
cam sensor area
filler cap sealing area
upper timing cover corners
A 500-1,000 lumen lamp, inspection mirror, or borescope is worth using on transverse engines and firewall-side banks. Mark suspected points with a paint pen or photos.
3. Run a controlled heat cycle
Bring the engine to operating temperature. As a general non-OE-specific shop method, many technicians idle until coolant reaches 85-95 C, then hold 2,000-2,500 rpm briefly a few times where safe and permitted. Some leaks do not show until the cover, gasket, and head have expanded.
Reinspect immediately after shutdown. Fresh traces often appear then, before they spread.
4. Use UV dye only when tracing stays inconclusive
If shop procedure and lubricant rules allow it, add approved fluorescent dye and inspect after a short run with a UV lamp. Typical treatment rates are around 7.5-15 ml per 4-6 L of oil, but the dye maker's instructions and vehicle guidance should control.
Dye is useful when oil from a higher component contaminates the valve cover rail. It is not a substitute for cleaning and visual inspection.
5. Account for air-flow spread
Cooling fans and road air can push oil rearward, downward, or across cast ribs and brackets. On inclined engines, a low corner may pool oil before it drips somewhere misleading. If the complaint appears only after driving, road-test 5-10 km and inspect within 3 minutes of shutdown.
6. Record the evidence before disassembly
Photograph:
the cleaned area
the first fresh oil point
any crack, warped section, collapsed hose, or oil-filled well
the general engine location and odometer
That record helps warranty review, repeatability, and purchasing analysis.
A complete diagnosis should answer four questions:
Is the leak from the perimeter gasket, tube seals, bolt grommets, or another upper-engine joint?
Is the failure driven by seal aging, surface damage, cover distortion, installation error, or pressure build-up?
Are related PCV parts, hoses, baffles, or diaphragms serviceable?
Will a gasket alone solve the complaint, or is a wider repair required?
For businesses planning service-part coverage in our catalog, that distinction matters. On applications with more than 3-5% repeat complaints, compare diagnosis photos, installation records, and batch history before treating the gasket as the only suspect.
Failure modes that make a new gasket leak again
Many repeat jobs happen because the visible leak was repaired but the underlying cause was left in place. The gasket gets blamed first because it is visible and cheap. In practice, the leak often belongs to the system around it.
When a top-end leak returns, inspect the cover, gasket, head rail, fasteners, ventilation path, oil condition, and prior workmanship together.
Crankcase ventilation restriction
A blocked or degraded PCV valve, separator, diaphragm, or hose can raise crankcase pressure and push oil past a gasket that would otherwise seal. This is common on turbo engines, high-blow-by engines, long-drain applications, and covers with integrated PCV functions.
Checks:
Inspect hoses for collapse, sludge, cracking, hardening, or wrong routing
Verify one-way valve function where applicable
Check integrated diaphragm or separator operation per service information
Look for excessive vapor pulsing at the oil filler opening using the approved method
Review oil consumption, misfire history, and blow-by indicators
Measure crankcase vacuum or pressure if tooling is available; many healthy petrol engines show slight vacuum at idle, while positive pressure warrants further investigation
Valve cover distortion
Stamped steel covers can pull up around bolt holes if over-tightened. Polymer covers can warp from heat aging, chemical exposure, or failure of integrated PCV and baffle features. A fresh gasket cannot compensate for an unstable sealing rail.
As a practical screening rule, local rail deviation above about 0.20-0.30 mm over a short span deserves closer review. Visible bolt-hole pull-up on steel covers also matters.
Inspect for:
bolt-hole distortion
cracks at breather fittings, PCV ports, or mounting bosses
poor rail flatness against a straightedge where allowed
damaged or detached integrated seals
pry damage from earlier removal attempts
Fastener and grommet problems
Some engines rely on shouldered bolts, sleeves, spacers, and elastic grommets to control clamp load. Reused flattened grommets can reduce sealing force even when the torque reading looks correct. Incorrect bolts or missing sleeves can either crush the gasket or leave sections under-clamped.
Typical valve cover fastener torque is often only 6-12 Nm. Small errors matter.
Cylinder-head rail damage
Nicks, corrosion, old sealant residue, abrasive-cleaning marks, and scratches at joint transitions create local leak paths. Pay close attention around half-moon sections, cam cap joints, timing-cover intersections, and corners where the manufacturer specifies a local bead.
Avoid rotary abrasive discs on aluminum rails. Plastic scrapers and lint-free wiping are usually safer.
Installation or material mismatch
Wrong gasket profile, poor groove retention, too much sealant, oily surfaces during assembly, or an elastomer unsuited to heat and oil exposure can all cause early leakage.
For distributors and private-label programs, these cases often look like warranty noise until returns are checked against application, batch, and installation details. Common gasket materials include ACM, FKM, HNBR, NBR, and silicone; the right choice depends on oil chemistry, temperature, compression-set target, and cover design.
When supplying private-label or application-specific sealing parts, dimensional repeatability and material consistency should sit inside a documented quality system aligned with IATF 16949:2016 and ISO 9001:2015. Buyers should define control points for section height, section width, corner fill, hardness, and visual defects instead of relying on sample fit alone.
Repair decision: gasket only, gasket kit, PCV service, or full cover
Once the source is confirmed, the next question is economic as much as technical: what repair closes the complaint without creating a comeback?
A gasket-only job may be the cheapest line on the invoice. It is rarely the cheapest outcome if the cover is warped, the tube seals are already leaking, or the PCV system is over-pressurizing the top end.
Use this decision framework:
Replace the gasket only when the cover is flat, crack-free, the groove is intact, and the leak clearly comes from seal aging or compression set
Replace the gasket plus tube seals and grommets when plug wells contain oil or clamp-load hardware is flattened, hardened, swollen, or split
Service or replace PCV-related components when there is restricted ventilation, diaphragm failure, separator blockage, or hose collapse
Replace the complete cover when you find warpage, cracked polymer, damaged baffles, stripped mounting points, failed integrated PCV features, or non-serviceable tube seals
Investigate overall engine condition when excessive blow-by or repeat pressure-related leakage returns after correct repair
Before refit, verify:
the mating surfaces are clean, dry, and free of old material
sealant is used only where the engine maker specifies it, typically at local joint transitions or corner radii
bolt holes, sleeves, and grommets are not distorted or oil-swollen
the gasket is fully seated in the groove with no twist or lifted corner
fasteners are tightened in the correct sequence and to specification
PCV hoses and components function correctly after assembly
plug wells and coil boots are cleaned if oil was present
For imported aftermarket programs, buyers should ask for validation evidence such as:
elastomer material conformity records, including compound code and hardness target
compression-set, oil-resistance, or heat-aging data where available
dimensional inspection records for groove fit, section profile, and sealing features
batch traceability under IATF 16949:2016 and ISO 9001:2015
chemical compliance declarations where relevant, including REACH (EC) No 1907/2006
packaging validation showing gaskets are not folded, crushed, or permanently deformed in transit
Commercially, separate stocked aftermarket items from engineered private-label programs. Existing catalog references may be available from 100-300 sets per order with 2-6 week lead times depending on stock and packaging. New tooling or compound validation may require 500-2,000 sets MOQ, 25-45 days for tooling and samples, and 30-60 days for mass production after approval.
Where an application uses an OE-style fitment code such as OE 11251..., disciplined cross-referencing reduces misbuild risk. For private-label lines or multi-application kit ranges, our team can support custom manufacturing for sealing and engine component programs.
Post-repair checks that stop repeat leak comebacks
A valve cover repair is not finished when the bolts are torqued. It is finished when the engine proves the leak is gone.
This is where many otherwise correct jobs fail. Rear edges stay hidden, plug wells are not rechecked, oil remains on heat shields, or a kinked PCV hose turns a good repair into the same complaint a week later.
Build these checks into the job card:
Run the engine to operating temperature and reinspect the full perimeter, especially rear corners and timing-cover intersections
Check plug wells again before reinstalling cosmetic covers or intake trim on engines with hidden coils
Remove oil residue from exhaust shields so leftover smoke is not mistaken for an active leak
Verify crankcase ventilation function after assembly; hoses are often misrouted or left partially disconnected
Reinspect after a short road test when the original complaint occurred mainly under load
Look above the valve cover rail before release, because a higher leak can contaminate the repaired area
Document torque method and installed parts for fleet, warranty, or repeat-failure analysis
For chain workshops and fleet networks, it helps to standardize a top-end leak inspection sheet covering:
initial symptom and mileage
cleaned inspection area
source confirmation
related PCV condition
cover condition and rail findings
parts replaced, including brand and lot code
torque method used, with tool ID or calibration date where required
final leak-free verification after heat cycle and road test
follow-up finding if the vehicle returns
A practical release standard is simple: no fresh oil bead after one heat cycle, no oil left in cleaned plug wells, no active drip within 10 minutes of shutdown, no oil smoke from shielding, and no kinked or disconnected PCV hose.
On high-risk applications, a 500-1,000 km recheck for fleet vehicles is reasonable.
This level of process control improves warranty tracking and helps purchasing teams identify whether failures cluster by engine code, installation method, production lot, or packaging date. If you are reviewing engine sealing lines alongside related hard parts, see our catalog and broader our catalog for program planning.
Supplier questions that matter after the diagnosis is correct
Even in an article about how to diagnose valve cover oil leak complaints, supplier quality still matters. A technician can identify the source accurately and still get a repeat leak if the replacement gasket has poor dimensional control, unstable material properties, or weak packaging.
Procurement teams should turn supplier claims into measurable requirements.
Ask suppliers for:
application list and cross-reference method
OE reference handling and supersession control
elastomer type and operating temperature range
oil-resistance and heat-aging validation where available
Shore hardness control window, commonly +/-5 Shore A unless the drawing requires tighter limits
critical dimensions for sealing height, section width, corner fill, and groove fit, with gauge method defined
batch traceability on bag, carton, and shipping documents
incoming material inspection method
final dimensional inspection sampling plan, such as AQL or agreed critical-feature inspection rate
packaging controls that prevent deformation in transit
field-return analysis process
corrective action process when leakage patterns appear in service
For B2B programs, sealing consistency depends on process stability as much as nominal design. A supplier working under IATF 16949:2016 and ISO 9001:2015 should be able to explain document control, material traceability, non-conformance handling, corrective action flow, and how engineering feedback prevents repeat defects.
Where program risk justifies it, ask for a PPAP-style file or equivalent: drawing, material record, control plan, dimensional report, trial-fit notes, and packaging specification.
Procurement teams should also compare field returns against engine application, installation conditions, batch records, and packaging state. That helps separate true supplier-quality issues from blocked PCV systems, warped covers, incorrect torque, or damaged mating surfaces.
MOQ, price, and lead time should be treated as engineering variables too. A low MOQ of 50-100 sets may be possible for stocked references, but it often limits packaging customization and price leverage. Private-label cartons, barcode labels, or kit changes commonly move practical MOQ toward 300-1,000 sets per reference. New molded gasket development may require tooling cost, 2-3 sample rounds, 20-40 sample sets for fitment checks, and roughly 8-14 weeks from drawing confirmation to first shipment.
If you are assessing leakage trends across a product range, Driventus can review fitment patterns and supply options through our quality system and engineering support. You can also request a quote for aftermarket or OEM-related programs.
Frequently asked questions
Yes. Oil from the upper timing cover, cam carrier, cam sensor area, or cam plug can spread across the valve cover rail and appear to come from the gasket. Clean the area fully, run a heat cycle, and identify the highest fresh oil point before replacing parts.
No. If the cover is flat, crack-free, and its integrated functions are intact, a gasket set may be sufficient. Replace the complete cover when there is warpage, cracking, damaged baffles, stripped mounting points, or failed integrated PCV or tube-seal features.
Common causes include incorrect torque sequence, reused bolt grommets, unclean sealing surfaces, cover distortion, excess sealant, wrong gasket profile, and unresolved crankcase pressure problems. Repeat leakage usually means the root cause was not confirmed before the first repair.
If you are reviewing valve cover gasket supply, return rates, or application coverage, Driventus can support your evaluation with technical and manufacturing input. To discuss your programme, visit /contact.html