A suspected front crankshaft seal leak is easy to misread. Oil at the front of the engine can come from the timing cover, camshaft seals, valve cover gasket, oil pump housing, front cover joints, or residue carried forward by airflow. For buyers managing repair programmes, workshop networks, or technical claims, the job is not to replace the seal quickly. It is to prove the leak path before parts are ordered and responsibility is assigned. Weak diagnosis drives labour cost up, creates avoidable returns, and can make a correct replacement part look like the problem. This guide explains how to diagnose front crank seal leak conditions in a more practical way: what evidence matters first, what usually causes false calls, how to inspect the engine in sequence, and what to confirm before replacement. It is written for distributors, sourcing teams, and service organisations reviewing failure reports and field feedback. Driventus is an independent aftermarket manufacturer; brand names and OE references are used for identification and fitment context only.
Start with the leak pattern, not the part name
A front crankshaft seal sits where the crank nose passes through the front cover or oil pump housing. When it leaks, the rotating pulley or harmonic damper tends to grab the oil and spread it. That matters because the pattern is often more revealing than the amount.
At idle, crankshaft speed is typically 650 to 900 rpm. At a light raised-speed inspection it is often 1,500 to 2,000 rpm. Even a small leak can become a wide mist or ring at those speeds, because the damper surface can move a thin oil film several hundred millimetres across the front cover, lower shield, and belt path. Static gasket leaks usually behave differently.
The signs that most often point toward the front crank seal are:
Oil accumulation behind the crank pulley or around the lower timing cover
A circular oil spray pattern in the pulley area
Oil on the auxiliary belt, belt tensioner, idlers, or lower splash shield
Burning oil smell if oil reaches nearby hot surfaces
Intermittent belt slip, noise, or reduced belt grip after contamination
Progressive oil loss with no clear leak at the oil pan gasket
A fresh wet ring at the seal exit point after 3 to 10 minutes of idle or a short 5 to 15 km road test
Those signs are useful, but they are not proof on their own. A front main seal leak often shows itself most clearly with the engine running. A timing cover or valve cover leak, by contrast, usually leaves a visible track from a fixed joint line.
Symptom
More consistent with front crank seal
More consistent with other leak sources
Oil thrown radially around the pulley area
Yes
Less common
Oil begins higher on the cylinder head or upper timing cover
No
Yes
Belt face or pulley grooves visibly oily
Yes
Possible
Leak appears mainly with the engine running
Yes
Often possible
Oil seep follows a stationary joint line
Less common
Yes
Fresh wet ring forms around crank hub within 5 to 10 minutes
Yes
Less common
</tr></thead><tbody> </tbody></table>For buyers and warranty teams, this first distinction affects the whole cost picture. Replacing a seal in a simple layout may mean 1.0 to 2.5 labour hours. On a crowded diesel front end, it may mean 4.0 to 8.0 hours. If the diagnosis is wrong, the labour exposure grows much faster than the seal cost.
The usual failure modes before you blame the seal
A leaking front crankshaft seal is not automatically a bad seal. Lip seals depend on shaft condition, bore geometry, pressure control, correct installation, and compatible material. If one of those is wrong, a new seal can leak almost immediately even when the part itself is within specification.
On many passenger-vehicle applications, the seal is a low-cost item, often roughly USD 1.50 to USD 6.00 ex-works depending on size, material, and volume. Access labour can exceed that by 10 to 40 times. That is why root cause matters more than unit price.
Primary causes
1. Worn crankshaft sealing surface A groove, corrosion patch, polishing band, or damaged wear sleeve contact area can prevent the lip from controlling oil. As a working rule, grooves around 0.05 mm already deserve attention. Wear near or above 0.10 to 0.15 mm often leads to repeat leakage unless a sleeve is fitted or the lip runs on a different contact path.
2. Excessive crankcase pressure A blocked, restricted, or incorrectly routed PCV system can force oil past the lip seal, especially under load. On a healthy light-duty engine, slight vacuum or near-neutral crankcase pressure is typical at idle. Positive pressure at steady idle, or poor recovery after snap throttle, points toward ventilation restriction or elevated blow-by.
3. Misalignment or housing damage Distortion of the front cover or oil pump housing changes lip loading. Previous removal damage can do the same. Small nicks at the bore lead-in or puller marks are enough to compromise the seal outer diameter.
4. Incorrect installation depth or angle If the seal sits too deep, too shallow, or not square to the bore, the lip may run on the wrong shaft area or distort under load. Even 0.3 to 0.5 mm of depth error can move the contact path onto an old wear groove.
5. Pulley or damper runout Excessive radial movement at the crank pulley or harmonic damper can disturb the sealing path and accelerate lip wear. Runout in the 0.10 to 0.20 mm range may already matter on sensitive applications; compare with the vehicle maker's limit.
6. Material incompatibility or heat ageing Seal compound must match oil chemistry and operating temperature. NBR is common for standard ranges. ACM, HNBR, or FKM are more suitable where front-cover temperatures are higher. Typical continuous service capability differs meaningfully: NBR around -40 C to 100 or 120 C, ACM around 150 C, and FKM around 180 to 200 C depending on grade.
Related factors worth verifying
Overfilled engine oil
Restricted oil return paths in the front cover area
Abrasive cleaning on the crank nose or sealing land
Dry installation where the lip should have been lubricated
Damaged, improvised, or reused installation tools
Contamination introduced during assembly
Bore diameter out of tolerance or poor lead-in chamfer condition
From a supply standpoint, these variables explain why dimensional control and process traceability matter. Under IATF 16949:2016 and ISO 9001:2015, seal and housing-related parts should be managed with defined inspection criteria, nonconformance controls, and corrective action records. For buyers comparing suppliers, the practical checkpoints are shaft-diameter tolerance confirmation, seal outer-diameter interference range, rubber hardness control, spring specification, and batch traceability. For typical aftermarket programmes, MOQ may range from 300 to 1,000 pieces for a private-label seal, while a custom lip geometry or material change may move MOQ closer to 2,000 to 5,000 pieces with tooling and validation lead times of roughly 30 to 60 days. If you are reviewing component sourcing options, our quality system outlines the controls used across engine component production.
A field procedure that actually isolates the source
Use a structured inspection path before authorising replacement. The objective is simple: find the first point where fresh oil appears. Not the lowest point. Not the dirtiest point.
In workshop and warranty terms, that discipline can save 0.5 to 2.0 labour hours compared with repeated partial disassembly based on assumption.
1. Clean the area fully
Degrease the front of the engine, lower cover, pulley area, belt path, splash shield, and adjacent joints. Old residue moves during a road test and often mimics an active leak. Let the area dry completely before rechecking. As a practical standard, clean at least 150 to 250 mm around the crank centreline.
2. Work from the highest point downward
Before focusing on the seal, inspect above the crank centreline:
Valve cover gasket edges
Camshaft seal area, where applicable
Upper timing cover joints
Oil pressure switch or nearby oil galleries
Front cover-to-cylinder head interfaces
If fresh oil starts above the crankshaft centreline, the front crank seal may only be the collection point. On some engines, the front cover, cam seal, and valve cover sit within 80 to 150 mm of each other, so this check is critical.
3. Run the engine at idle and raised speed
Observe the pulley area with proper guarding, lighting, and workshop safety procedures. A true front seal leak often starts as a fine wet ring or light spray behind the rotating damper. A useful routine is 3 to 5 minutes at idle followed by 2 to 3 minutes at 1,500 to 2,000 rpm. If nothing appears, repeat after a short road test or load cycle.
4. Use UV dye if the source is still unclear
A workshop-approved oil dye helps on compact transverse engines, where airflow and belt movement can spread oil quickly. Typical dosage follows product instructions, often around 7.5 to 15 ml per 4 to 6 litres of engine oil. After circulation, inspect with the correct UV lamp and yellow filter glasses.
5. Check crankcase ventilation
Inspect hoses, PCV valves, breathers, separators, and return paths. Look for collapsed lines, sludge restriction, incorrect routing, or abnormal crankcase pressure. Elevated pressure is a common hidden cause of repeat front seal leaks. Where equipment is available, use a manometer or low-pressure gauge at the dipstick tube or service port and record the reading at idle and 2,500 rpm. A result trending positive rather than neutral or slightly negative warrants further investigation.
6. Measure pulley and shaft condition
Verify:
Shaft sealing-land finish, groove wear, corrosion, and polishing marks
Pulley or harmonic damper runout
Damper hub condition and fit on the crank nose
Keyway burrs or sharp edges that may cut the seal lip during assembly
Check the shaft sealing land with a micrometer in at least four clock positions and compare with nominal diameter. Measure pulley runout with a dial indicator on a clean reference surface. A field report that says `shaft land wear approx. 0.08 mm` or `damper radial runout 0.14 mm` is far more useful than `worn` or `acceptable`.
7. Inspect housing bore and cover alignment
Check for scoring, corrosion, uneven bore wear, seal cocking marks, and tool damage from previous removals. A good seal cannot compensate for a distorted bore or damaged cover face. Measure the bore where feasible and note whether the lead-in chamfer is intact. On repetitive failures, inspect cover flatness and fastener seating because local distortion can change bore roundness under clamp load.
8. Confirm service history
If the seal was replaced recently, review the part specification, installation depth, lubrication method, tool use, and any related front-end work. Failures within the first 500 to 2,000 km are commonly linked to fitment issues. Later failures may indicate pressure, wear-track, or material-life problems.
For repair chains standardising parts across multiple locations, this sequence works well in job cards before any claim is assigned to the component. It gives warranty teams comparable evidence instead of subjective leak descriptions.
Front crank seal or something nearby? Use this comparison
Misidentification is common because several front-engine joints sit close together. Oil also travels downward, outward, and rearward depending on belt movement, fan airflow, road speed, and underbody panels. The question is not whether the area is oily. The question is where the oil started.
Suspected source
Typical leak pattern
Inspection clue
Common follow-up
Front crankshaft seal
Oil behind pulley, radial spray, belt contamination
Wetness centred on crank nose or damper hub
Check shaft wear, runout, and crankcase pressure
Timing cover gasket or sealant joint
Seepage along vertical or horizontal cover edge
Oil tracks follow the cover perimeter
Inspect joint line, cover flatness, and fastener history
Camshaft seal
Oil starts higher, then runs down the front cover
Upper cover area becomes wet first
Inspect cam bore area and upper cover components
Valve cover gasket
Oil begins at the top of the engine front face
Oil is visible above the timing area
Confirm gasket hardening, cover distortion, or fastener issues
Oil pump housing or front cover crack
Localised seep, sometimes pressure related
Wetness appears at a casting defect, plug, or housing joint
Use dye test and inspect the housing carefully
</tr></thead><tbody> </tbody></table>Where OE references are used in trade enquiries, for example a seal associated with OE 06A107065, always verify the engine code, shaft diameter, housing type, installation depth, and production variant before assigning responsibility. Similar-looking seals can differ in lip profile, dust lip design, outside diameter, material, and contact position on the shaft. A 0.5 to 1.0 mm width change, a different helix direction, or an OD interference change of a few hundredths of a millimetre can materially change leakage behaviour.
This matters in B2B sourcing because the same visible symptom can lead to very different purchasing decisions:
If the leak is confirmed at the seal lip and shaft wear is within service limit, a seal-only order may be sufficient.
If the shaft has a measurable groove, add a repair sleeve or crank component depending on engine design.
If the belt is oil-soaked, budget for belt and tensioner inspection and likely replacement.
If repeat failures cluster by engine family, review whether the stocked seal material and lip design match field temperature and oil exposure.
For sourcing teams, that logic affects MOQ and landed-cost planning. A standard seal may have replenishment lead times of 20 to 35 days from production release, while a bundled repair kit with sleeve or belt content may require 35 to 60 days depending on supplier integration. If your team is reviewing engine-related replacement parts more broadly, see our catalog and our engine components range.
Before replacement, verify the sealing system as a whole
Once the leak source is confirmed, replacement should still wait until the surrounding conditions are checked. Many repeat failures begin here, when the old seal is removed before the shaft, bore, pressure system, and pulley condition are documented.
From a cost perspective, this is where a low-value component can create a high-value claim. A USD 3 to USD 8 installed seal can trigger warranty exposure many times higher once labour, freight, and downtime are included.
Pre-replacement checklist:
Confirm exact shaft diameter, bore diameter, seal width, and application variant
Inspect the crank nose for grooves, corrosion, scoring, or an unsuitable wear track
Remove burrs from the keyway and leading edges before fitting the seal
Verify pulley or harmonic damper runout against service limits
Check crankcase ventilation function and oil level
Review seal material suitability for oil chemistry and temperature exposure
Confirm installation depth, direction, and whether the lip requires lubrication
Use the correct installer so the seal enters squarely and evenly
Replace contaminated belts if oil exposure has affected grip or rubber condition
For a more useful specification review, record these points where possible:
Shaft diameter at the seal land in at least four positions
Bore diameter and visible bore condition
Seal width and intended installed depth from the housing face
Whether the lip contact path avoids any existing wear groove
Dry or lubricated lip requirement according to the seal design
Presence and condition of any wear sleeve, flange, or integrated installation guide
Post-installation verification:
Ensure the seal runs on the intended contact land
Confirm no lip rolling, spring displacement, or cutting occurred during fitment
Recheck for leaks at idle, raised speed, and operating temperature
Inspect belt tracking and pulley grooves if oil contamination was present before repair
Verify that neighbouring joints remain dry after a road test or controlled run cycle
Record photos and measurements for any warranty or supplier review
A practical acceptance routine is 5 minutes at idle, 3 minutes at 1,500 to 2,000 rpm, then a road test or loaded run followed by reinspection after shutdown. If the system stays dry through heat soak and restart, the repair is more likely complete than if it is checked only immediately after installation.
For B2B buyers, part quality matters most when the rest of the system is correct. A reliable supply programme should include controlled raw materials, bore and lip-related dimensional inspection, validated production processes, and traceable records under IATF 16949:2016 and ISO 9001:2015. Where elastomeric components or related materials are involved in export programmes, compliance screening may also include REACH (EC) No 1907/2006 depending on market requirements. On commercial terms, buyers should align specification complexity with programme economics: standard stocked seals usually carry lower MOQ and shorter lead time, while private-label packaging, special elastomer grades, or custom kits can increase MOQ from roughly 500 pieces to 2,000 pieces or more and extend lead time from about 3 to 5 weeks to 6 to 10 weeks.
Driventus supports private-label and application-specific supply through custom manufacturing.
What buyers and warranty teams should capture in the report
For procurement professionals, technical diagnosis should flow directly into sourcing, warranty control, and supplier communication. A short note saying the seal failed is not enough. The useful report is the one that separates product issues from installation error, engine condition, and application mismatch.
Recommended data points in field reports:
Engine family, engine code, and production variant
Mileage, operating hours, and duty cycle
Oil grade, oil level, and service interval history
Crankcase ventilation condition and any pressure test result
Photos before cleaning, after cleaning, and after the engine is run
UV dye result, if used
Shaft surface condition, groove depth if measured, and runout result
Installation date and mileage of the previous seal, if applicable
Seal part number, batch code, and packaging identification
Presence of belt contamination, pulley damage, or housing damage
Notes on installation tool, seal depth, and lubrication method
Ambient temperature and operating condition at failure if known
This information helps determine whether the issue is:
A genuine component defect
An application mismatch
An installation problem
A system issue such as pressure build-up, shaft wear, or pulley runout
A related leak from the timing cover, camshaft seal, valve cover, or oil pump housing
That distinction affects supplier evaluation, return rates, stocking decisions, and technical training. It also reduces the risk of ordering high volumes of one part to solve what is actually a mechanical condition on the engine.
Useful internal decision rules include:
If repeat claims stay below an agreed ppm or return-rate threshold, monitor the trend before changing supplier.
If failures cluster by one batch code, quarantine stock and request dimensional and material verification from the supplier.
If the same engine family shows mixed seal brands but the same shaft-wear pattern, investigate the application before issuing a broad supplier claim.
If claim cost per repair materially exceeds the seal value, prioritise kits or technical bulletins that reduce misdiagnosis rather than chasing the lowest unit price.
For importers and distributors, structured evidence also improves replenishment planning. A standard replacement seal may be reordered quickly, but a corrective switch to different material, revised lip geometry, or a bundled sleeve-and-seal kit may require sample approval, 20 to 50 piece validation lots, and production lead times of 30 to 60 days before regular supply starts. If you need technical support on engine sealing applications or want to discuss supply options, you can request a quote.
Frequently asked questions
Yes. Because the crankshaft is rotating, oil may appear clearly only when the engine is running and oil movement increases. Static seepage can be minimal, which is why cleaning, live inspection, and sometimes UV dye are useful.
Repeat leaks are often caused by shaft wear, excessive crankcase pressure, incorrect installation depth, pulley runout, or damage to the seal lip during fitting. Replacing the seal alone may not solve the root cause.
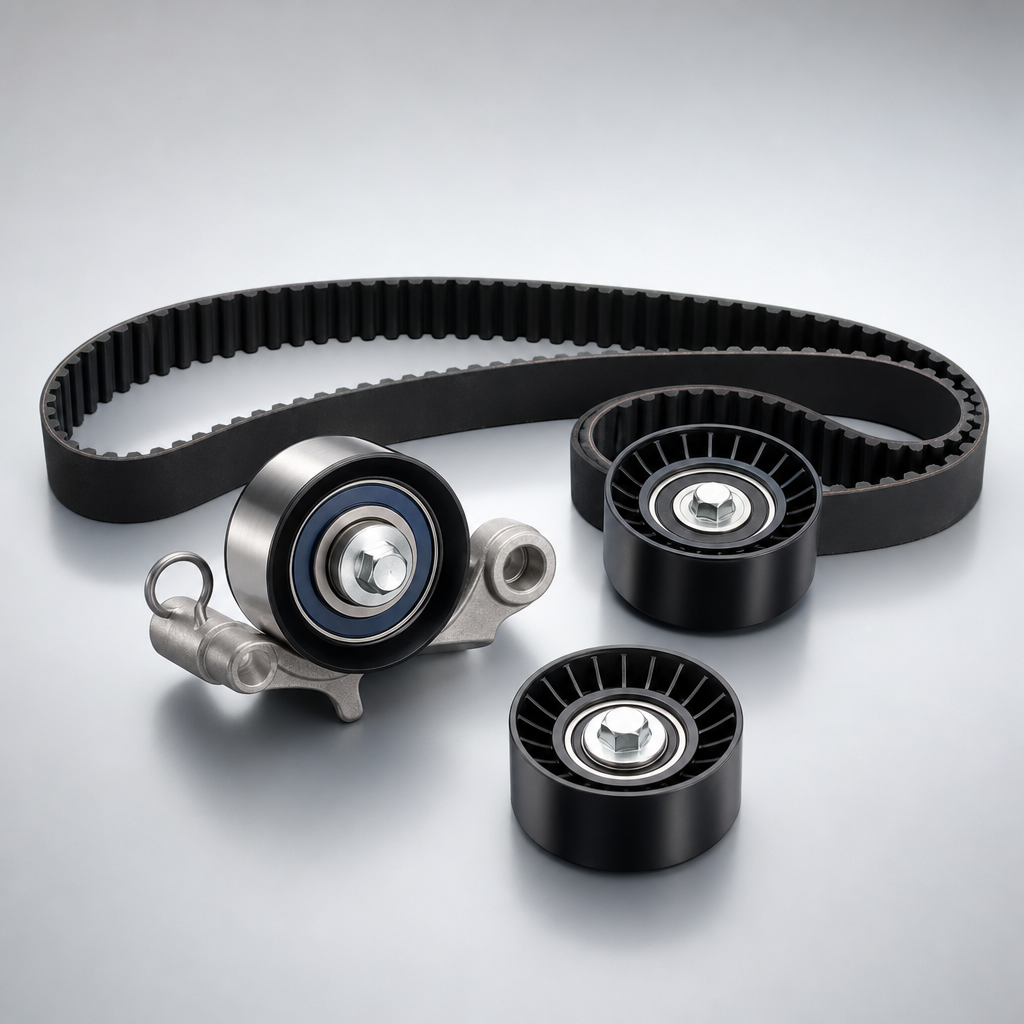
Usually yes. Oil contamination can reduce belt grip, soften rubber, and shorten service life. Inspect the belt, tensioner, idlers, and pulleys carefully, then replace affected items according to workshop policy and vehicle service requirements.
If you are reviewing engine sealing failures or sourcing replacement programmes, Driventus can support technical assessment and supply planning. Contact our team at /contact.html