Engine Valve Symptoms of Failure: Diagnosis and Replacement
Engine valve symptoms of failure often show up first as a single-cylinder misfire, rough idle, low compression, hard starting, backfiring, abnormal ticking, or a sharp burnt exhaust note. They should not be treated as a generic engine complaint. When a valve can no longer seal, transfer heat into the seat, or move concentrically in the guide, the damage can spread quickly to the seat insert, guide bore, piston crown, catalytic converter, and cylinder head.
Good diagnosis links the symptom to a measurable failure mode: seat recession, tulip cracking, a bent stem, worn guide, weak spring control, carbon build-up, margin loss, abnormal face runout, or a valve face that no longer transfers heat properly. That distinction matters for repair planners and B2B sourcing teams because the replacement decision depends on test values, dimensions, material grade, surface treatment, and batch documentation, not visual guesswork.
Driventus is an independent aftermarket manufacturer; brand names are referenced for fitment only. For teams sourcing engine valves for rebuilders, fleets, remanufacturers, or aftermarket distribution, the key purchase criteria are dimensional match, alloy and heat-resistance class, stem finish, face hardness, coating or nitriding specification, packaging format, traceability, and proof of process control under IATF 16949:2016 and ISO 9001:2015.
What the symptoms usually indicate
The same outward symptom can come from ignition, fuel, timing, air metering, piston-ring wear, or valve-train faults. The pattern of the complaint matters. A valve-side fault becomes more likely when spark, injector operation, fuel pressure, air leaks, and cam/crank correlation have been checked, but one cylinder still shows poor sealing or abnormal combustion evidence.
Symptom
Likely valve-side cause
What it suggests
Rough idle or single-cylinder misfire
Intake or exhaust valve not sealing
Leakage past the seat, bent stem, deposit interference, worn guide, or poor concentricity
Loss of power under load
Exhaust valve overheating or poor seating
Reduced compression, insufficient seat contact, margin loss, or excessive exhaust gas temperature
Hard starting, especially hot
Valve leakage on one cylinder
Compression loss during cranking; leakage can increase as parts expand with heat
Ticking from the top end
Excessive lash, worn tip, guide wear, follower wear, or spring issue
Measure lash, installed height, tip condition, and cam/follower contact before condemning the valve
Backfire through intake or exhaust
Incorrect timing or a valve hanging open
Check cam timing, lash, spring control, seat condition, and stem movement in the guide
Burnt exhaust smell or sharp exhaust note
Exhaust valve edge erosion or incomplete closure
Combustion gas may be cutting past the valve face and seat contact band
Low compression on one cylinder
Valve face, seat, margin, or guide-control problem
Leak-down direction separates valve leakage from ring or head-gasket leakage
</tr></thead><tbody> </tbody></table>As a guide, healthy cylinders on the same engine are often expected to be within about 10-15% of each other, although the service manual limit always takes priority. A low cylinder that does not improve materially during a wet compression test is more suspicious for valve leakage than ring wear. During leak-down testing, many production engines show low single-digit to low-teens percentage leakage when healthy; readings above the service limit, or one cylinder substantially worse than the others, justify targeted inspection.
The location of leak-down air is critical. Air heard at the throttle body or intake manifold points toward the intake valve or intake seat. Air at the tailpipe points toward the exhaust valve or exhaust seat. Air from the oil filler or crankcase breather is more consistent with piston ring, piston, or cylinder-wall leakage. Bubbles in the coolant, or air crossing to an adjacent cylinder, suggest head-gasket, casting, or deck issues. This separation helps avoid unnecessary valve replacement when the root cause is elsewhere, and it gives sourcing teams better evidence for warranty or batch review.
Why valves fail in service
Exhaust valves carry the highest thermal load. They seal hot combustion gas, then reject most of that heat through the valve seat, with a smaller share passing through the stem and guide. Exhaust gas temperatures can exceed 800°C in high-load service, and the valve edge becomes vulnerable when seat contact is narrow, uneven, recessed, or contaminated. If the valve cannot transfer heat into the seat quickly enough, the margin overheats, pits, erodes, and eventually burns.
Common contributors include lean combustion, detonation, incorrect ignition timing, excessive exhaust back pressure, EGR or fuel-control faults, carbon preventing full closure, poor seat concentricity, incorrect lash, and valve-seat machining errors.
Intake valves run cooler because the incoming air-fuel charge or intake air helps reduce temperature, but they are still exposed to sealing and movement problems. Oil vapour, crankcase ventilation deposits, EGR soot, direct-injection deposit formation, fuel quality, and repeated short duty cycles can build carbon on the stem, tulip, or back of the valve. Heavy deposits may reduce airflow, disturb swirl or tumble, restrict stem movement, and stop the valve from seating fully, which often appears as rough idle and low-speed instability.
Other causes are mechanical or process-related rather than purely thermal:
Stem wear from poor lubrication, contaminated oil, abrasive particles, incorrect guide material pairing, or extended service intervals.
Excessive guide clearance allowing side loading, off-centre seating, increased face runout, and accelerated seat wear.
Bent stems after timing belt or chain errors, over-rev events, piston contact, hydraulic lock, or incorrect assembly.
Weak, broken, or mismatched springs causing valve float, seat bounce, keeper wear, and repeated impact loading.
Excessive lash reducing valve-open duration and increasing impact; insufficient lash reducing seat contact time and raising valve temperature.
Incorrect machining that leaves the seat off-centre, too wide, too narrow, or at the wrong seat angle relative to the valve face.
Poor keeper groove condition, worn retainers, incorrect installed height, or tip grinding errors that affect motion control.
Material or heat-treatment mismatch, especially on exhaust valves that require suitable austenitic heat-resistant steel, bimetallic construction, hard-facing, nitriding, or equivalent application-specific treatment.
Root cause affects both repair quality and procurement. A single burnt exhaust valve may be corrected with one replacement valve and controlled seat work if the guide, spring, installed height, and combustion control are within specification. A pattern of margin loss across several cylinders points more toward overheating, calibration, fuel, cooling, or machining problems. Excessive guide wear usually means the head needs guide repair, a matched valve set, and controlled seat cutting rather than isolated valve replacement.
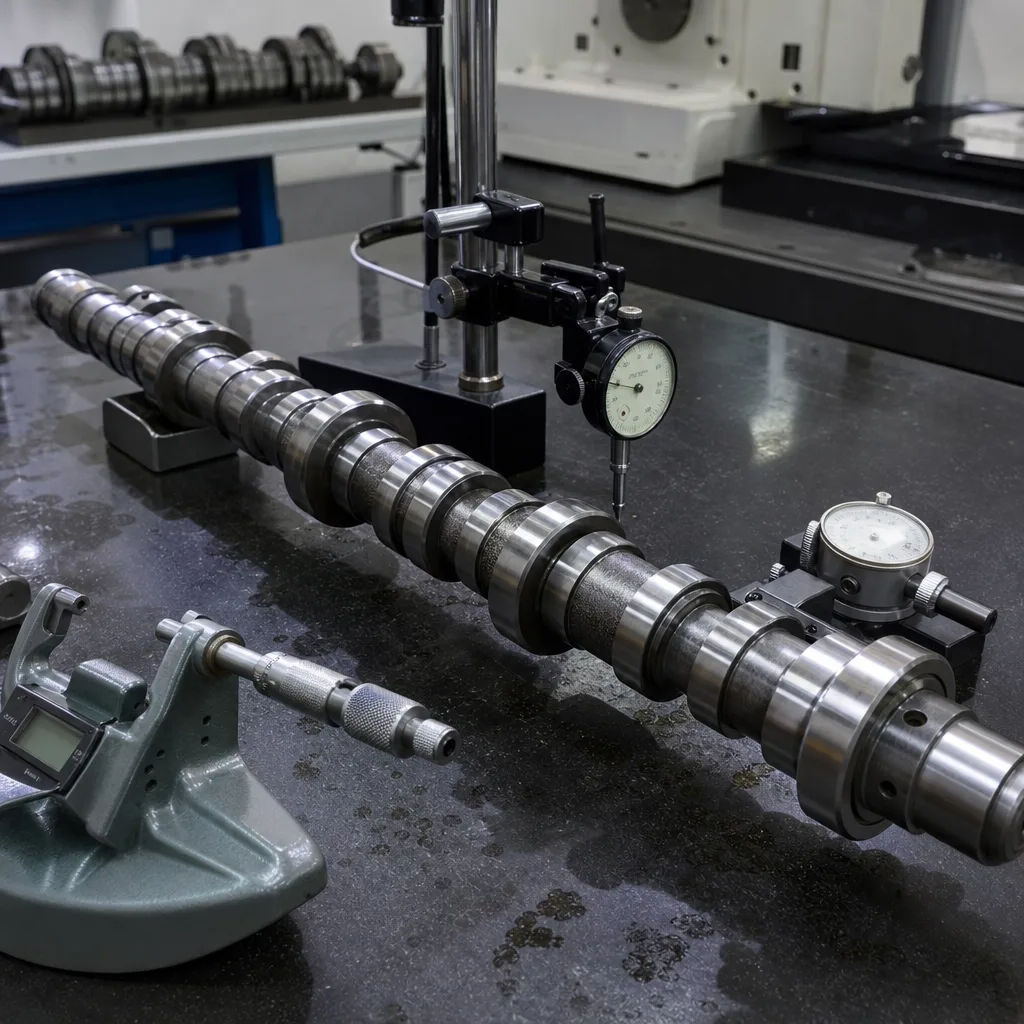
How to inspect before teardown
Start with tests that separate valve problems from ignition, fuel, piston-ring, gasket, and control-system faults. A disciplined pre-teardown inspection gives the repair team evidence before the cylinder head is removed. It also helps purchasing teams order the correct valve type, quantity, and related parts the first time.
1. Scan for fault codes and freeze-frame data, noting cylinder number, coolant temperature, load, rpm, fuel trim, and misfire counter data when available. 2. Confirm ignition strength, spark plug condition, injector pulse, injector balance where practical, fuel pressure, intake leaks, and basic cam/crank correlation. 3. Record dry compression on every cylinder using the same cranking speed and throttle condition, then compare cylinder spread against the service limit. 4. Run a wet compression test if ring leakage is suspected; a significant increase after adding oil points more toward rings, while little change keeps valves or gasket leakage in focus. 5. Run a leak-down test near top dead centre on the compression stroke and listen at the intake tract, exhaust outlet, crankcase, coolant neck, and adjacent cylinders. 6. Use a borescope to check for carbon build-up, chipped or burnt valve edges, abnormal valve colour, tulip deformation, piston contact marks, and a valve face that is not closing evenly. 7. Check valve lash or hydraulic lash adjuster behaviour, spring condition, installed height, rocker arm or cam follower contact marks, and evidence of coil bind or retainer contact if the head is still assembled. 8. Inspect spark plugs for one-cylinder oil ash, fuel fouling, overheating, melted electrodes, or porcelain colour changes that match the suspect cylinder. 9. Where access allows, check manifold vacuum behaviour; a rhythmic needle drop can support a sealing diagnosis, although it should not replace compression and leak-down data.
If air escapes from the exhaust port during leak-down, the exhaust valve, seat, and guide alignment are the first suspects. If air escapes from the intake tract, inspect the intake valve, intake seat, deposits, and stem movement. If leakage appears between adjacent cylinders or into the cooling system, the repair plan must include gasket, deck flatness, crack, and pressure checks.
Before teardown, record the cylinder number, test conditions, compression values, leak-down percentages, lash measurements, and visible evidence. Borescope images, plug photos, and test data are useful for warranty review, supplier discussion, and repair planning. That documentation is especially valuable in fleet, remanufacturing, engine-rebuild, and distributor programmes where repeated failures may reveal a field-service pattern rather than an isolated component defect.
When replacement is required
Replacement is required when the valve head, face, stem, tip, keeper groove, or margin is outside the service specification or shows damage that cannot be corrected by cleaning, refacing, or controlled lapping. Reuse should always be based on measurement and surface condition. A valve that looks acceptable may still have excessive runout, a stretched stem, a thin margin, or poor keeper fit.
Use dimensional checks against the engine service specification or approved drawing before reusing any valve. Minimum inspection points include:
Head diameter and margin thickness, especially on exhaust valves where margin loss accelerates burning.
Stem diameter measured at multiple positions along the guide wear path with a micrometer.
Stem-to-guide clearance measured with the approved method for the engine family.
Stem straightness and runout; bent stems should not be straightened for critical repair programmes.
Overall length, tip height, and tip surface hardness or wear condition.
Face angle, face runout, seat contact location, and seat contact width.
Valve head concentricity relative to the stem centreline.
Stem surface finish, chrome condition where applicable, scoring, pitting, galling, or transfer material.
Head edge condition, hot spots, cracks, tulip deformation, and evidence of torching or gas cutting.
Typical seat contact width depends on engine design, but many light-vehicle applications use a narrower intake seat and a wider exhaust seat to balance sealing, airflow, and heat transfer. The approved service data should define the acceptable band. A contact pattern that is too narrow can overheat the valve; one that is too wide can reduce seating pressure and airflow. Concentricity between the valve face, seat, and guide is just as important as nominal diameter.
Lapping can confirm contact and show whether the seat pattern is continuous, but it is not a structural repair. It cannot correct a cracked valve head, a burnt edge, a heavily recessed seat, a bent stem, excessive guide clearance, an out-of-round seat, or a scored stem. If the valve has lost margin, shows a visible hot spot at the edge, has an interrupted seat band, or has a seating face too narrow to transfer heat reliably, replacement is safer than reuse.
Assess the seat and guide at the same time. A new valve installed into a worn guide or poorly machined seat can fail quickly because it will not close concentrically or transfer heat correctly. Treat valve replacement as a sealing system: valve alloy, face angle, seat angle, seat width, guide clearance, spring load, installed height, tip geometry, lash, and lubrication all have to work together.
Sourcing replacement valves for repair programmes
For procurement teams, valve sourcing should be controlled by drawing data, application duty cycle, material specification, surface treatment, inspection records, and pack format. A replacement valve has to match the engine's thermal and mechanical environment, not only the catalogue cross-reference. Exhaust valves often require heat-resistant alloys, controlled face hardness, suitable stem treatment, and stable margin geometry. Intake valves may place more emphasis on stem finish, guide compatibility, deposit resistance, head profile, and airflow consistency.
Review our catalog or the broader engine components range for current options, and use our quality system page to understand traceability, incoming inspection, in-process checks, final inspection, and dimensional control. If a programme needs a non-standard stem length, head diameter, face angle, coating, material grade, marking, kitting format, barcode label, private-label carton, or export packaging format, our custom manufacturing service can align production to an approved drawing or sample.
For RFQ validation, define the critical characteristics before purchase:
Engine application, fuel type, displacement, cylinder head code, and intake/exhaust position.
Head diameter, stem diameter, total length, margin, keeper groove position, tip geometry, and head profile.
Valve face angle, seat contact requirement, stem end specification, and any swirl-polished or undercut geometry.
Material grade, such as application-appropriate martensitic or austenitic valve steel, bimetallic construction, or hard-facing requirement where specified.
Stem coating, chrome plating, nitriding, or other surface treatment, including required treated length where relevant.
Supply format: individual pieces, cylinder sets, full head sets, engine sets, or kits with guides, stem seals, springs, retainers, or collets.
Marking, batch traceability, PPAP-style documentation if required, carton quantity, pallet configuration, and aftermarket label requirements.
Buyers should request material declarations, hardness data, dimensional reports, surface treatment records, batch traceability, and process-control evidence aligned with IATF 16949:2016, ISO 9001:2015, and REACH (EC) No 1907/2006. For high-volume programmes, agreed control plans, AQL levels, retained samples, drawing revision control, and corrective-action procedures reduce receiving risk. Where relevant to the engine programme, durability or emissions-related evidence can be discussed against the agreed test plan, including applicable regional or customer standards such as ECE R-83 or SAE procedures.
Driventus is an independent aftermarket manufacturer; brand names are referenced for fitment only. For distributors, fleet maintenance groups, engine rebuilders, and remanufacturing buyers, the objective is not just an OE-fit part number. It is a repeatable valve supply with controlled dimensions, documented metallurgy, stable packaging, and traceable batches that support workshop efficiency and warranty review.
Frequently asked questions
Yes. Misfire, rough idle, and poor acceleration can overlap with coil, plug, injector, and compression faults. If ignition and fuel checks are normal, run compression and leak-down tests. A single cylinder that leaks through the intake or exhaust port usually points back to the valve, seat, or guide alignment.
Only if the valve face and seat are still within specification. Lapping can confirm or improve the contact pattern, but it cannot correct a burnt edge, cracked head, bent stem, excessive guide clearance, lost valve margin, or poor seat concentricity. If measurements are out of tolerance, replacement and seat machining are the correct route.
Not always. Replace the valve that fails inspection, then verify the related guide, seat, spring, and lash condition. In practice, many rebuilders replace full cylinder-head sets when labour cost is high, mileage is high, or mixed wear makes single-valve replacement less economical.
If you need engine valve replacements matched to drawings, material targets, packaging requirements, and batch documentation, [request a quote](/contact.html).