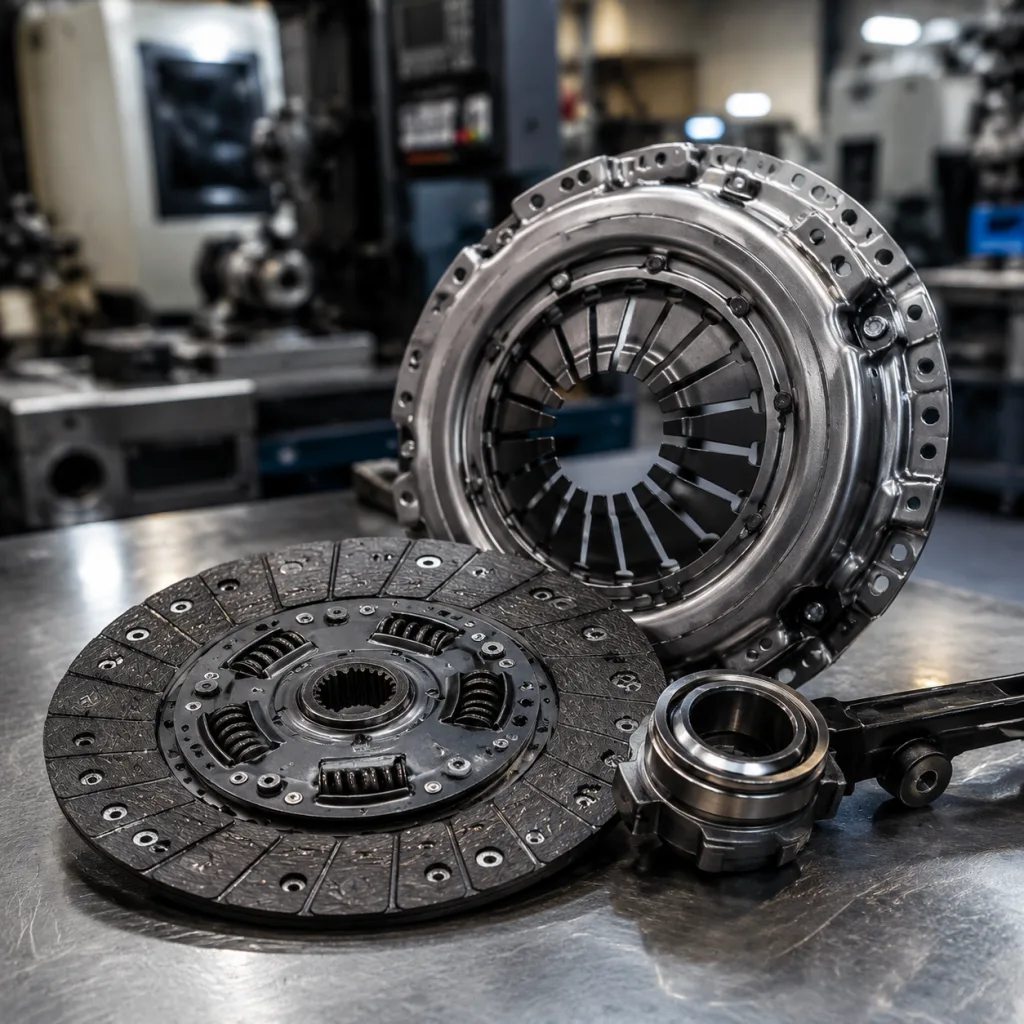
Crankshaft Bearing Wear: Causes, Fixes, and Sourcing Controls
Crankshaft bearing wear is usually the engine’s last visible warning, not the first fault. The shell tells a story about oil pressure, contamination, geometry, assembly practice, and operating abuse. If you replace the bearing without reading that story, the comeback rate rises fast.
For distributors, fleet buyers, and remanufacturers, the real cost is not the damaged shell. It is the repeat claim after the crankshaft has been polished, a new set has been fitted, and the root cause is still in the engine. This article treats crankshaft bearing wear causes and fixes as a decision process: identify the wear pattern, match it to likely failure modes, verify dimensions and oil supply, then source the right replacement parts with the right controls.
Driventus is an independent aftermarket manufacturer; brand names and OE references are used for fitment identification only.
Read the Wear Pattern Before You Read the Part Number
A failed bearing is a diagnostic record. Start there. Before cleaning, measuring, or discarding anything, photograph each shell in its installed position and keep upper and lower halves separated. The bearing that rode the load path often looks different from the shell that simply carried oil.
Capture the basics in the claim file: engine code, VIN or fleet ID, mileage or hours, oil grade, service interval, hot oil pressure, journal location, shell position, crankshaft size, and batch code. If the claim is recurring, keep the oil filter and a sealed oil sample. That evidence usually matters more than a loose damaged shell in a parts tray.
</tr></thead><tbody> </tbody></table>Do not order bearings from a catalog image or a visible size mark alone. Confirm the application, journal diameter, housing bore, and grade. Typical running clearance in light-duty engines is often in the 0.025–0.075 mm range, but the engine specification always wins. If you already have an OE-style cross-reference, use it as a starting point, not a substitute for measurement.
What Actually Drives Main and Rod Bearing Failure
The useful way to think about crankshaft bearing wear causes and fixes is by failure mode, not by part category. Most engines fail from a combination of lubrication loss, contamination, geometry error, and assembly mistake. One damaged shell may show all four.
1) Oil starvation This is the classic failure path. The oil film breaks down, metal contacts metal, and the shell wipes. Triggers include low sump level, aeration, blocked pickup screens, worn pumps, stuck relief valves, blocked crank drillings, high oil temperature, or oil that is too thin for the duty cycle. Rod bearings often fail early because they depend on oil delivered through the mains and crank passages. If hot-idle pressure is below spec, pressure falls sharply when warm, or pressure builds slowly after start-up, stop and inspect the oil system before fitting new shells.
2) Contamination Silicon dust, machining chips, carbon, degraded sealant, metal debris, and dirty assembly practices embed in the overlay and score the journal. Turbocharger failure, timing-chain wear, piston seizure, and a previous bearing failure all justify assuming the oil circuit is contaminated until proven clean. In remanufacturing, brush-cleaning and flushing crank drillings is not optional.
3) Wrong clearance Too tight and the oil film is squeezed out as the engine heats up. Too loose and the oil wedge weakens, pressure drops at the bearing, and fatigue accelerates. Measure journal diameter, housing bore, and shell wall thickness with calibrated tools. Do not rely on visual fit. Plastigage can support a field decision, but it should not replace dimensional measurement in a controlled build.
4) Distortion and misalignment Oval rod big ends, fretted caps, stretched bolts, block tunnel distortion, or overheating can make a bore look acceptable while the bearing is actually being crushed unevenly. New shells cannot fix a bent or oval housing. If the bore is out of round, tapered, or misaligned beyond the engine maker’s limits, the machining or component must be corrected first.
5) Journal finish and geometry A polished crankshaft is not always a good crankshaft. Taper, ovality, poor fillet shape, burrs at oil holes, or the wrong surface roughness can all shorten bearing life. After grinding or polishing, verify diameter, runout, fillets, chamfers, and cleanliness. Many reman programs target an Ra around 0.1–0.3 micrometre, but the engine specification should define the acceptance limit.
A Practical Inspection Sequence for Warranty and Rebuild Teams
The goal of inspection is simple: separate part defect from system fault. Without that separation, purchasing blames the supplier, the workshop blames the oil pump, and the engine comes back again.
Use this order:
1. Record the failure context: engine code, mileage or hours, duty cycle, oil grade, service interval, and symptoms. 2. Note any trigger event: overheating, oil loss, turbo failure, timing damage, piston seizure, prior rebuild, or detonation. 3. Check hot oil pressure before teardown if the engine still runs safely. 4. Open the oil filter and inspect for bearing material, steel, carbon, sealant, or abrasive dust. 5. Save an oil sample when the claim value justifies it. 6. Remove and label every shell by location and orientation. 7. Measure crank journals for diameter, taper, and ovality with a calibrated micrometer. 8. Inspect journal finish, chamfers, fillets, oil holes, heat tint, and cracks. 9. Measure rod big-end and main tunnel bores with caps torqued correctly. 10. Check crankshaft straightness, thrust faces, and end float. 11. Inspect the oil pump, relief valve, pickup seal, sump, galleries, cooler, and spray jets if fitted. 12. Look at connected parts such as rods, pistons, pins, gaskets, and turbo oil lines.
For B2B claim handling, attach photos, labels, batch records, and measured values. If the claim includes a crankshaft, full gasket set, oil pump, or turbocharger, require the same evidence format every time. That makes it easier to decide whether the fault came from material, machining, packaging contamination, cross-reference mismatch, installer error, or operating conditions.
Tool control matters too. Calibrate micrometers and bore gauges on schedule, usually at least annually, and verify them with setting standards before batch inspection. Record to 0.001 mm where possible. A rounded 0.01 mm clearance result can hide a marginal build.
Fix the Root Cause First, Then Fit the Bearing
The wrong repair is the one that only makes the engine quiet for a few days. If the cause is still active, the new shell is just the next witness part.
When lubrication is the problem
Clean the full oil circuit. That means the crank drillings, block galleries, sump, spray jets if fitted, and any areas that trap debris. Replace the filter. After a severe failure, replacing the oil cooler is often safer than trying to flush it. Check pickup sealing, pump wear, relief-valve movement, pressure-control solenoids if fitted, and oil temperature control. Use the exact lubricant grade and service interval the engine program calls for.
For reman or fleet work, define a flush standard: remove gallery plugs where practical, brush the drillings, rinse until no visible residue remains, then dry with filtered air and protect machined surfaces from corrosion. If the cooler cannot be cleaned to a defined standard, replace it.
When geometry is the problem
If the crankshaft is within approved regrind limits, machine it to the correct undersize and pair it with matching bearings. Common aftermarket undersizes are 0.25 mm, 0.50 mm, 0.75 mm, and 1.00 mm, but the engine may not allow every step. After grinding, recheck diameter, taper, ovality, fillet radius, chamfers, finish, and cleanliness.
If there is cracking, heat damage, excessive runout, bad thrust faces, or hardness loss, replace the crankshaft. Check connecting rod big ends after torque or bolt stretch, and resize or replace them if needed. Main tunnel distortion may require line boring or line honing. Thrust wear means you also need to inspect clutch, torque converter, or accessory axial loads.
When assembly is the problem
Install clean shells, correct grade, correct orientation, and correct lubrication according to the builder’s procedure. Confirm cap direction, oil-hole alignment, locating lugs, and bearing crush. Do not mix upper and lower halves or use sealant near oil passages unless the procedure allows it. Follow the specified torque sequence and replace torque-to-yield fasteners when required. Prime the oil system before start-up where allowed, then verify pressure immediately after first fire.
How to Spec Replacement Parts So the Failure Does Not Return
For buyers, the part itself is only half the story. The other half is the spec that keeps the wrong part from entering the supply chain.
Driventus supplies engine and powertrain components through our catalog, including crankshafts, pistons, gaskets, water pumps, turbochargers, and related engine components.
A useful purchasing specification for bearing-related programs should include:
Application data: engine family, displacement, fuel type, production range, market version, and OE cross-reference where available.
Bearing type: main, rod, thrust, flanged, semi-flanged, or application-specific set.
Size logic: standard, undersize journal, oversize housing, and grade-code rules.
Construction: steel backing, intermediate layer, overlay type, and lead-free requirement where applicable.
Ask for pricing by annual volume and release quantity, not only by unit price. A lower price can be a poor deal if the set has weak thickness control, poor labeling, or no traceability. Split lead time into sample, production, and shipping. Common stocked references move faster; special undersizes, custom cartons, and private-label work usually need more time for drawing checks, artwork approval, first-article measurement, and scheduling.
Driventus operates under IATF 16949:2016 and ISO 9001:2015. Our quality system covers incoming material control, in-process inspection, final sampling, traceability, and corrective action handling. For private-label or application-specific requirements, custom manufacturing can include drawing review, PPAP-style documentation where agreed, sample approval, and packaging configuration for distributor networks.
Supplier Controls That Cut Warranty Exposure
Low unit cost does not matter if the program keeps generating claims. Bearing sourcing needs process control, not just a price list.
The controls that matter most are practical:
Control point
Why it matters
Batch traceability
Helps isolate a bad lot fast
Dimensional sampling records
Confirms wall thickness, crush, oil-hole alignment, and locating features
Material declarations
Supports audits and compliance files
Cleanliness control
Reduces embedded abrasive particles
Cross-reference review
Prevents wrong grade or wrong application shipment
Packaging verification
Avoids mixed sets, missing thrust items, and unclear marking
Corrective action process
Gives buyers a real response path when a claim appears
</tr></thead><tbody> </tbody></table>For high-volume programs, set an AQL or agreed sampling plan for critical dimensions and visual defects. Critical checks usually include shell thickness, oil-hole location, set composition, and locating features. Visual checks should cover burrs, corrosion, dents, foreign particles, and mixed labels. Keep retention samples from the approved lot so future claims can be compared against the shipped build.
When a warranty case appears, retain the failed parts, packaging labels, oil filter, oil sample if available, and installation notes. Ask the supplier for containment, root cause, corrective action, and preventive action. That is the only way to close the loop on crankshaft bearing wear causes and fixes instead of simply replacing the same failure twice.
For regulated markets, the bearing itself is not usually certified under vehicle emissions rules such as ECE R-83, but bearing failure can still affect oil consumption, combustion stability, catalyst life, and emissions performance at the vehicle level. Treat the crankshaft, bearings, gaskets, oil pump, cooler, filter, and oil control parts as one reliability system.
Frequently asked questions
Only if excessive bearing clearance is the verified cause. Low oil pressure can also come from a worn pump, blocked pickup, leaking galleries, aerated oil, a stuck relief valve, overheating, or the wrong viscosity. Measure the oil system before installing new shells.
No. If journal size, hardness, runout, cracks, fillets, oil holes, and thrust faces remain within program limits, the crankshaft may be reground and reused with the correct undersize bearings. If heat damage, deep scoring, cracking, or thrust-face damage is present, replacement is usually safer.
Request controlled drawings or specs, cross-reference lists, batch traceability, dimensional inspection reports, material declarations, quality certificates such as IATF 16949:2016 and ISO 9001:2015, and packaging/labelling rules. For larger programs, also define sample approval, MOQ, lead time, change-notification rules, and claim handling before shipment.
If you are reviewing crankshaft, bearing, or engine-component sourcing for a distributor or repair-chain program, share your application list, annual volume, target MOQ, packaging requirements, and required lead time to [request a quote](/contact.html).